Table of Contents
Advertisement
Available languages
Available languages
Quick Links
Advertisement
Table of Contents

Related Manuals for Dexter Power CDT112LD.T


Summary of Contents for Dexter Power CDT112LD.T
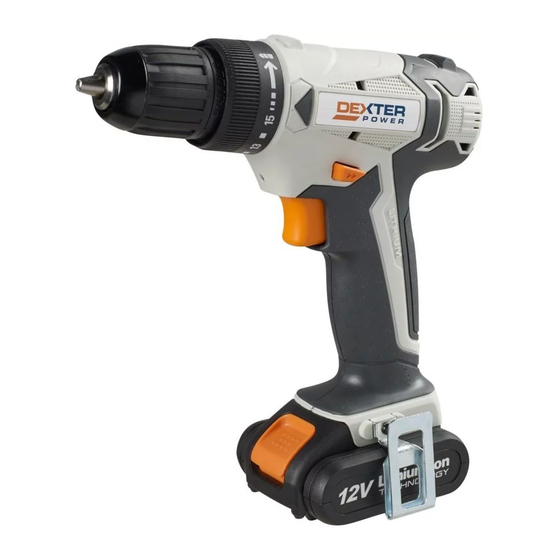
- Page 1 CDT112LD.T Furadeira sem fio 12V de 1 velocidades 12V Cordless drill 1 speeds MANUAL DO USUÁRIO USERS MANUAL LEROY MERLIN CIA BRASILEIRA DE BRICOLAGEM - CNPJ 01.438.784/0001-05 MADE IN CHINA 20XX...
- Page 4 Instruções Originais AVISOS DE SEGURANÇA GERAIS DA FERRAMENTA ELÉTRICA AVISO Leia todos os avisos, instruções, ilustrações e especificações de segurança fornecidos com esta ferramenta. O não cumprimento de todas as instruções listadas abaixo pode resultar em choque elétrico, incêndio e/ou lesão grave. Guarde todos os avisos e instruções para consulta futura.
- Page 5 d) Remova qualquer chaveta ou chave de ajuste antes de ligar a ferramenta elétrica. Uma chave inglesa ou uma chave que permaneça conectada a uma parte giratória da ferramenta elétrica pode provocar lesões pessoais. e) Não se debruce. Mantenha os pés no chão e o equilíbrio o tempo todo. Isso permite um melhor controle da ferramenta elétrica em situações inesperadas.
- Page 6 c) Quando o jogo de baterias não estiver sendo usado, mantenha-o afastado de outros objetos de metal como clipes de papel, moedas, chaves, pregos, parafusos ou outros pequenos objetos que podem fazer uma conexão de um terminal a outro. Colocar terminais de bateria lado a lado pode provocar curto-circuito e causar queimaduras ou incêndios.
- Page 7 baterias não estiver sendo usado, mantenha-o afastado de outros objetos metálicos, como clipes de papel, moedas, chaves, pregos, parafusos ou outros pequenos objetos que podem fazer uma conexão de um terminal a outro. Colocar terminais de bateria lado a lado pode provocar curto-circuito e causar queimaduras ou incêndios.
- Page 8 de forma segura e que os perigos envolvidos sejam compreendidos. As crianças não devem brincar com o equipamento. A limpeza e a manutenção do usuário não devem ser feitas por crianças sem supervisão. Se o cabo de alimentação estiver danificado, ele deve ser substituído pelo fabricante, por seu representante de serviço ou pessoa igualmente qualificada, para evitar riscos.
- Page 9 temperaturas abaixo de 0ºC ou acima de 40ºC. Isso é importante, pois pode prevenir sérios danos ao jogo de baterias. 17. Carregue apenas jogos de bateria do mesmo modelo fornecido pelo fabricante e modelos recomendados pelo fabricante. 18. Depois de carregar, desconecte o carregador de bateria da fonte de energia.
-
Page 10: Dados Técnicos
DADOS TÉCNICOS Tipo CDT112LD.T (CDT -designação da máquina, representativo da furadeira sem fio) Tensão Entrada do carregador 100-240V~50/60Hz, 42W Saída do carregador 10,8-20V 1500mA Modelo do carregador ACG1815D Modelo do jogo de baterias ABP1220SD Capacidade da bateria 2,0Ah íon-lítio Nº de células da bateria Tempo de carregamento 80 min. -
Page 11: Lista De Componentes
Como a ferramenta é usada e os materiais sendo cortados ou perfurados. A ferramenta em boas condições e com a manutenção em dia. O uso do acessório correto para a ferramenta e a garantia de que ela está afiada e em boas condições. O aperto do punho nas alças e se qualquer acessório antivibração e ruído for usado. E a ferramenta sendo usada conforme pretendido por seu desenho e estas instruções. - Page 12 Este produto é reciclável. Se não puder mais ser usado, descarte em um centro de reciclagem de resíduos. Designação de tipo CDT112LD.T (CDT -designação da máquina, representativo da furadeira à bateria) Recomendamos que você compre seus acessórios citados na lista acima na mesma loja que lhe vendeu o carregador de baterias.
-
Page 13: Instruções De Operação
INSTRUÇÕES DE OPERAÇÃO OBSERVAÇÃO: Antes de usar a ferramenta, leia o manual de instruções atentamente. Uso indicado A máquina tem por função colocar e afrouxar parafusos, assim como furar madeira, metal e plástico. ANTES DE COLOCAR EM OPERAÇÃO A) CARREGAMENTO DA BATERIA O carregador de bateria fornecido é... - Page 14 Flash Liga/Desliga Status ________ Vermelha ligada Carregando _ _ _ _ Vermelha intermitente Bateria com defeito ________ Verde ligada Completamente carregado _ _ _ _ Verde intermitente Retardamento quente/frio INSTRUÇÕES DE OPERAÇÃO 1. COMO USAR A PRESILHA PARA CINTO (VIDE FIG.B1, B2) Aparafuse a presilha para cinto (7) na ferramenta com o parafuso fornecido na sacola plástica.
- Page 15 10 - 18 para apertar parafusos em materiais macios e duros para perfurações pesadas 7. TRAVA AUTOMÁTICA DO EIXO (VIDE FIG. G) A trava automática do eixo permite que você a use como uma chave de fenda normal. Você pode dar uma torção extra para apertar firmemente um parafuso, soltar um parafuso muito apertado ou continuar trabalhando quando a energia da bateria expirou.
-
Page 16: Solução Do Problema
SOLUÇÃO DO PROBLEMA 1. PORQUE A FURADEIRA NÃO LIGA QUANDO VOCÊ PRESSIONA O BOTÃO? O controle de rotação avanço/regresso, o qual está acima do botão de ligar, está posicionado na função de trava. Destrave o controle de rotação avanço/reverso colocando-o na posição de rotação necessária. - Page 17 GARANTIA 1. Os produtos DEXTER são desenvolvidos de acordo com os mais altos padrões de qualidade DIY. A Dexter fornece uma garantia de 24 meses para os seus produtos, a partir da data da compra. Esta garantia aplica-se a todos os defeitos materiais e de fabricação que possam surgir.
-
Page 19: General Power Tool Safety Warnings
Original Instructions GENERAL POWER TOOL SAFETY WARNINGS WARNING Read all safety warnings, instructions, illustrations and specifications provided with this power tool. Failure to follow all instructions listed below may result in electric shock, fire and/or serious injury. Save all warnings and instructions for future reference. The term “power tool”... - Page 20 4) Power tool use and care a) Do not force the power tool. Use the correct power tool for your application. The correct power tool will do the job better and safer at the rate for which it was designed. b) Do not use the power tool if the switch does not turn it on and off.
-
Page 21: Drill Safety Warnings
DRILL SAFETY WARNINGS 1 ) Safety instructions for all operations a) Hold the power tool by insulated gripping surfaces, when performing an operation where the cutting accessory or fasteners may contact hidden wiring. Cutting accessory or fasteners contacting a “live” wire may make exposed metal parts of the power tool “live” and could give the operator an electric shock. -
Page 22: Additional Safety Instructions For Your Battery Charger
GENERAL SAFETY WARNINGS FOR BATTERY CHARGER WARNING Read all safety warnings and all instructions. Failure to follow the warnings and instructions may result in electric shock, fire and/or serious injury. Save all warnings and instructions for future reference. This appliance can be used by children aged from 8 years and above and persons with reduced physical, sensory or mental capabilities or lack of experience and knowledge if they have been given supervision or instruction concerning use of the appliance in a safe way and... - Page 23 15. Do not recharge non-rechargeable batteries, as they can overheat and break. 16. Longer life and better performance can be obtained if the battery pack is charged when the air temperature is between 18ºC and 24ºC. Do not charge the battery pack in air temperatures below 0ºC, or above 40ºC.
-
Page 24: Technical Data
TECHNICAL DATA Type CDT112LD.T (CDT -designation of machinery, representative of Cordless Drill) Voltage Charger input 100-240V~50/60Hz, 42W Charger output 10.8-20V 1500mA Charger Model ACG1815D Battery pack model ABP1220SD Battery capacity 2.0Ah Li-Ion No. Of Battery cells Charging time 80min No load speed... -
Page 25: Component List
The use of the correct accessory for the tool and ensuring it is sharp and in good condition. The tightness of the grip on the handles and if any anti vibration and noise accessories are used. And the tool is being used as intended by its design and these instructions. To reduce vibration and noise risk: -Wear anti-vibration gloves -Shorten trigger time... - Page 26 SYMBOLS To reduce the risk of injury, user must read instruction manual Warning This product is recyclable. If it cannot be used anymore, please take it to waste recycling centre. Wear ear protection Wear eye protection Wear dust mask Indoor use only Batteries may enter water cycle if disposed improperly, which can be hazardous for ecosystem.
-
Page 27: Before Putting Into Operation
Type designation CDT112LD.T (CDT-designation of machinery, representative of Battery-powered Drill) We recommend that you purchase your accessories listed in the above list from the same store that sold you the battery charger. Refer to the accessory packaging for further details. Store personnel can assist you and offer advice. - Page 28 Light ON/OFF flash Status ________ Red on Charging _ _ _ _ Red flash Defective Battery ________ Green on Fully Charged _ _ _ _ Green flash Hot/Cold Delay OPERATING INSTRUCTIONS 1. HOW TO USE THE BELT CLIP (SEE FIG.B1, B2) Screw the Belt clip (5) on the tool with the screw provided in the plastic bag. The Belt clip can be hooked on your belt or pocket, etc.
-
Page 29: Problem Solution
7.AUTOMATIC SPINDLE LOCK (SEE FIG. G) The automatic spindle lock allows you to use it as a regular screwdriver. You can give an extra twist to firmly tighten a screw, loosen a very tight screw or continue working when the battery energy has expired. For manual screwdriver purposes, the chuck is automatically locked when the tool is off. 8. -
Page 30: Maintenance
the chuck and the drill body. Position 1 is the lowest torque (screw driving force) and position 18 is the highest torque (screw driving force). Position is for drill operation. Regulate the torque adjusting ring to a higher position to reach the best result. 3. -
Page 31: Warranty
WARRANTY 1. Dexter products are designed to highest DIY quality standards. Dexter provides a 24-months warranty for its products, from the date of purchase. This warranty applies to all material and manufacturing defects which may arise. No further claims are possible, of whatever nature, direct or indirect, relating to people and /or materials. - Page 35 ADEO Services - 135 Rue Sadi Carnot - CS 00001 59790 RONCHIN - France Made in P. R.C. 20XX * Garantie 2 ans / 2-year guarantee...
Need help?
Do you have a question about the CDT112LD.T and is the answer not in the manual?
Questions and answers