Table of Contents
Advertisement
Quick Links
Installation Manual
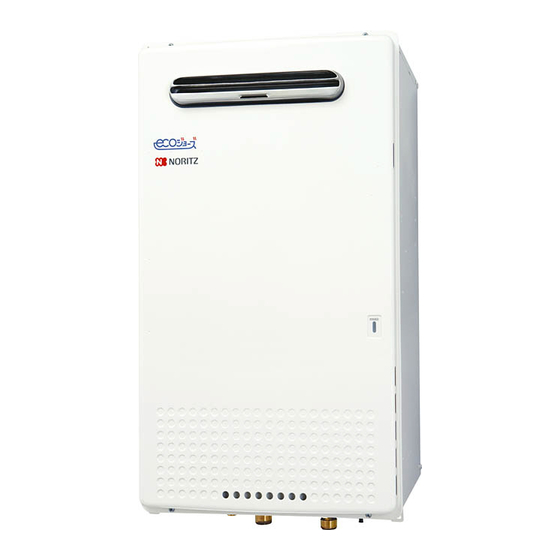
CONDENSING TANKLESS GAS WATER HEATER
NCC300OD (GQ-C5032WZ US)
Potential dangers from accidents during installation and use are divided into the following three
categories. Closely observe these warnings, they are critical to your safety.
DANGER
WARNING
CAUTION
WARNING:
If the information in this manual is not followed exactly, a fire or explosion may result
causing property damage, personal injury or death.
Prohibited
Requests to Installers
• In order to use the water heater safely, read this installation manual carefully, and follow the
installation instructions.
• Failures and damage caused by erroneous work or work not as instructed in this manual are not
covered by the warranty.
• Check that the installation was done properly in accordance with this Installation Manual upon
completion.
• After completing installation, either place this Installation Manual in a plastic pouch and attach it to
the side of the Water Heater (or the inside of the pipe cover or recess box if applicable), or hand it
to the customer to retain for future reference.
CERTIFIED
R
Low NOx Approved by SCAQMD
14 ng/J or 20 ppm
(Natural Gas Only)
SBB80YZ-1
Rev. 11/20
DANGER indicates an imminently hazardous situation which,
if not avoided, will result in death or serious injury.
WARNING indicates a potentially hazardous situation which,
if not avoided, could result in death or serious injury.
CAUTION indicates a potentially hazardous situation which,
if not avoided, may result in minor or moderate injury.
Disconnect
Power
CAUTION
FOR USE IN COMMERCIAL OR MANUFACTURED HOME APPLICATIONS.
Installation must conform with local codes, or in the absence of
local codes, the National Fuel Gas Code, ANSI Z223.1/NFPA 54-
latest edition and/or the Natural Gas and Propane Installation
Code CSA B149.1 - latest edition.
When applicable, installation must conform with the Manufactured
Home Construction and Safety Standard, Title 24 CFR, Part
3280 or the Canadian Standard CAN/CSA-Z240 MH Mobile
Homes, Series M86.
Noritz America reserves the right to discontinue, or change at any
time, the designs and/or specifications of its products without notice.
(Outdoor Installation)
Ground
NORITZ AMERICA
CORPORATION
Be sure to do
*SBB80YZ*
Advertisement
Table of Contents

Related Manuals for Noritz NCC300OD


Summary of Contents for Noritz NCC300OD
- Page 1 14 ng/J or 20 ppm 3280 or the Canadian Standard CAN/CSA-Z240 MH Mobile (Natural Gas Only) Homes, Series M86. Noritz America reserves the right to discontinue, or change at any time, the designs and/or specifications of its products without notice. SBB80YZ-1 Rev. 11/20...
-
Page 2: Included Accessories
System Controller Unit SCU-301-12M System Controller SCU-401-12M (SC-301-6M, SC-401-6M) SCU-401-24M Noritz Connect Neutralizer Wireless Adapter (NT20A) NWC-ADAPTER (For up to 10 water heaters) (NAW-1 US) * Isolation valves are necessary for flushing the Heat Exchanger. They allow for easy flushing of the system. -
Page 3: Quick Connect Multi System Installation
Quick Connect Multi System Installation • The Quick Connect Multi System allows the installation of two units together utilizing only the Quick Connect Cord. The Quick Connect Cord is 6 ft.(2m) long. Install the units 3-17" (75 - 432mm) apart from each other to ensure the cord will be able to reach between the units. -
Page 4: Before Installation
Before Installation WARNING Check the Gas • Check that the rating plate indicates the correct type of gas. • Check that the gas supply line is sized for 300,000 Btuh. Check the Power • The power supply required is 120VAC, at 60Hz. May result in fire or electric shock. - Page 5 WARNING • Avoid places where fires are common, such as those where gasoline, benzene and adhesives are handled, or places in which corrosive gases (ammonia, chlorine, sulfur, ethylene compounds, acids) are present. Prohibited Using the incorrect voltage may result in fire or cracking. •...
-
Page 6: Installation Clearances
Installation Clearances WARNING Before installing, check for the following: Install in accordance with relevant building and mechanical codes, as well as any local, state or national regulations, or in the absence of local and state codes, to the National Fuel Gas Code ANSI Z223.1/NFPA 54 –... - Page 7 Clearance Requirements from Vent Terminations to Building Openings * All clearance requirements are in accordance with ANSI Z21.10.3 and the National Fuel Gas Code, ANSI Z223.1 and in Canada, in accordance with the Natural Gas and Propane Installation Code CSA B149.1. Vent Terminal Air Supply Inlet Area Where Terminal...
- Page 8 Installation Securing to the wall • The weight of the device will be applied to the wall. If the strength of the wall is not sufficient, reinforcement must be done to prevent the transfer of vibration. • Do not drop or apply unnecessary force to the device when installing. Internal parts may be damaged and may become highly dangerous.
-
Page 9: Gas Piping
The installer must be professionally trained to do such work and must always follow all local and national codes and regulations. Gas line sizing calculations must be performed for every installation. Please contact Noritz America at 866-766-7489 if you have any questions or concerns. - Page 10 Refer to the NFPA 54 for details. Please contact Noritz for details. For corrugated stainless steel tubing (CSST) capacity tables, please consult with the manufacturer.
- Page 11 BTU/Cubic Foot ratings. For simplification of your calculations, 1 Cubic Foot of Gas is approximately equivalent to 1000 BTU. Sample Gas Line Instructions 1. Size each outlet branch starting from the furthest Noritz Condensing Tankless Gas Water Heater using the Btuh required and the length from the meter. Barbecue (300,000 Btuh) 2.
- Page 12 Table 3. Maximum Undiluted Propane (LP) Delivery Capacity in Thousands of BtuH (0.5” WC Pressure Drop) [Schedule 40 Metallic Pipe] Length (including fittings) Pipe 100' 125' 150' 175' 200' Size (3m) (6m) (9m) (12m) (15m) (18m) (24m) (30m) (38m) (45m) (53m) (60m) 1/2"...
-
Page 13: Water Piping
Installation and service must be performed by a qualified plumber. In the Water Piping Commonwealth of Massachusetts, this product must be installed by a licensed plumber or gas fitter in accordance with the Massachusetts Plumbing and Fuel Gas Code 248 CMR Sections 2.00 and 5.00. Observe all applicable codes. This appliance is suitable for combination potable water and space heating applications. -
Page 14: Drain Piping
• In order for the freeze prevention heaters to operate, the water heater must have power at all times. Damage to the water heater as a result Total Hardness* : 200 mg/L (12 gpg) or less of the below is not covered by the Noritz Aluminum : 0.05 to 0.2 mg/L or less America Limited Warranty. -
Page 15: Water Treatment System
= 1, 2, 3, 4, F # = 0, 1, 2, 3, 4, 5, 6, 7, 8, 9 Damage to the water heater as a result of the items below is not covered by the Noritz America Limited Warranty. • Water in excess of 12 gpg (200mg/L) of hardness •... - Page 16 Procedure for Flushing the Heat Exchanger This procedure is only intended for use by a qualified service professional or authorized Noritz Service Representative. Any unauthorized use of this procedure may result in voiding the warranty.Please contact Noritz America (866-766-7489) for additional support.
-
Page 17: Water Heater
Flushing the Heat Exchanger (For Single Unit) 1. Open the Front Cover. 2. Connect the blue connector**** marked "FLUSH" for flushing near the Circuit Board. Water Heater Circuit Board Connect ***** The connector color is blue and labeled “FLUSH”. Manifold Plate FLUSH 3. - Page 18 1. Connect the blue connector marked "FLUSH" for unit needing to be flushed. (The water heater is isolated from Quick Connect Multi system when the blue connector marked "FLUSH" for flushing is connected. Not need to disconnect the Quick Connect Cord.) Sub Water Heater Main Water Heater Connect...
- Page 19 1. Connect the blue connector marked "FLUSH" for unit needing to be flushed. (The water heater is isolated from Multi System when the blue connector marked "FLUSH" for flushing is connected. Not need to disconnect the “Cord for the Multi System”.) Unit 1 Unit 2 Unit 6...
- Page 20 The Code “CCC” goes out on the Remote Controller. 8. Close the Front Covers. 9. Open the gas supply valves and water outlet valves. 10. Check for correct operation of the water heaters. Please contact Noritz America if more information is needed for flushing. (Phone # : 866-766-7489)
-
Page 21: Condensate Piping
Condensate Piping CAUTION Due to the acidic nature of the condensate, be sure to properly drain and if necessary, treat the condensate prior to disposal. Damage caused by improperly handled condensate is not covered by the warranty. • This water heater is a high efficiency, fully condensing appliance which produces acidic condensate during operation. - Page 22 Condensate piping to floor drain Condensate piping with pump Condensing Condensing Tankless Gas Tankless Gas Water Heater Water Heater DO NOT ADD DO NOT ADD ANY VALVES ANY VALVES 1/2" PVC pipe 1/2" PVC pipe 3/8" ID tubing* 1/2" PVC elbow Slope pipe downwards The end of the drain pipe 1/4"...
-
Page 23: Plumbing Applications
If the Air Handler does not control the water flow automatically, the Scale detection feature will not work. Notes: 1. Noritz recommends the use of an Isolation Kit with the installation. These kits include an integrated shut-off and service valve with unions and a pressure relief valve. -
Page 24: Electrical Wiring
Electrical Wiring Consult a qualified electrician for the electrical work. Do not connect electrical power to the unit until all electrical wiring has been completed. Disconnect Power This appliance must be electrically grounded in accordance with local codes, or in the absence of local codes, with the National Electrical Code, ANSI/NFPA 70. - Page 25 Connecting Remote Controller Cord to Unit • Keep the remote controller cord away from the freeze prevention heaters in the unit. • Tie the redundant cord outside the water heater. Do not put the extra length inside the equipment. • The remote controller cord can be extended up to 300' (90m) with 18AWG wire. •...
-
Page 26: Remote Controller
Changing Other Features Adjusting the Temperature / Water Quantity Display Note: The setting must be done within the first 10 minutes of connecting electrical power to the water heater. Table of Setting Items Item Choices (factory defaults shaded) Celsius / Liter °F / gal °C / L Fahrenheit / Gallon... -
Page 27: Pump Wiring
* This feature is not available when using the Quick Pump Wiring Connect Multi System feature. Connecting the pump control wire 1. Leave enough slack so that the pump control wires will stay connected if the unit is removed from the Pump Control wall. - Page 28 For Quick Connect Multi System Installation Connecting Quick Connect Cord-2 use part #QC-2 only. (sold separately). Caution The wire coloring on the Quick Connect Cord-2 will not be the same as the wire coloring of the connection plug inside the unit. 1.Red 1.Red 1.White...
-
Page 29: Maintenance
Maintenance Periodically check the following to ensure proper operation of the water heater. • The venting system must be examined periodically by a qualified service technician to check for any leaks or corrosion. • The burner flame must be checked periodically Yellow Flame or Lifting Flame for a proper blue color and consistency. -
Page 30: Lighting Instructions
* If both units do not ignite, switch which unit will ignite first by pressing the Max. or Min. Mani-fold Pressure Set Button on the circuit board. (*2) Press Max. or Min. Manifold Unit A Ignites Unit A Doesn't Ignite Pressure Set Button on Unit B Unit B Doesn't Ignite Unit B Ignites... - Page 31 Dimensions < inch (mm) > 18.7" (476mm) 12 x 0.24" x 0.4" (6 x 10mm) OBLONG HOLE 6 x Ø0.5" (Ø13mm) 11.8" (300mm) 7.8" (198mm) 6.7" (170mm) 5.5" (140mm) 18.9" (480mm) 3.9" (100mm) 18.3" (466mm) 2.8" (70mm) 14.2" (360mm) 12.6" (320mm) 3.6"...
- Page 32 Multi-System Install one system controller (SC-301-6M, SC-401-6M) for every six units. Dipswitch Settings (for remote controllers RC-7647M or RC-7650M when used with system controller SC-201-6M) Note: When this water heater is used with remote controllers RC-7646M-2, RC-7649M, or RC-9018M, it is not necessary to follow this procedure. When using the remote controller RC-7647M or RC-7650M (ºC temperature display), a dipswitch change will be necessary on all water heaters connected to the system controller.
- Page 33 B-1. Example of Recirculation with a Multi-System (Recirculation system) This system will make hot water more quickly available to remote fixtures. The pump will circulate water through the loop until the entire loop is warm, and then the system controller will turn off the pump until the loop cools down.
- Page 34 B-2. Example of Installation with a Storage Tank and Recirculation System (Tank recirculation system) The pump will push water through the Multi-System to heat up the tank. When the temperature of the thermostat is high, the system controller will turn off the pump until the the temperature cools down.
- Page 35 Multi-System Wiring (Use SC-301-6M, SC-401-6M) Unit 1 System Controller No.6 * Connect these to the No.5 remote control terminal No.4 block in each unit No.3 No.2 90 90 B5 B5 Power Remote control terminal block Remote Controller Cord Remote Controller Unit 2 * The remote controller terminal location may differ depending...
- Page 36 A. Installation without a recirculation system (Using external system controller) (Standard System)
- Page 37 B-1. Example of Recirculation with a Multi-System (Using external system controller) (Recirculation system) This system will make hot water more quickly available to remote fixtures. The pump will circulate water through the loop until the entire loop is warm, and then the system controller will turn off the pump until the loop cools down.
- Page 38 B-2. Example of Installation with a Storage Tank and Recirculation System (Using external system controller) (Tank recirculation system) The pump will push water through the Multi-System to heat up the tank. When the temperature of the thermostat is high, the system controller will turn off the pump until the the temperature cools down.
- Page 39 Multi-System Wiring (Use SCU-301-12M, SCU-401-12M/24M) CAUTION • The below diagram shows the connection of 3 units to the system controller. When connecting 4 or more units, follow the same procedure. • Connect the water heaters to the system controller follwing the detailed wiring instructions included with the system controller.
-
Page 40: Post Installation Checks
● Refer to the Installation Manual provided with the water heat- er for complete installation details. Installation Guide NORITZ AMERICA CORPORATION In order to use this product safely, read this installation manual carefully and follow the installation instructions. ● Potential dangers from accidents during installation and use are described below. -
Page 41: Included Parts List
Included Parts List (The value in ( ) indicates the quantity.) Mounting Machine Raised countersunk Raised countersunk Remote Controller Wall anchor bracket screw head wood screw head screw (For junction box installation) Notes on the Installation Location Connection of Remote Controller Cord •... - Page 42 5. Attach the remote controller to the mounting 2. Remove the decorative frame from the remote bracket. Insert the bottom of the remote controller. (The remote controller is inserted controller into the groove at the bottom of the in the decorative frame.) bracket and push in the 2 hooks on top of the remote controller completely.
Need help?
Do you have a question about the NCC300OD and is the answer not in the manual?
Questions and answers