Summary of Contents for ALLEN & HEATH dLive DM32
- Page 1 DM32, DM48, DM64 Getting Started Guide Before starting please check www.allen-heath.com for the latest dLive firmware and documentation. AP9985...
- Page 2 Limited Three Years Manufacturer’s Warranty Allen & Heath warrants the Allen &Heath -branded hardware product and accessories contained in the original packaging ("Allen & Heath Product”) against defects in materials and workmanship when used in accordance with Allen & Heath's user manuals, technical specifications and other Allen & Heath product published guidelines for a period of THREE (3) YEARS from the date of original purchase by the end-user purchaser ("Warranty Period").
-
Page 3: Important - Read Before Starting
IMPORTANT - Read before starting Safety instructions Before starting, read the Important Safety Instructions printed on the sheet supplied with the equipment. For your own safety and that of the operator, technical crew and performers, follow all instructions and heed all warnings printed on the sheet and on the equipment panels. -
Page 4: Table Of Contents
Packed items Check you have received the following: • DM MixRack • Getting Started Guide AP9985 • Safety Sheet • IEC mains lead Contents IMPORTANT - Read before starting ......................3 Packed items ..............................4 Contents ............................... 4 Introduction............................5 dLive MixRacks ........................ -
Page 5: Introduction
1. Introduction dLive is a distributed digital mixing system providing a uniquely flexible solution for any live sound application. It separates the mix engine from the control surface, putting the audio and processing where it is needed, and offering a host of control and audio networking possibilities. Refer to the Allen & Heath website to find out more about dLive. - Page 6 DM32 32 mic/line in 16 XLR out DM48 48 mic/line in 24 XLR out DM64 64 mic/line in 32 XLR out MixRack Getting Started Guide AP9985 Issue 5...
-
Page 7: Installing The Mixrack
2. Installing the MixRack 2.1 Free standing The MixRack can be operated as a freestanding unit for shelf or floor operation. Check that its plastic feet are fitted. Ensure adequate air flow around the unit. It must not be covered in any way. Always stand the unit on a firm flat surface away from any soft furnishings or carpet. -
Page 8: Rear Panel
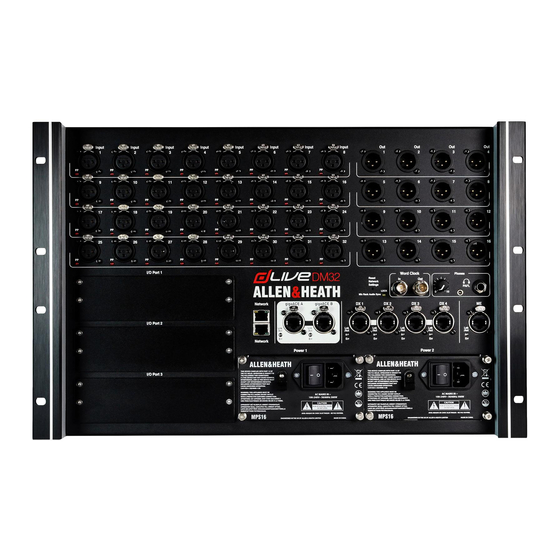
3. Rear Panel Mic/Line inputs - Recallable preamps for balanced or unbalanced microphone and line level signals. Gain, Pad and 48V are digitally controlled within the preamp. The PP indicator lights up when phantom power voltage is detected at the socket, whether internally or externally sourced. - Page 9 Network –2x RJ45 Gigabit Ethernet ports. Connect a laptop or a wireless router to use with dLive Editor or iOS apps. All devices on the network must have compatible IP addresses. A recessed switch lets you reset the network settings to factory default. To reset, turn the MixRack off, insert a pointed object to press and hold the switch whilst turning the MixRack back on.
-
Page 10: Front Panel
* On early dLive units, remove the 4 screws securing the blank panel using a star Torx T8 screwdriver. Heed the safety warnings printed on the panel. A plastic P-clip cable clamp is provided to secure the mains cable. Slot the cable in or lock it in place using a star Torx T20 screwdriver to refit the clamp around the cable. -
Page 11: Connect And Power Up
5. Connect and power up Switch on the MixRack. It takes around 15s for the mix engine to start passing audio. You should hear the relays click as they connect the outputs once the boot-up is completed. The Ready indicator on the front panel will light up at this point. -
Page 12: Me System Connection
5.3 ME system connection Plug a touring grade CAT5e (or higher specification) cable up to 100m long between the MixRack ME port and the ME-1 or ME-U. Refer to www.allen-heath.com for cable requirements, recommendations, and a list of CAT5 cables available to order. 5.4 Connect a laptop or wireless router Connect a laptop, router or access point to either of the Network ports to use with dLive Editor or iOS apps. -
Page 13: Dimensions
6. Dimensions DM32 - 310mm/12.2" DM48 - 354mm/13.9" DM64 - 443mm/17.4" 380.00mm/15" 482.60mm/19" 442.00mm/17.4" 434.00mm/17.1" 220.00mm/8.7" 24.00mm/0.9" MixRack Getting Started Guide AP9985 Issue 5... -
Page 14: Technical Specs
7. Technical specs Inputs System Mic/Line XLR Inputs Balanced XLR, +48V phantom power Measured balanced XLR in to XLR out, 20-20kHz, minimum Gain, Pad out, signal @ 0dB (meter) Mic/Line Preamp Fully recallable Dynamic Range 110dB Input Sensitivity -60 to +15dBu System Signal to Noise -92dB Analogue Gain...


Need help?
Do you have a question about the dLive DM32 and is the answer not in the manual?
Questions and answers