
Subscribe to Our Youtube Channel
Related Manuals for realspace Caldell 231-009


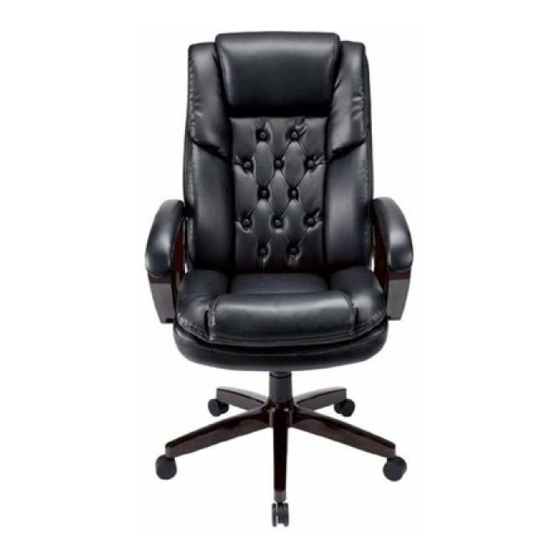
Summary of Contents for realspace Caldell 231-009
- Page 1 Date Manufactured / Date de fabrication / Fecha de fabricación: _________ Lot # / Numéro de lot / Número de lote: __________ version / version / versión 0815 Item 231-009 / 24626656...
- Page 2 For customer support, Vendor Sticker can be found on the underside of Seat Cushion (B).
- Page 3 Pour le service à la clientèle, vous trouverez l’autocollant avec les informations du fournisseur sur le dessous du coussin du siège (B).
- Page 4 Para servicio al cliente, encontrará la etiqueta con las informaciones del proveedor en la parte inferior del cojín del asiento.
-
Page 5: Parts List
LISTE DE PIÈCES PARTS LIST LISTA DE PIEZAS Spare Qty. / Qté. Name / Nom / Nombre Part / Pièce / Pieza Épargner Cantidad. Sobrante Back Cushion Coussin arrière Cojín del respaldo Seat Cushion Coussin du siège Cojín del asiento Armrests Accoudoir Brazo... - Page 6 SIZE COMPARISON CHART TABLEAU DE COMPARAISON DE TAILLES TABLA DE COMPARACIÓN DE TAMAÑOS 3/4 " Bolt Boulons de 19mm Pernos de 19mm 1 1/4 " Bolt Boulons de 32mm Pernos de 32mm 1 3/4" Bolt Boulons de 44mm Pernos de 44mm Customer Service 1-800-949-9974 Service à...
- Page 7 Turn the Star Base (F) upside down. Press the Casters (G) into holes at the end of each leg. Turn the Star Base (F) upright and insert Gas Lift (E) into the center hole of Star Base (F). Gas Lift Cover should be in place over Gas Lift(E). Retournez la base en étoile (F).
- Page 8 Align Seat Plate (D) over pre-drilled holes on the underside of Seat Cushion (B) with black tension knob facing the front of the seat. Attach Seat Plate (D) to Seat Cushion (B) using 4 Bolts (H1) as shown. Tighten securely with enclosed Allen Wrench (J). Be careful not to cross thread bolts or damage the seat.
- Page 9 Attach Seat Cushion (B) to the steel connected Back Cushion (A) by securing 4 Bolts (H2) to the holes of Seat Cushion (B) as shown. Do not tighten Bolts fully until you have completed assembly. Fixez le coussin elastic (B) au cousin d’acier (A) en positionnant 4 boulons (H2) dans les trous du coussin elastic (B)comme illustré.
- Page 10 Turn assembled seat upright and locate central hole of Seat Plate (D) over Gas Lift(E). Push down firmly until connection is secure. Retournez le siège à l'endroit et placez le trou central du plateau du siège (D) sur le levier pneumatique(E). Appuyez fermement jusqu'à...
- Page 11 Attach both Left Armrests (C) and Right Armrests (C) to Seat Cushion (B) and Back Cushion (A) by using 6 Bolts (H3). Leave bolts loose until all 6 (H3) have been installed. Then tighten bolts fully. À ľaide de 6 boulons (H3) et en utilisant la clé hexagonale (J),fixez les accoudoirs (C) au coussin de siège (B) assemblé.
- Page 12 Press the Plastic Caps (I) into the Arm Rest holes to cover bolts and sit down on Seat Cushion. Sitting on the Seat Cushion applies even pressure on the Gas lift and Star Base and secures them in place. Pressez les capuchons de plastique (I) dans les trous des accoudoirs pour couvrir les boulons et asseyez-vous sur le coussin du siège.Vous asseoir permet ďappliquer une pression uniforme sur la poussée de gaz et la base étoilée et de les fixer en place.
- Page 13 Before using your Chair, ensure that all the Bolts are tightened fully for safety. You can now enjoy the comfort of your new Chair! NOTE: Please keep the Allen Wrench and check all bolts periodically to ensure these remain tightly fastened. Avant d'utiliser votre fauteuil de bureau, assurez-vous que tous les boulons sont entièrement serrés par précaution.
- Page 14 FUNCTION INSTRUCTION MODE D’EMPLOI INSTRUCCIONES DE LAS FUNCIONES TO ADJUST SEAT HEIGHT While seated, lean forward, lifting your body weight from the seat. Reach underneath the right side of chair and locate the flat-surfaced handle. Lift the handle up slowly to allow the chair to rise to the desired height.
- Page 15 TO ADJUST TILT TENSION Reach under the front center of chair seat and grasp the round black knob. To loosen the tilt mechanism, turn the knob clockwise. This lessens the effort required to rock back and forth. Rotate the knob until desired resistance is reached.
- Page 16 TO OPERATE TILT LOCKOUT Reach underneath the right side of chair and locate the flat-surfaced handle. Slide the handle all the way out (away from the seat). When the handle is in this position, leaning back will cause the chair to tilt backwards.
- Page 17 360˚ SWIVEL 360˚ Seat swivel. ROTATION DE 360 DEGRÉS Rotation du siège de 360 degrés GIRO DE 360˚ Giro de 360˚ del asiento Customer Service 1-800-949-9974 Service à la clientèle : 1-800-949-9974 Nuestro teléfono de atención al cliente es +1-800-949-9974...
- Page 18 Swinton Avenue Trading, Inc. Limited Five Year Product Warranty This limited warranty covers the original purchase of new product used for normal commercial, personal or household use. Swinton Avenue Trading, Inc. (SAT) warrants its products will be free from defects in materials and workmanship (normal wear and tear excepted), for five (5) years from the date of purchase, except as provided below.
- Page 19 Swinton Avenue Trading, Inc. Garantie limitée de cinq (5) ans Cette garantie limitée couvre les produits neufs utilisés dans le cadre d'applications commerciales ou domestiques normales. Swinton Avenue Trading, Inc. (SAT) garantit ses produits contre les défauts de matériel et de main-d'œuvre (à l'exception de l'usure normale) durant cinq (5) ans à compter de la date d'achat, à...
- Page 20 Swinton Avenue Trading, Inc. Garantía limitada de cinco años para el producto Esta garantía limitada cubre la adquisición original de un producto nuevo utilizado con fines comerciales, personales o domésticos normales. Swinton Avenue Trading, Inc. (SAT) garantiza que sus productos estarán exentos de defectos materiales y de fabricación (a excepción de los derivados de un uso y desgaste normal) durante cinco (5) años a partir de la fecha de compra del producto, con la salvedad de lo dispuesto a continuación.
Need help?
Do you have a question about the Caldell 231-009 and is the answer not in the manual?
Questions and answers