Table of Contents
Advertisement
Quick Links
Advertisement
Table of Contents

Related Manuals for Eargo 5


Summary of Contents for Eargo 5
- Page 1 Q U I C K S TA R T G U I D E...
-
Page 2: Table Of Contents
WELCOME TO EARGO! CONTENTS We’re super excited to have you join our Eargo What’s Included family. Please charge your Charger using the Get to Know Your Eargo & Charger provided USB-C cable for 4 hours before use. Device & Charger Indicators This guide is a quick reference. -
Page 3: What's Included
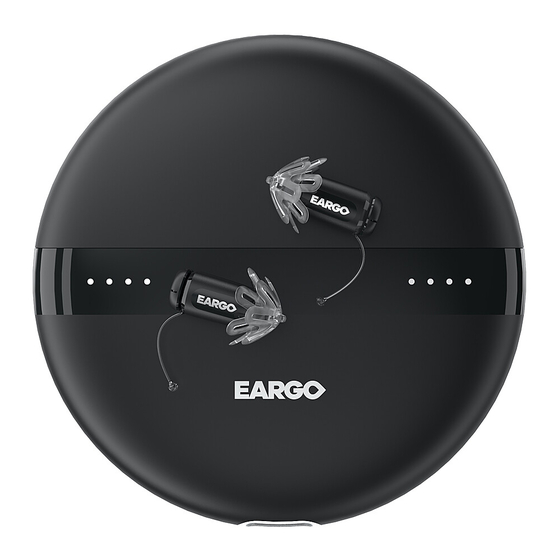
WHAT’S INCLUDED 2 Eargo 2 Medium 2 Large Charger USB-C Cleaning Devices Closed Petals Closed Petals Power Cord Tool 2 Microphone 2 Medium 2 Large Quick Start Cleaning (Mic) Caps Open Petals Open Petals Guide Power Adapter Cloth *Devices ship with Medium Closed Petals attached. -
Page 4: Get To Know Your Eargo & Charger
GET TO KNOW YOUR EARGO Replaceable Replaceable Mic Cap Petal Sound Inlet Device Removal Thread Sound Outlet Removal Thread Grip... - Page 5 GET TO KNOW YOUR CHARGER Sensor Hearing Device Indicator Lights Hearing Device Cradles Charger Indicator Light Cradle Indicator Lights USB-C Power Cord Used in programming and detecting your devices.
-
Page 6: Device & Charger Indicators
DEVICE INDICATORS Full Charge: Four solid white Hearing The Cradle Indicator Device Indicator Lights Lights stay solid white and pulsing Cradle to guide correct Eargo Lights. placement. Low Charge: Two rapid white double- flashes indicate less than 25% charge. When your Eargo... - Page 7 CHARGER INDICATOR Full Charge: Solid white when The Charger Indicator Light shows the charge plugged in. status of the Charger. The light slowly pulses white when plugged in and actively charging. Adequate Charge: Solid white when unplugged ( > 25% charge). Low Charge: Rapid white double- flash.
-
Page 8: Remove From Charger Insert Into Ear
INSERT INTO EAR Lift by Removal Thread Grip. Hold with the L (left) or R (right) facing you. Eargo devices automatically turn on after about Grasp the Device 15 seconds. Charger and devices may feel warm Removal Thread. from inductive charging. - Page 9 ADJUST THE PROGRAM REMOVE FROM EAR Eargo devices come with four Preset programs Grasp the Removal Thread Grip. Gently pull up for you to try. Amplification, especially for speech, and out to remove. Before replacing devices in the increases as you go from Preset Program 1 to Charger, wipe them gently with the Cleaning Cloth.
-
Page 10: Charge Your Eargo Devices
CHARGE YOUR EARGO DEVICES Ensure Device Removal Thread is pointing up. Position over the Charger, Petals pointing in. Release the device. Feel a slight magnetic pull as it settles into place. Make sure that Device Removal Threads are centered inside the Lid when you close the Charger. -
Page 11: Find The Perfect Fit
FIND THE PERFECT FIT Your Eargo devices ship with Medium Closed We have also included some other style options Petals. We have included other size options for to meet individual sound quality and hearing loss you to ensure your ears are comfortable. -
Page 12: Daily & Additional Care
DAILY CARE Brush the Petal to remove wax and It’s important to keep your Eargo devices clean debris from the tip because wax, oil or debris can affect their sound and holes. quality and performance. We’ve made it pretty easy to do! - Page 13 Hearing Device Cradles If not replacing, Petals may be soaked in warm soapy water for 3-5 minutes to clean them. Rinse and dry Petal thoroughly. Brush and wipe Use the Cleaning Tool Wiper to remove wax the Sound Outlet on the bare Eargo device, then and debris from the Sensor and Hearing Device securely reattach the Petal.
- Page 14 REMOVE THE PETALS REMOVE THE MIC CAPS Hold the device firmly around its middle. With your Hold the device firmly around its middle. With your other hand, grasp both layers of the Petal and peel other hand, use your fingernail to peel the Mic Cap it away.
- Page 15 REPLACE THE PETALS Replacement Petal packaging is designed to Sound help change them. Locate the tray and place it Outlet label side up. Wipe the Sound Outlet Select a new Petal. with the Cleaning Cloth. Peel the tab up. Align the Sound Outlet Press into place until with the center of the you feel a click.
-
Page 16: Replace The Petals & Mic Caps
REPLACE THE MIC CAPS Sound Inlet Replacement Mic Caps are packaged Wipe the Sound Inlet Select a new Mic Cap. with the extra Open with the Cleaning Cloth. Peel the tab up. Petals. From time- to-time you need to replace the Mic Caps to ensure the best sound quality. -
Page 17: Appendix
Indications for Use: The hearing device is accustomed to having an object in it. If this or intended to amplify and transmit sound to the ear anything related may arise, please contact Eargo. and thereby compensate for mild to moderate high-frequency hearing loss in adults. - Page 18 Petal yourself. Have the Petal removed by a training and experience to assist in the evaluation healthcare professional. and rehabilitation of a child with a hearing loss. Eargo devices are for those that are at least 18 Warning to Hearing Aid Dispensers: years of age. eargo.com/guides...
- Page 19 1 (800) 61-EARGO eargo.com Eargo and the Eargo wordmark are registered trademarks of Eargo, Inc. ©2021 Eargo, Inc. Quick Start Guide LBL0256 Rev D...
Need help?
Do you have a question about the 5 and is the answer not in the manual?
Questions and answers