Table of Contents
Advertisement
Advertisement
Table of Contents

Related Manuals for AODELAN E3+


Summary of Contents for AODELAN E3+
- Page 1 Wireless Flash Trigger Receiver 无线电引闪接收器...
- Page 3 Note: Before using the E3 Wireless Trigger for Canon, please read this instruction manual carefully. Please also note to upgrade its firmware to the latest version following the instructions provided on www.aodelan.net. (To check the firmware version, please see page 9). Warnings 1.
-
Page 4: Fcc Interference Statement
FCC Interference Statement: This device complies with part 15 of the FCC Rules. Operation is subject to the followingtwo conditions: (1) This device may not cause harmful interference, and (2) this device must accept any interference received, including interference that may cause undesired operation. FCC Radiation Exposure Statement: This equipment complies with FCC RF radiation exposure limits set forth for an uncontrolled environment. - Page 5 Canon ETTL Speedlites and thus to perform wireless radio receiving function. The receiver is compatible with multiple wireless radio transmitting devices, including Aodelan E3 transmitter, Canon ST-E3-RT Speedlite transmitter, and Canon Speedlites that are compatible with radio transmission...
- Page 6 Table of Contents I. Parts --------------------------------------------------------------------------------------------5 II. Preparation Before Use -----------------------------------------------------------------6 III. The LCD Display-------------------------------------------------------------------------11 IV. Wireless Flash Shooting: Radio Transmission-------------------------------12 V. Trouble Shooting Guide---------------------------------------------------------------17...
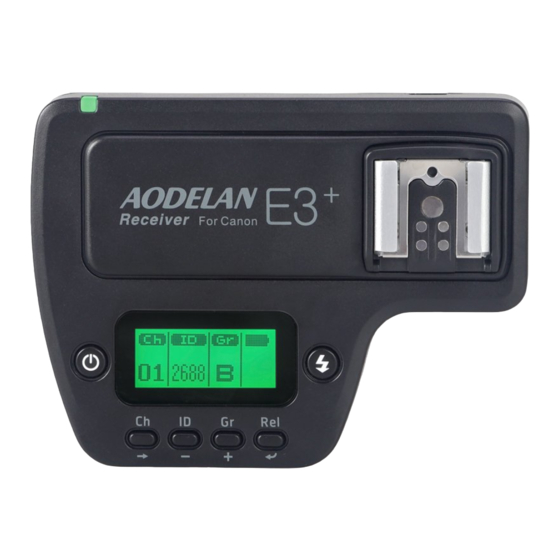
- Page 7 I.Parts 1. Radio transmission confirmation lamp 2. LCD panel 3. Power button 4. Function button 1 5. Function button 2 6. Function button 3 4 5 6 7 7. Function button 4 8. Test flash button 9. Hot shoe mount 10.
-
Page 8: Preparation Before Use
II. Preparation Before Use Installing the Batteries 1. Press the battery compartment cover and slide it down as shown to open the battery cover. 2. Insert the batteries. Make sure the “+” and“-”battery contacts are correctly oriented as shown. (Note: Please use 2 pieces of AA alkaline batteries or AA type NI-MH batteries. - Page 9 Attaching and Detaching the E3 Receiver Attaching the flash to the E3 Receiver 1. Align the flash’s hot shoe and the receiver’s hot shoe mount. 2. Slide the flash all the way into the receiver’s hot shoe mount 3. Lock the flash with the flash’s locking mechanism.
- Page 10 Turn On/Off the E3 Receiver 1. Turn On: Press and hold the power button until MENU interface is displayed on screen. 2. Turn off: Press and hold the power button until the LCD screen goes blank. USB Port The firmware of E3 receiver can be upgraded via the USB port, so as to adjust its parameter and extend its compatibility with cameras to come in the future.
-
Page 11: Test Firing
Click "Icon" icon, locate and double click on the FIF file from the pop-out window. Then it starts loading the new firmware. 1.3 The status of the upgrade will be displayed in the process bar. When completed, an "Updata OK" will be displayed at the bottom of the upgrade software window, and an “update OK”... -
Page 12: Lock Function
Attaching the E3 Receiver to Studio Lights or Flashes by Cable 1) Turn off the flash/strobe and the E3 receiver 2) Connect a cable to the receiver’s 3.5 mm output port 3) Connect the opposite end of the cable to a flash or studio strobe 4) Turn on the flash/strobe and E3 receiver 5) Set the flash to Manual mode –... -
Page 13: Lcd Display
III.LCD Display Transmission Channel Ch.1~Ch.15and Auto Wireless radio ID 0000~9999 Firing group Up to five groups (A/B/C/D/E) Battery power state Slave units and master unit in communication receiver in communication with flash that attached to its hot shoe mount... -
Page 14: Wireless Flash Shooting: Radio Transmission
IV. Wireless Flash Shooting: Radio Transmission Note: The transmitter attached to the camera is called the master unit, E3 receiver and a flash that is wirelessly controlled is called the slave unit. Wireless Flash Shooting Set the master unit and E3 receiver’s to exactly the same channel and ID, and the flash mounted on E3 receiver set to ETTL mode, the flash (slave) - Page 15 shooting; 2. When the master unit is set to M, slave unit fires at the set flash output 3. When the master unit is set to Gr, you can shoot with a different flash mode (ETTL/M/ OFF)for each group(A/B/C/D/E). Note: 1) After connecting flash with E3 receiver, please firstly turn on the flash, set the flash mode to ETTL, and lastly turn on the receiver.
- Page 16 Master Unit Slave Unit Set A, B or C as the firing group. If set Ratio OFF to D or E, flash will not be triggered Set A or B as the firing group. If set to ETTL/M Ratio A:B C, D or E, flash will not be triggered Ratio A:B C(ETTL)...
- Page 17 transmission channel parameter will flash on the LCD; press function button 2< > or 3< >to select from Ch. 1-15 or Auto; press power button or function button 4< >to exit the setting. Setting the wireless radio ID: press function button 2 < >, the thousands digit will flash on the LCD;...
- Page 18 Color Status Description Action Transmission OK Green No connected Check the channel and ID Master Units + slave units = Too many units 16units or less Blinking Turn the power off and on Error again Shortly lit when E3 receiver sends flash Blue or remote release order...
-
Page 19: Technical Specification
V. Technical Specification Type Wireless Trigger For Canon/Receiver EOS type-A camera compatible with E-TTL II Compatible cameras /E-TTL autoflash Exposure control system E-TTL II/E-TTL auto, manual flash Frequency 2405~2475Hz Channel Auto, Ch.1~15 Wireless radio ID 0000-9999 Slave unit control Up to 5 groups(A/B/C/D/E), up to 15 units Transmission distance 100m+ 2 x AA alkaline batteries or AA NI-MH... -
Page 20: Warranty Terms
2. The main unit of product comes with a 1 year warranty from the date of purchase. 3. New firmware will be available for download on aodelan.net. Customer can look for firmware upgrades on the website. 4. For other terms, please refer to details of the Three Guarantees policy. - Page 21 1. Log in www.aodelan.net and contact AODELAN Customer Service Center to confirm whether the product needs to be returned for repair. The shipping cost to send back the product will be at customer’s expense (AODELAN Customer Service Center’s reply shall prevails).
-
Page 22: Accessory List
Accessory List Aodelan E3 Receiver 1 PC AA Battery 2 PCS Manual 1 PC QC Certificate 1 PC *Please check the package according to the accessory list.
Need help?
Do you have a question about the E3+ and is the answer not in the manual?
Questions and answers