Table of Contents

Related Manuals for Toshiba MMC-AP0158HP Series


Summary of Contents for Toshiba MMC-AP0158HP Series
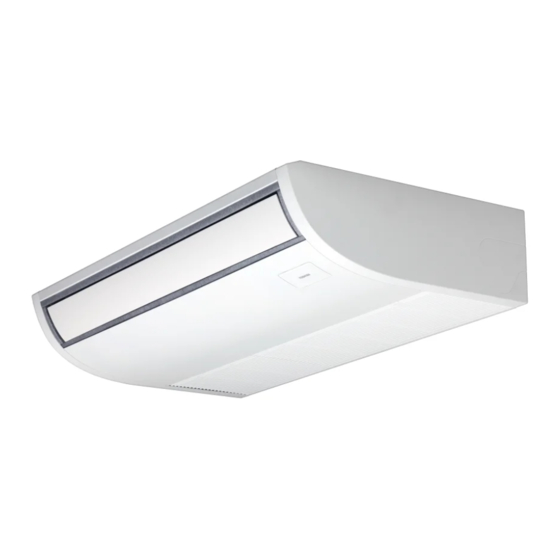
- Page 1 AIR CONDITIONER (MULTI TYPE) Installation Manual Indoor Unit For commercial use Model name: Ceiling Type MMC-AP0158HP Series MMC-AP0188HP Series MMC-AP0248HP Series MMC-AP0278HP Series MMC-AP0368HP Series MMC-AP0488HP Series MMC-AP0568HP Series English...
-
Page 2: Table Of Contents
– 1 – Contents Original instruction Please read this Installation Manual carefully before installing the Air Conditioner. 1 Precautions for safety ....................3 • This Manual describes the installation method of the indoor unit. • For installation of the outdoor unit, follow the Installation Manual attached to the outdoor unit. 2 Accessory parts ...................... - Page 3 Shoes with additional protective toe cap heavy objects made by Toshiba Carrier Corporation. He or she has been trained to install, maintain, relocate and remove the air conditioners made by Toshiba Carrier Corporation or, alternatively, he or she has Repair of outdoor unit...
-
Page 4: Precautions For Safety
– 3 – ■ Warning indications on the air conditioner unit Precautions for safety Warning indication Description The manufacturer shall not assume any liability for the damage caused by not observing the description of this manual. WARNING WARNING WARNING ELECTRICAL SHOCK HAZARD Disconnect all remote ELECTRICAL SHOCK HAZARD electric power supplies... - Page 5 • Place a “Work in progress” sign near the circuit breaker while the • Before working at heights, put a sign in place so that no-one will installation, maintenance, repair or removal work is being carried approach the work location, before proceeding with the work. out.
- Page 6 – 5 – • Install the indoor unit at least 2.5 m above the fl oor level since Refrigerant piping otherwise the users may injure themselves or receive electric • Install the refrigerant pipe securely during the installation shocks if they poke their fi ngers or other objects into the indoor work before operating the air conditioner.
- Page 7 • To connect the electrical wires, repair the electrical parts or Test run undertake other electrical jobs, wear gloves to provide protection • Before operating the air conditioner after having completed the for electricians, insulating shoes and clothing to provide work, check that the electrical control box cover of the indoor protection from electric shocks.
- Page 8 – 7 – Explanations given to user CAUTION • Upon completion of the installation work, tell the user where the New refrigerant air conditioner installation circuit breaker is located. If the user does not know where the • This air conditioner adopts the new HFC refrigerant (R410A) circuit breaker is, he or she will not be able to turn it off in the which does not destroy ozone layer.
-
Page 9: Accessory Parts
Accessory parts Selection of installation place Avoid installing in the following places. Part name Q’ty Shape Usage Select a location for the indoor unit where the cool or warm air will circulate evenly. (Hand over to customers) Avoid installation in the following kinds of locations. Installation Manual This manual (For other languages that do not appear in this Installation... -
Page 10: Installation
– 9 – ■ Installation space (Unit: mm) Installation Reserve suffi cient space required for installation or service work. CAUTION Strictly comply with the following rules to prevent damage of the indoor units and human injury. 250 or more 250 or more •... - Page 11 ■ ■ Installation of hanging bolt Before installation Installation of hanging bolt CAUTION Use M10 hanging bolts (4 pcs, locally procured). • Consider the piping / wiring after the unit is hung to Removal of air intake grille Matching to the existing structure, set pitch according determine the location of the indoor unit installation 1) Remove the screws of air intake grille fi...
- Page 12 – 11 – ■ ■ Draw-out direction of pipe / <In case of taking pipe from upper side> Installation of indoor unit ◆ Holding down of main unit Taking pipe from upper side is applied only to the wire refrigerant pipe. <Hanging the indoor unit directly from the ◆...
-
Page 13: Drain Piping
◆ Attaching the hanging bracket Attach the indoor unit onto the hanging Drain piping fi rst bracket and fasten it tight with the bolts and screws. bracket Remove the screws fastening hanging CAUTION onto the indoor unit. Following the Installation Manual, perform the drain piping work so that water is properly drained. Apply a heat insulation so as not to cause a dew condensation. - Page 14 – 13 – ■ ■ Connection of drain hose Heat insulating process • Insert the attached drain hose into the drain pipe connecting port on the drain pan up to the end. • Using the attached drain hose heat insulator, lap the connecting section and the drain hose without clearance, •...
-
Page 15: Refrigerant Piping
■ * In case of fl aring for R410A with the conventional Evacuation Refrigerant piping ■ Connecting refrigerant piping fl are tool, pull it out approx. 0.5 mm more than that for R22 to adjust to the specifi ed fl are size. The Perform vacuuming from the charge port of valve of copper pipe gauge is useful for adjusting projection the outdoor unit by using a vacuum pump. -
Page 16: Electrical Connection
– 15 – Heat insulation process Electrical connection Apply heat insulation for the pipes separately at liquid side and gas side. • For the heat insulation to the pipes at gas side, use CAUTION the material with heat-resisting temperature 120 °C or higher. - Page 17 ▼Power supply ◆ Wire connection 220-240 V ~, 50 Hz REQUIREMENT Power supply 220 V ~, 60 Hz • Connect the wires matching the terminal numbers. Incorrect connection causes a trouble. Power supply switch / circuit breaker or power supply wiring / fuse rating for indoor units should be selected by •...
-
Page 18: Applicable Controls
– 17 – ■ Remote controller wiring Applicable controls Strip off approx. 9 mm the wire to be connected. ■ Basic procedure for changing Wiring diagram REQUIREMENT settings When the air conditioner is used for the fi rst time, it will Terminal block for take some moments after the power has been turned remote controller... - Page 19 ■ ■ ■ Installing indoor unit on high Filter sign setting Group control Each time button is pushed, indoor ceiling unit numbers in the control group change According to the installation condition, the fi lter sign In a group control, a remote controller can control up to cyclically.
-
Page 20: Test Run
– 19 – Test run Wireless remote controller Checking remote transmission 1. Push the ON/OFF button on the remote controller to ■ Before test run Wired remote controller NOTE determine that it works properly. • Pushing the TEMPORARY button once (for about •... -
Page 21: Maintenance
▼Periodic Maintenance Maintenance • For environmental conservation, it is strongly recommended that the indoor and outdoor units of the air conditioner in use be cleaned and maintained regularly to ensure effi cient operation of the air conditioner. When the air conditioner is operated for a long time, periodic maintenance (once a year) is recommended. Furthermore, <Daily maintenance>... -
Page 22: Troubleshooting
– 21 – Troubleshooting ■ ■ Confi rmation and check Confi rmation of error log When an error occurred in the air conditioner, an error When an error occurred on the air conditioner, the code and indoor UNIT No. appear on the display part error log can be confi... - Page 23 Check method On the wired remote controller, central control remote controller and the interface P.C. board of the outdoor unit (I/F), a check display LCD (Remote controller) or 7-segment display (on the outdoor interface P.C. board) to display the operation is provided.
- Page 24 – 23 – Check code Wireless remote controller Outdoor unit 7-segment display Sensor block display of receiving unit Check code name Judging device Wired remote controller display Auxiliary code Operation Timer Ready Flash ─ ─ Indoor unit TCJ sensor error Indoor unit ─...
- Page 25 Check code Wireless remote controller Outdoor unit 7-segment display Sensor block display of receiving unit Check code name Judging device Wired remote controller display Auxiliary code Operation Timer Ready Flash ─ Outdoor unit line address duplicated ─ ─ Duplicated indoor units with priority (Displayed in indoor unit with priority) No.
- Page 26 – 25 – Check code Wireless remote controller Outdoor unit 7-segment display Sensor block display of receiving unit Check code name Judging device Wired remote controller display Auxiliary code Operation Timer Ready Flash 01:Comp. 1 side 02:Comp. 2 side Comp. position detective circuit system error IPDU 03:Comp.
-
Page 27: Specifi Cations
MMC-AP0488HP Series MMC-AP0568HP Series Generic Denomination: Air Conditioner * Under 70 dBA Model / type: MMC-AP0158HP Series, MMC-AP0188HP Series, MMC-AP0248HP Series, MMC-AP0278HP Series, MMC-AP0368HP Series, MMC-AP0488HP Series, MMC-AP0568HP Series Commercial name: Super Modular Multi System Air Conditioner Super Heat Recovery Multi System Air Conditioner Mini-Super Modular Multi System Air Conditioner (MiNi-SMMS series) Complies with the provisions of the “Machinery”... - Page 28 – 27 – Warnings on Refrigerant Leakage Important 2) When there is an effective opening with the adjacent room for ventilation of leaking refrigerant gas (opening without a door, or an opening 0.15 % or larger than the respective fl oor spaces at the top or bottom of the door). Check of Concentration Limit The room in which the air conditioner is to be installed requires a design that in the event of refrigerant gas Outdoor unit...
- Page 29 144 / 9 Moo 5, Bangkadi Industrial Park, Tivanon Road, Tambol Bangkadi, Amphur Muang, Pathumthani 12000, Thailand 1114654499-1...
Need help?
Do you have a question about the MMC-AP0158HP Series and is the answer not in the manual?
Questions and answers