Table of Contents
Advertisement
Quick Links
Advertisement
Chapters
Table of Contents

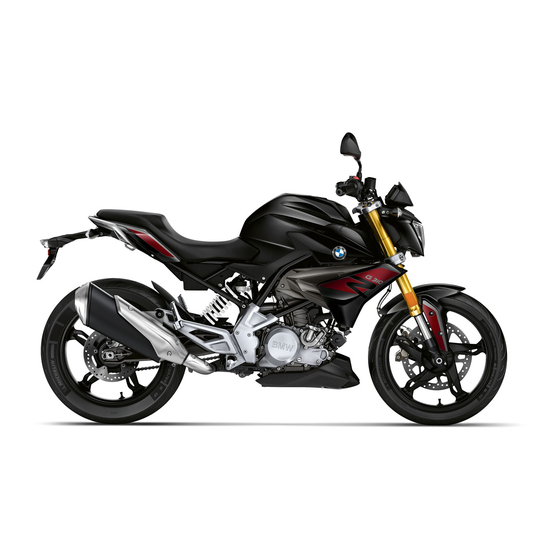
Related Manuals for BMW Motorrad G 310 R


Summary of Contents for BMW Motorrad G 310 R
- Page 1 MOTORRAD RIDER'S MANUAL (US MODEL) G 310 R MAKE LIFE A RIDE...
- Page 2 Motorcycle Data Model Vehicle identification number Color number Initial registration License plate Retailer Data Contact in Service Ms./Mr. Phone number Retailer's address/phone number (company stamp)
- Page 3 WELCOME TO We are pleased that you have chosen a BMW Motorrad vehicle and welcome you to the family of BMW drivers. Familiarize your- self with your new vehicle so that you can ride safely and confi- dently in all traffic situations.
- Page 4 GENERAL INSTRUC- OPERATION TIONS Ignition Lights Quick & easy reference Turn indicators Abbreviations and sym- Multifunction display bols Time and date Equipment Resetting the trip dis- Technical data tance Timeliness of the status Resetting average val- of this manual Additional sources of Seat information Certificates and operat-...
- Page 5 TECHNOLOGY IN CARE DETAIL Care products Washing the vehicle General instructions Cleaning sensitive Anti-lock brake system motorcycle parts Paint care MAINTENANCE Protective wax coat- General notes Storing the motorcy- Onboard vehicle tool Putting the motorcy- Front-wheel stand cle into operation Rear-wheel stand Engine oil Brake system...
- Page 6 SERVICE Reporting safety de- fects BMW Motorrad Service BMW Motorrad Elec- tronic service history (eSH) BMW Motorrad Mo- bility Services Maintenance work Maintenance sched- Maintenance confir- mations Service confirmations INDEX...
- Page 8 GENERAL INSTRUCTIONS...
-
Page 9: Table Of Contents
QUICK & EASY REFERENCE ABBREVIATIONS AND SYMBOLS EQUIPMENT TECHNICAL DATA TIMELINESS OF THE STATUS OF THIS MANUAL ADDITIONAL SOURCES OF INFORMATION CERTIFICATES AND OPERATING PERMITS DATA MEMORY... -
Page 10: Quick & Easy Reference
GENERAL INSTRUCTIONS ATTENTION Special in- QUICK & EASY REFERENCE structions and precaution- Chapter 2 of these operating ary measures. Non-compliance instructions will provide you can cause damage to the vehi- with an initial overview of your cle or accessories and warranty motorcycle. -
Page 11: Equipment
(OE) tion documents or requested offered by BMW and selected from your BMW Motorrad re- optional accessories (OA). This tailer or other qualified service explains why the manual may partner or specialist workshop. -
Page 12: Timeliness Of The Status Of This Manual
INFORMATION driver assistance systems. Con- BMW Motorrad retailer trol units also make comfort Your BMW Motorrad retailer is and infotainment functions pos- always happy to answer any of sible. your questions. Information about the stored... - Page 13 The vehicle owner can have sonal data. a BMW Motorrad retailer or Vehicle users have the right to other qualified service partner obtain comprehensive informa- or specialist workshop read out...
- Page 14 GENERAL INSTRUCTIONS dition, component load, events Legal requirements for the or faults stored temporarily or disclosure of data permanently. The vehicle manufacture is re- This information generally doc- quired by the law applicable in uments the condition of a com- this context to provide authori- ponent, module, system or the ties with the data stored by the...
- Page 15 Data input and data transfer tification number. in the vehicle The information can be read General information out by a BMW Motorrad re- Depending on the equipment, tailer or other qualified service comfort settings and individual- partner or specialist workshop.
- Page 16 GENERAL INSTRUCTIONS saved in the vehicle, it can be system of the mobile end de- deleted at any time. vice. This data is transmitted to third Services parties only upon personal re- General information quest as part of the use of on- If the vehicle has a mobile line services.
- Page 17 tems which are intended for this purpose. Any collection, processing and use of personal data that goes beyond the provision of ser- vices take place only as per- mitted by law, on the basis of a contractual agreement or as a result of consent.
- Page 18 OVERVIEWS...
- Page 19 GENERAL VIEW, LEFT SIDE GENERAL VIEW, RIGHT SIDE UNDERNEATH THE SEAT MULTIFUNCTION SWITCH, LEFT MULTIFUNCTION SWITCH, RIGHT INSTRUMENT CLUSTER...
-
Page 20: General View, Left Side
OVERVIEWS GENERAL VIEW, LEFT SIDE with additional onboard socket Power socket ( 105) Adjusting ring for spring preload ( Seat lock ( Chain adjustment values Engine oil indicator Type plate Tire pressure table... -
Page 21: General View, Right Side
GENERAL VIEW, RIGHT SIDE Fuel filler opening ( Brake fluid reservoir for front wheel brake ( Vehicle identification num- Coolant expansion tank Oil filler opening ( Brake fluid reservoir for rear wheel brake ( Grab handle (... -
Page 22: Underneath The Seat
OVERVIEWS UNDERNEATH THE SEAT Battery ( Diagnostic socket 100) Fuses ( Operating instructions Onboard vehicle tool kit Gripping clamp... -
Page 23: Multifunction Switch, Left
MULTIFUNCTION SWITCH, LEFT Headlight flasher ( Light rocker switch Turn indicators ( Horn... -
Page 24: Multifunction Switch, Right
OVERVIEWS MULTIFUNCTION SWITCH, RIGHT Emergency-off switch Starter button (... -
Page 25: Instrument Cluster
INSTRUMENT CLUSTER Button ( Indicator lights ( Multifunction display Warning lights ( Photodiode for brightness control in the multifunction display Engine speed warner... - Page 26 DISPLAYS...
- Page 27 WARNING AND INDICATOR LIGHTS MULTIFUNCTION DISPLAY INDICATOR LIGHTS SERVICE DISPLAY FUEL RESERVE TACHOMETER...
-
Page 28: Warning And Indicator Lights
DISPLAYS WARNING AND INDICATOR LIGHTS Neutral indicator light High beam indicator light Turn signal indicator light Low-fuel warning light Warning light for vehicle voltage ( General warning light ABS warning light (... -
Page 29: Multifunction Display
MULTIFUNCTION DISPLAY On-board computer Indication range for values Service display ( Clock ( Warning symbols ( Gear indicator, "N" is shown at idle Speed Rotational speed (RPM) Fuel level (... -
Page 30: Indicator Lights
DISPLAYS INDICATOR LIGHTS Layout Warnings are displayed by means of the corresponding warning lights. If several warnings are present, all corresponding warning lights and warning symbols are displayed. You will find an overview of the potential warnings on the following pages. Warnings that do not have their own warning light are shown as a warning symbol 1 in the... - Page 31 Overview of warning indicators Indicator and Display text Meaning warning lights lights up. Vehicle voltage is too low ( is displayed. flashes red. Coolant temper- ature too high lights up is displayed. Engine in emer- yellow. gency-operation mode ( lights up Engine warning flashes.
- Page 32 Accident hazard at an authorized service facil- Do not continue riding. ity, preferably an authorized Possible cause: BMW Motorrad Retailer. Battery is faulty. Possible cause: Have the malfunction cor- The coolant circuit is faulty. rected as soon as possible...
- Page 33 The engine control unit has di- eliminated at a specialist agnosed a fault which impairs workshop, preferably an au- the engine performance or thorized BMW Motorrad re- throttle response. The engine tailer. is running in the emergency- Possible cause: operation mode. In exceptional...
- Page 34 DISPLAYS Possible cause: ity, preferably an authorized BMW Motorrad Retailer. ABS self-diagnosis rou- tine not completed Fuel down to reserve lights up. The ABS function is not avail- able, as the self-diagnosis function has not been com- WARNING pleted. (The motorcycle must...
-
Page 35: Service Display
Have your motorcycle ser- viced regularly by a specialist workshop, preferably an au- thorized BMW Motorrad re- tailer. The motorcycle remains op- erationally safe and is suitably road-safe. If servicing is due in less than... -
Page 36: Fuel Reserve
DISPLAYS Continuous SERVICE When the motorcycle is inscription propped on its side stand, the slight angle of inclination means that the sensor cannot register the fuel quantity correctly. For this reason, the range is only recalculated when the side stand is folded The travel range automatically appears in the multifunction If the service appointment date... - Page 38 OPERATION...
- Page 39 IGNITION LIGHTS TURN INDICATORS MULTIFUNCTION DISPLAY TIME AND DATE RESETTING THE TRIP DISTANCE RESETTING AVERAGE VALUES SEAT...
-
Page 40: Ignition
OPERATION IGNITION Vehicle keys You are provided with 2 vehicle keys. A single key fits the steering and ignition lock, the fuel filler cap and the seat lock. Locking the steering lock Push the ignition key 1 into the steering lock and turn to ATTENTION the LOCK position while mov- Handlebars turned in wrong... -
Page 41: Lights
Pre-Ride-Check is carried out. Emergency off or operation mode ABS self-diagnosis is per- formed ( WARNING Switching off ignition Operation of the emergency ON/OFF switch when riding Danger of falling due to blocking of rear wheel Do not operate the emer- gency ON/OFF switch when riding. -
Page 42: Turn Indicators
OPERATION tion switched on longer than Operating headlight flasher absolutely necessary. The low beams come on auto- matically under the following conditions: If the engine was started. If the vehicle is pushed while the ignition is on. With the engine switched off, you can switch on the Press button 1. - Page 43 Indicator light of turn indi- cator flashes. Move switch 1 to center posi- tion to switch off turn indica- tors.
-
Page 44: Multifunction Display
OPERATION MULTIFUNCTION DISPLAY Selecting the display Requirement Current fuel consumption: The vehicle is at a standstill. CONSA Average speed: SPEED Turn on the ignition. Date: DATE The on-board computer is Settings: SETUP displayed. Repeatedly short-press but- ton 1 until desired value is displayed. -
Page 45: Time And Date
TIME AND DATE Setting the clock Selecting the display ( 38). 2 is displayed. SETUP Briefly press button 1 to in- crement the month 7. When the month has been set as desired, press and hold button 1. Day 6 flashes. Press and hold button 1. -
Page 46: Resetting Average Values
OPERATION SEAT Removing the seat Park the motorcycle, making sure that the ground is firm and level. Press and hold button 1 until value 3 has been reset. RESETTING AVERAGE VAL- Selecting the display ( 38). The average value to be re- Push down on rear part of set 2 has been selected. - Page 47 Installing seat Insert seat 1 with the mount 3 centered into the battery tray 4. Put on detent pin 2 and press into the lock.
- Page 48 SETTING...
- Page 49 MIRRORS ADJUST THE SPRING PRELOAD BRAKE CLUTCH...
-
Page 50: Mirrors
SETTING MIRRORS Right mirror (lock nut) to adapter Adjusting mirrors 16 lb/ft (22 Nm) (Left-hand thread) Left mirror (lock nut) to adapter 16 lb/ft (22 Nm) Slide protective cap 1 over screw connection. Move mirrors into desired po- ADJUST THE sition by rotating them. -
Page 51: Spring Preload
The spring preload must be checked by a specialized work- adjusted to the weight of the shop, preferably by an autho- rider, passenger and load. rized BMW Motorrad retailer. Higher weight requires a higher Headlight beam throw adjust spring preload, lower weight Requirement requires a lower spring preload. -
Page 52: Brake
SETTING Basic setting of spring preload, rear Stage 1 (One-up without load) Stage 5 (One-up with load) Stage 10 (Two-up and load) BRAKE Turn the adjustment screw 1 Adjusting the brake lever into the desired position by applying gentle pressure from WARNING the rear. - Page 53 Turn the adjustment screw 1 into the desired position by applying gentle pressure from the rear. The adjusting screw is easier to turn when the clutch lever is pressed forward. Adjustment options: From position 1: smallest dis- tance between handlebar grip and clutch lever To position 4: largest dis- tance between handlebar grip...
- Page 54 RIDING...
- Page 55 SAFETY INSTRUCTIONS REGULAR CHECK STARTING BREAKING IN ENGINE SPEED WARNER BRAKES PARKING YOUR MOTORCYCLE REFUELING SECURING MOTORCYCLE FOR TRANSPORTATION...
-
Page 56: Safety Instructions
This applies even to short Payload of Topcase journeys, and to every season of the year. Your authorized BMW Motorrad retailer will be max 7 lbs (max 3 kg) happy to advise you and has Make sure that weight is uni-... - Page 57 Speed If you ride at high speed, al- WARNING ways bear in mind that various Harmful exhaust gas boundary conditions can ad- Danger of suffocation versely affect the handling of Do not inhale exhaust your motorcycle: fumes. Wrong spring system setting Do not run the engine in Unevenly distributed load closed rooms.
-
Page 58: Regular Check
RIDING Catalytic converter Danger of overheating If misfiring causes unburned fuel to enter the catalytic con- ATTENTION verter, there is a danger of Engine idling for a lengthy overheating and damage. period while at a standstill For this reason, observe the Overheating due to insuf- following points: ficient cooling;... -
Page 59: Starting
Check clutch function ( 80). Idle mode appears on the Check tire tread depth display. 83). Alternative: If a gear is en- Checking tyre pressure gaged, pull the clutch. 82). You cannot start the mo- Check that the luggage is se- torcycle with the side cure. - Page 60 ABS self-diagnosis lights up. The self-diagnosis routine is determining whether The last active display is shown BMW Motorrad ABS is ready on the screen 4. for operation. The self- The indicator lights 5 light up. diagnosis routine launches automatically when you switch...
-
Page 61: Breaking In
Phase 1 an authorized specialist work- shop, preferably an authorized Check on system compo- BMW Motorrad retailer. nents monitored by diagnostic system while motorcycle is BREAKING IN parked. flashes. Engine In the period preceding the running-in check (initial in- Phase 2... -
Page 62: Engine Speed Warner
RIDING Brake pads ENGINE SPEED WARNER New brake pads have to bed- Requirement ded in before they can achieve The vehicle is not yet in 6th their optimum frictional force. gear and the maximum acceler- This initial reduction in braking ation is to be reached. -
Page 63: Brakes
Locking up of the front wheel sult in a decrease in the brak- is prevented by BMW Motorrad ing action. ABS. Delayed or poorer braking ac- With the frequently instructed tion must be expected in the "emergency braking,"... -
Page 64: Parking Your Motorcycle
RIDING After working on the brakes due to oil or grease residues. ATTENTION When driving on soiled roads Loading of the side stand or off-road with additional weight Component damage cause by WARNING tipping over Do not sit on the motorcy- Poorer braking action due to cle when it is parked on the moisture and dirt... - Page 65 Do not overfill the fuel tank. els or during longer periods of downtime. Your authorized ATTENTION BMW Motorrad retailer can provide you with more detailed Contact of fuel and plastic information. surfaces Damage to surfaces (become...
-
Page 66: Securing Motorcycle For Transportation
RIDING fill level is detected and the fuel reserve indicator light is switched off. The "usable fuel quantity" specified in the technical data is the fuel quantity, which can be refueled if the fuel tank was completely emptied, i.e., if the engine dies off due to lack Open the protective cap 2. - Page 67 ATTENTION ATTENTION Motorcycle tips to the side Pinching of components Component damage when raising Do not pinch components, Component damage cause by e.g. brake lines or wiring tipping over Secure the motorcycle harnesses. against tipping to the Lay tensioning straps at front side, preferably with the over lower fork bridge on assistance of a second...
- Page 68 RIDING The vehicle is pulled down against its springs with the suspension compressed strongly.
- Page 70 TECHNOLOGY IN DETAIL...
- Page 71 GENERAL INSTRUCTIONS ANTI-LOCK BRAKE SYSTEM...
- Page 72 TECHNOLOGY IN DETAIL What happens when rough GENERAL INSTRUCTIONS roads are encountered? You'll find more information on Bumpy or rough roads can the subject of technology at: briefly lead to a loss of contact bmw-motorrad.com/technik between the tires and the road surface, until the transferable ANTI-LOCK BRAKE SYSTEM braking force is reduced to...
- Page 73 Apart from problems on the BMW Motorrad ABS? BMW Motorrad ABS, unusual The BMW Motorrad ABS en- riding conditions can also sures riding stability on any sur- cause a fault message to be face within the limits of riding generated.
- Page 74 How important is regular maintenance? WARNING Brake system not regularly serviced Accident hazard To ensure that the BMW Motorrad ABS is in a properly maintained condition, it is vital that the specified service intervals are kept to. Reserves for safety The potentially shorter...
- Page 76 MAINTENANCE...
- Page 77 GENERAL NOTES ONBOARD VEHICLE TOOL KIT FRONT-WHEEL STAND REAR-WHEEL STAND ENGINE OIL BRAKE SYSTEM CLUTCH COOLANT TIRES RIMS WHEELS CHAIN LIGHT SOURCE JUMP-STARTING BATTERY FUSES DIAGNOSTIC SOCKET...
-
Page 78: General Notes
91). maintenance and repair Open-ended wrench tasks can be obtained on Wrench size: 10/16 mm DVD through your authorized Adjusting mirror arm BMW Motorrad retailer. 44). Removing the battery Special tools and thorough 97). specialized knowledge are Hook wrench required to carry out some of Adjusting the spring the work. -
Page 79: Front-Wheel Stand
For a description of the cor- rect installation, please re- fer to the instructions for the ATTENTION front-wheel stand. Use of BMW Motorrad front BMW Motorrad offers a suit- wheel stand without addi- able auxiliary stand for each tional center or auxiliary motorcycle. -
Page 80: Engine Oil
MAINTENANCE fer to the instructions for the rear-wheel stand. BMW Motorrad offers a suit- able auxiliary stand for each motorcycle. Your authorized BMW Motorrad retailer will be very happy to assist you in choosing the suitable auxiliary stand. ENGINE OIL... - Page 81 Have oil level corrected at a specialist workshop, Use of too little or too much preferably an authorized engine oil BMW Motorrad retailer. Engine damage BMW Motorrad recom- Always make sure that the mends occasionally check- oil level is correct.
-
Page 82: Brake System
Have all work on the brake system carried out by ex- perts. Have the brakes checked at an authorized workshop, preferably an authorized BMW Motorrad retailer. Check the wear marks 2. Checking the front brake pad Front brake-pad wear thickness limit Park motorcycle. - Page 83 BMW Motorrad retailer. BMW Motorrad recommends you only install genuine brake pads from BMW Motorrad. Inspect the chamfer 2. Checking rear brake pad thickness Park motorcycle. Ensure that the ground is firm and level.
- Page 84 In order to ensure the oper- ating reliability of the brake system, make sure that the brake pads are not worn be- yond their minimum thick- ness. Have brake pads renewed at a specialist workshop, preferably an authorized BMW Motorrad retailer.
- Page 85 If the brake fluid level falls be- low the approved level: Have the defect rectified as quickly as possible by a spe- cialist workshop, preferably an authorized BMW Motorrad re- tailer. Checking the rear brake fluid level Align handlebars so that the...
-
Page 86: Clutch
MAINTENANCE authorized BMW Motorrad re- tailer. CLUTCH Check clutch function Pull back the clutch lever. The clutch must fully disen- gage. Signs that the clutch is fully disengaged: Read out the brake fluid level Easy to change gear Easy to switch to idling at the brake fluid reservoir 1. -
Page 87: Coolant
Lock the adjusting sleeve 3 Clutch lever play using the knurled nut 2. Checking clutch lever play 0.04...0.08 in (1...2 mm) (at 80). the handlebar lever, handle- Repeat these steps until the bars are in straight-ahead po- clutch lever play is correctly sition, engine is cold) adjusted. -
Page 88: Tires
MAINTENANCE Coolant top-up quantity Antifreeze and anti-corrosion agent 150 ml (Difference between the MIN and MAX markings) Checking coolant level 81). When the coolant meets the Coolant, specified level specified level: Close the cap of the coolant Between MIN and MAX expansion tank. -
Page 89: Rims
Risk of accident due to by a specialist service facil- poorer rideability ity, preferably an authorized If necessary, replace the BMW Motorrad retailer. tyres before the legally spec- ified minimum tread depth is reached. Park motorcycle, ensuring that support surface is firm and... -
Page 90: Wheels
Removing the front wheel Place the motorcycle on an auxiliary stand. BMW Motorrad recommends Loosen clamping bolts 1. you use the BMW Motorrad rear-wheel stand. - Page 91 Place front wheel down and roll it forward out of the front suspension. When doing so, make sure that the wheel speed sensor is not damaged. Remove screw 3. Loosen clamping bolts 2. Slightly press the quick-re- lease axle inward for a better grip on the right side.
- Page 92 Always have the tightening torques checked by a ATTENTION specialized workshop, preferably an authorized Improper installation of the BMW Motorrad retailer. front wheel Damage to the wheel speed sensor When rolling in the front wheel, pay attention to the wheel speed sensor.
- Page 93 lease axle on the right side at Lubricant the same time. Screw in front wheel Optimoly TA quick-release axle 37 lb/ft (50 Nm) WARNING Tighten the clamping bolts 2 Improper installation of to the appropriate torque. quick-release axle Loosening of the front wheel After the brake caliper is fastened and the spring fork is relaxed, tighten the...
- Page 94 MAINTENANCE Removing the rear wheel Raise motorcycle, preferably with a BMW Motorrad rear- wheel stand. Mounting the rear-wheel stand ( 73). Support the rear wheel, e.g. with a wooden block, so that it cannot fall down after the quick-release axle is removed.
- Page 95 Loosen the lock nuts 3 on the left and right. Screw in the adjusting screws 4 on the left and right. Remove the chain tensioner 5 and push the quick-release axle to the right as far as it will go. Make sure that the wheel speed sensor 10 is not dam- aged when rolling out the rear...
- Page 96 10 is not damaged specialized workshop, when rolling in rear wheel. preferably an authorized BMW Motorrad retailer. Roll the rear wheel on the support into the swinging arm until the brake caliper carrier can be installed.
-
Page 97: Chain
Roll the rear wheel as far for- Insert chain tensioner, left 5. Install the nut 6 with washer, ward as possible and lay the but do not tighten yet. chain 9 on the chain sprocket. Adjusting chain tension 91). CHAIN Adjusting chain tension Park motorcycle. - Page 98 MAINTENANCE Ensure that the notch on top of the chain tensioner 5 is adjusted to the same scale value on the right and left. Tighten the lock nuts 3 on the left and right to the specified torque. Locknut of drive-chain tensioning screw Using a screwdriver, push 14 lb/ft (19 Nm)
- Page 99 To extend and maximize the chain's service life Permissible chain length BMW Motorrad recommends using BMW Motorrad chain max 5.7 in (max 144.30 mm) lubricant or: (measured over the center Lubricant of 10 rivets, chain under ten-...
-
Page 100: Light Source
MAINTENANCE authorized BMW Motorrad re- Rivet heads should be parallel tailer. to the centerline of the chain 2. Riveting is OK. If one or more rivet heads has CAUTION rotated: Contact a specialist work- JUMP-STARTING shop, preferably an authorized Touching live parts of the BMW Motorrad retailer. -
Page 101: Battery
der to protect starter motor and donor battery. ATTENTION Allow both engines to idle for Jump-starting with a voltage a few minutes before discon- higher than 12 V necting the jump cables. Damage to the motorcycle's Disconnect the jump cable electronics from the negative terminal The battery of the donor... - Page 102 4 weeks, connect terminals. a trickle-charger to the Disconnecting battery from battery. motorcycle ( 97). BMW Motorrad has de- Charging a disconnected veloped a trickle-charger battery specially designed for com- Disconnecting battery from patibility with the electronics motorcycle ( 97).
- Page 103 Disconnecting battery from Connecting battery to vehicle motorcycle Park the motorcycle, making sure that the ground is firm and level. Removing the seat ( 40). First, install the positive bat- tery cable 2 and cover with the protective cap 3. Then install the negative bat- tery cable 1.
- Page 104 MAINTENANCE minal on right in direction of travel. Attach the right side of the holder to the battery tray 2. Fold the holder 1 down and attach on the left. The wiring harness 3 is now back in its initial position. Unhook and lift up the holder 1 on the left.
-
Page 105: Fuses
If the fuses blow FUSES frequently, have the Replacing fuses electrical system checked by an authorized specialized ATTENTION workshop, preferably an authorized BMW Motorrad Bypassing defective fuses retailer. Risk of short circuit and fire Do not bypass defective Installing seat ( 41). fuses. -
Page 106: Diagnostic Socket
MAINTENANCE DIAGNOSTIC SOCKET Fuse 4 Loosening the diagnostic socket 20 A (ABS pressure modula- tor) CAUTION Fuse 5 Incorrect procedure followed when disconnecting the data 15 A (Lighting, horn) link connector for the On- Fuse 6 Board Diagnostics. Motorcycle experiences mal- functions 7.5 A (Instrument cluster, di- Only have the data link con-... - Page 107 Loosen the diagnostic socket 2 from the bracket 3. The interface for the diagno- sis and information system can be connected to the diag- nostic socket 2. Fastening the diagnostic socket Disconnect the interface for the diagnosis and information system. Insert the diagnostic socket 2 into the bracket 3.
- Page 108 ACCESSORIES...
- Page 109 GENERAL NOTES HEATED GRIPS POWER SOCKET TOPCASE TOPCASE LIGHT...
-
Page 110: General Notes
Safety risk country. BMW Motorrad cannot ex- Your BMW Motorrad retailer amine or test each product offers you expert advice when of outside origin to ensure choosing genuine BMW parts, that it can be used on or accessories and other products. -
Page 111: Power Socket
should switch back to the first Cable routing stage. The cables from the onboard sockets to the auxiliary de- vices must be routed in such a way that they do not im- pede the rider. Cable routing must not re- strict the steering angle and the handling characteristics. - Page 112 ACCESSORIES Hook topcase into luggage Turn the key in the topcase rack 4. Make sure that lock to position 1. hooks 2 are securely seated in corresponding mounts 3. Press the carrying handle 1 down until it engages. Press the lock cylinder 1 for- ward.
- Page 113 Removing the topcase with luggage rack with topcase Pull release lever 1 all the way Close topcase lid and hold it down. Ensure that no objects Turn the key in the topcase are trapped between cover lock to position 1. and case.
-
Page 114: Topcase Light
ACCESSORIES Maximum payload and maximum speed with luggage rack with topcase Observe maximum payload and maximum speed. Maximum speed when riding with a loaded topcase Insert the base 5 into the with topcase slot 4. Fit the mount 6 onto the with topcase Light hook 2. - Page 115 topcase nor remove it from the adapter. Removing the topcase Light with luggage rack with topcase Light Turn the key until it is vertical in the lock. Push the release lever 1 in the arrow direction. Open topcase lid 2. Closing topcase Light with luggage rack with topcase Light...
- Page 116 ACCESSORIES Maximum speed when riding with a loaded topcase max 81 mph (max 130 km/h) Payload of Topcase max 7 lbs (max 3 kg)
- Page 118 CARE...
- Page 119 CARE PRODUCTS WASHING THE VEHICLE CLEANING SENSITIVE MOTORCYCLE PARTS PAINT CARE PROTECTIVE WAX COATING STORING THE MOTORCYCLE PUTTING THE MOTORCYCLE INTO OPERATION...
-
Page 120: Care Products
BMW insect re- products available at your au- mover to soften and wash off thorized BMW Motorrad re- insects and stubborn dirt on tailer. BMW Care Products painted parts prior to washing have been materials tested, lab- the motorcycle. -
Page 121: Cleaning Sensitive Motorcycle Parts
Trim panel components to hydraulic brake system, to Clean trim panel components the electrical system and the with water and BMW Motorrad seat cleaning agent. Exercise caution when using Windshield and turn indicator high-pressure or steam-jet glass made of plastic devices. -
Page 122: Paint Care
Use BMW Motorrad metal pol- lution or natural sources of dirt, ish for additional treatment. such as tree resin or pollen. -
Page 123: Protective Wax Coating
Preserve bare metal and ton ball. BMW Motorrad rec- chrome-plated parts with an ommends removing tar stains acid-free grease (petroleum with BMW tar remover. Then jelly). - Page 124 TECHNICAL DATA...
- Page 125 TROUBLESHOOTING CHART SCREW CONNECTIONS FUEL ENGINE OIL ENGINE CLUTCH TRANSMISSION REAR-WHEEL DRIVE FRAME CHASSIS BRAKES WHEELS AND TIRES ELECTRICAL SYSTEM DIMENSIONS WEIGHTS PERFORMANCE DATA ACCESSORIES...
-
Page 126: Troubleshooting Chart
TECHNICAL DATA TROUBLESHOOTING CHART Engine does not start. Possible cause Remedy Side stand extended and gear Fold in side stand. engaged Emergency on/off switch (kill Set emergency off switch to switch) operation mode ( 35). Gear engaged and clutch not Operate the clutch or put the disengaged transmission into idle so that... -
Page 127: Screw Connections
SCREW CONNECTIONS Front wheel Value Valid Screw in front wheel quick-release axle M12 x 20 37 lb/ft (50 Nm) Clamping bolts in axle mount M8 x 30 Tightening sequence: Tighten the screws 6 times, alternating between one and the other each time 14 lb/ft (19 Nm) Rear wheel... -
Page 128: Fuel
JASO MA2, Additives (for instance, molybdenum- based substances) are prohibited, because they would attack the coatings on engine components, BMW Motorrad recommends BMW Motorrad ADVANTEC Ultimate oil. Engine oil, quantity for topping max 0.2 quarts (max 0.18 l), Difference between... -
Page 129: Engine
ENGINE Engine number location Crankcase, lower part, right Engine type A82A03B Engine design Water-cooled, 1-cylinder, four- stroke engine with four valves that are actuated via rocker arms, two overhead camshafts and a counterbalance shaft. Displacement 313 cc (313 cm Cylinder bore 3.1 in (80 mm) Piston stroke 2.4 in (62.1 mm) -
Page 130: Transmission
TECHNICAL DATA TRANSMISSION Transmission design Claw-shifted 6-speed trans- mission integrated in engine housing Transmission gear ratios 3.083, Primary gear ratio 1:3.000, 1st gear 1:2.063, 2nd gear 1:1.588, 3rd gear 1:1.286, 4th gear 1:1.095, 5th gear 1:0.955, 6th gear REAR-WHEEL DRIVE Type of final drive Chain drive Chain sag... -
Page 131: Chassis
0.16 in (min 4 mm), Wear limit WHEELS AND TIRES Recommended tire combina- An overview of the current tions tire approvals is available from your authorized BMW Motorrad retailer or on the Internet at bmwmotorrad.com/service. Speed category of front/rear tires... -
Page 132: Electrical System
TECHNICAL DATA Front wheel Front wheel design Aluminum cast wheel Front-wheel rim size 3.00" x 17" Front tire designation 110/70 R 17 Load index for front tire At least 37 Permissible front-wheel imbal- max 0.2 oz (max 5 g) ance Rear wheel Rear wheel design Aluminum cast wheel... -
Page 133: Dimensions
Battery Battery design AGM (Absorptive Glass Mat) battery Battery voltage 12 V Battery capacity 8 Ah Spark plugs Spark plugs, manufacturer and NGK LMAR8J-9E designation Light source Bulb for low-beam and high- beam headlight Bulb for parking light Bulb for taillight/brake light Light source for license plate light Bulbs for flashing turn indica-... -
Page 134: Weights
TECHNICAL DATA Front-seat height 30.9 in (785 mm), without rider at DIN unladen weight Rider's inside-leg arc, heel to 69.3 in (1760 mm), without heel rider, at DIN unladen weight WEIGHTS Unloaded vehicle weight 362 lbs (164 kg), DIN un- loaded vehicle weight, ready for road, 90% full tank of gas, without OE... - Page 136 SERVICE...
- Page 137 REPORTING SAFETY DEFECTS BMW MOTORRAD SERVICE BMW MOTORRAD ELECTRONIC SERVICE HISTORY (ESH) BMW MOTORRAD MOBILITY SERVICES MAINTENANCE WORK MAINTENANCE SCHEDULE MAINTENANCE CONFIRMATIONS SERVICE CONFIRMATIONS...
-
Page 138: Reporting Safety Defects
However, the NHTSA cannot be- come involved in individual problems between you, your autho- rized BMW Motorrad retailer, or BMW of North America, LLC. You can contact the NHTSA by calling the Vehicle Safety Hot- line on 1–888–327–4236 (Teletypewriter TTY for the hearing impaired: 1–800–424–9153) for free, by visiting the website at... -
Page 139: Bmw Motorrad Service
BMW MOTORRAD SERVICE torcycle. With its worldwide retailer net- Have all maintenance and re- work, BMW Motorrad can at- pair tasks confirmed in the tend to you and your motor- Service chapter in this manual. cycle in over 100 countries Documented proof of sched- around the globe. -
Page 140: Bmw Motorrad Mobility Services
BMW pre-delivery check Service Manual. The BMW pre-delivery check is Objection carried out by your authorized At the BMW Motorrad retailer BMW Motorrad retailer before or specialist workshop, the ve- it turns the motorcycle over to hicle owner can object to the you. - Page 141 The service display in the multi- function display reminds you of the next service date ap- prox. one month or 620 miles (1000 km) before the entered values. More information on the topic of service is available at: bmw-motorrad.com/service The required scope of mainte- nance work for your motorcycle can be found in the following maintenance plan:...
-
Page 142: Maintenance Schedule
SERVICE MAINTENANCE SCHEDULE BMW Running-in check annually or every (including oil change) 6000 miles (10000 km) Standard BMW Service (whichever comes first) Engine oil change with fil- for the first time after one year, then every 2 years Replace air cleaner insert every 24000 miles Replace spark plug (40000 km) or every 4... -
Page 143: Maintenance Confirmations
The repair procedures belonging to the BMW Service standard package are listed below. The actual maintenance work applica- ble for your vehicle may differ. Performing the vehicle test using the BMW Motorrad diagnostic system Checking coolant level Checking/adjusting clutch play... - Page 144 SERVICE BMW pre-delivery check BMW Running-in Check performed performed Odometer reading Next service latest or, if reached earlier Odometer reading Stamp, signature Stamp, signature...
- Page 145 BMW Service performed Odometer reading Next service latest or, if reached earlier Odometer reading Work performed Yes No BMW Service Engine oil change with filter Checking valve clearance Replacing air cleaner element Oil change - telescopic fork Replacing all spark plugs Replacing fuel filters and fuel hoses (at main- tenance) Replace the hose from intake silencer to...
- Page 146 SERVICE BMW Service performed Odometer reading Next service latest or, if reached earlier Odometer reading Work performed Yes No BMW Service Engine oil change with filter Checking valve clearance Replacing air cleaner element Oil change - telescopic fork Replacing all spark plugs Replacing fuel filters and fuel hoses (at main- tenance) Replace the hose from intake silencer to...
- Page 147 BMW Service performed Odometer reading Next service latest or, if reached earlier Odometer reading Work performed Yes No BMW Service Engine oil change with filter Checking valve clearance Replacing air cleaner element Oil change - telescopic fork Replacing all spark plugs Replacing fuel filters and fuel hoses (at main- tenance) Replace the hose from intake silencer to...
- Page 148 SERVICE BMW Service performed Odometer reading Next service latest or, if reached earlier Odometer reading Work performed Yes No BMW Service Engine oil change with filter Checking valve clearance Replacing air cleaner element Oil change - telescopic fork Replacing all spark plugs Replacing fuel filters and fuel hoses (at main- tenance) Replace the hose from intake silencer to...
- Page 149 BMW Service performed Odometer reading Next service latest or, if reached earlier Odometer reading Work performed Yes No BMW Service Engine oil change with filter Checking valve clearance Replacing air cleaner element Oil change - telescopic fork Replacing all spark plugs Replacing fuel filters and fuel hoses (at main- tenance) Replace the hose from intake silencer to...
- Page 150 SERVICE BMW Service performed Odometer reading Next service latest or, if reached earlier Odometer reading Work performed Yes No BMW Service Engine oil change with filter Checking valve clearance Replacing air cleaner element Oil change - telescopic fork Replacing all spark plugs Replacing fuel filters and fuel hoses (at main- tenance) Replace the hose from intake silencer to...
- Page 151 BMW Service performed Odometer reading Next service latest or, if reached earlier Odometer reading Work performed Yes No BMW Service Engine oil change with filter Checking valve clearance Replacing air cleaner element Oil change - telescopic fork Replacing all spark plugs Replacing fuel filters and fuel hoses (at main- tenance) Replace the hose from intake silencer to...
- Page 152 SERVICE BMW Service performed Odometer reading Next service latest or, if reached earlier Odometer reading Work performed Yes No BMW Service Engine oil change with filter Checking valve clearance Replacing air cleaner element Oil change - telescopic fork Replacing all spark plugs Replacing fuel filters and fuel hoses (at main- tenance) Replace the hose from intake silencer to...
- Page 153 BMW Service performed Odometer reading Next service latest or, if reached earlier Odometer reading Work performed Yes No BMW Service Engine oil change with filter Checking valve clearance Replacing air cleaner element Oil change - telescopic fork Replacing all spark plugs Replacing fuel filters and fuel hoses (at main- tenance) Replace the hose from intake silencer to...
- Page 154 SERVICE BMW Service performed Odometer reading Next service latest or, if reached earlier Odometer reading Work performed Yes No BMW Service Engine oil change with filter Checking valve clearance Replacing air cleaner element Oil change - telescopic fork Replacing all spark plugs Replacing fuel filters and fuel hoses (at main- tenance) Replace the hose from intake silencer to...
- Page 155 BMW Service performed Odometer reading Next service latest or, if reached earlier Odometer reading Work performed Yes No BMW Service Engine oil change with filter Checking valve clearance Replacing air cleaner element Oil change - telescopic fork Replacing all spark plugs Replacing fuel filters and fuel hoses (at main- tenance) Replace the hose from intake silencer to...
- Page 156 SERVICE BMW Service performed Odometer reading Next service latest or, if reached earlier Odometer reading Work performed Yes No BMW Service Engine oil change with filter Checking valve clearance Replacing air cleaner element Oil change - telescopic fork Replacing all spark plugs Replacing fuel filters and fuel hoses (at main- tenance) Replace the hose from intake silencer to...
-
Page 157: Service Confirmations
SERVICE CONFIRMATIONS The table serves to provide evidence of maintenance and repair work, as well as installed optional accessories and special cam- paigns performed. Work performed Odometer Date reading... - Page 158 SERVICE Work performed Odometer Date reading...
- Page 160 INDEX Brake fluid Abbreviations and symbols, 4 Checking the front fluid level, 78 Self-diagnosis, 54 Checking the rear fluid Technology in detail, 66 level, 79 Warning light, 27 Front expansion tank, 15 Accessories Rear expansion tank, 15 General notes, 104 Brake pads Socket, 105 Breaking in, 56...
- Page 161 Clutch Engine Adjusting handlebar lever, 46 In emergency operation, 26 Adjusting play, 81 Parking, 35 Checking operation, 80 Severe fault, 27 Checking play, 80 Starting, 53 Technical data, 123 Technical data, 123 Coolant Engine oil Checking fill level, 81 Checking fill level, 74 Fill level indicator, 15 Oil filler opening, 14 Topping up, 82...
- Page 162 INDEX Headlight Jump-starting, 94 Adjusting for RHD/LHD traffic, 44 Keys, 34 Headlamp range and spring preload, 44 Light sources headlight, 44 Replacing the LED light Headlight beam throw source, 94 adjust, 45 Technical data, 127 Headlight flasher Lights Operation, 36 Adjusting headlight, 44 Headlight range Low beams, 35...
- Page 163 Putting into operation, 117 Rear-wheel drive Storage, 117 Technical data, 124 Multifunction display, 19 Rear-wheel stand Overview, 23 Mounting, 73 Selecting the display, 38 Refueling, 59 Multifunction switch Fuel grade, 58 Overview, left, 17 Rider's Manual (US Model) Overview, right, 18 Position on the vehicle, 16 Notice concerning current Safety information...
- Page 164 INDEX Steering lock Topcase Locking, 34 Operation, 105, 108 Storing, 117 Torques, 121 Transmission Switching off, 58 Technical data, 124 Trip recorder Tachometer Displaying (TRIP1, TRIP2), 38 Tachometer, 30 Troubleshooting chart, 120 Technical data Turn signals Battery, 127 Operating element, 17 Brakes, 125 Operation, 36 Chassis, 125...
- Page 165 80788 Munich, Germany servicing your vehicle. Reprints and duplication of For more information visit: this work, in whole or part, www.P65Warnings.ca.gov/ are prohibited without the passenger-vehicle express written approval of BMW Motorrad, Aftersales. Original Rider's Manual, printed in Germany.
- Page 166 Important data for refueling: Fuel Recommended fuel quality Regular unleaded (max. 15 % ethanol, E15) 87 AKI (91 ROZ/RON) 87 AKI Usable fuel quantity Approx. 2.9 gal (Approx. 11 l) Fuel reserve Approx. 1.1 quarts (Approx. 1 l) Tire inflation pressure Front tire pressure 31.9 psi (2.2 bar), with cold tires;...
Need help?
Do you have a question about the G 310 R and is the answer not in the manual?
Questions and answers