Table of Contents
Advertisement
Quick Links
WIP21 User Manual
Please read all instructions carefully before use to get the most out of your WIP21
Wireless Surveillance Camera.
Please keep this manual for future reference and ensure all safety instructions have
been read carefully before using. Applications and their functions may vary by
country and/or hardware specification.
The design and features are subject to change without notice.
1
Advertisement
Table of Contents

Related Manuals for ipixo WIP21


Summary of Contents for ipixo WIP21
- Page 1 WIP21 User Manual Please read all instructions carefully before use to get the most out of your WIP21 Wireless Surveillance Camera. Please keep this manual for future reference and ensure all safety instructions have been read carefully before using. Applications and their functions may vary by country and/or hardware specification.
-
Page 2: Table Of Contents
Contents Important Safety Information/Additional Notes What comes in the box?/Camera Features Connecting the IP Camera 3 Step WiFi Setup The Home Screen Viewing the camera feed App Management Skin Styles Voice Message Network Limitations Traffic Statistics Help Push Camera Settings Edit Password Alarm Setting Action with alarm... -
Page 3: Important Safety Information/Additional Notes
Important Safety Information Do not install the product outdoors or in any place where it may become wet. Do not install the product in any place that might be exposed to extreme heat or cold – the camera should be kept out of direct sunlight. ... -
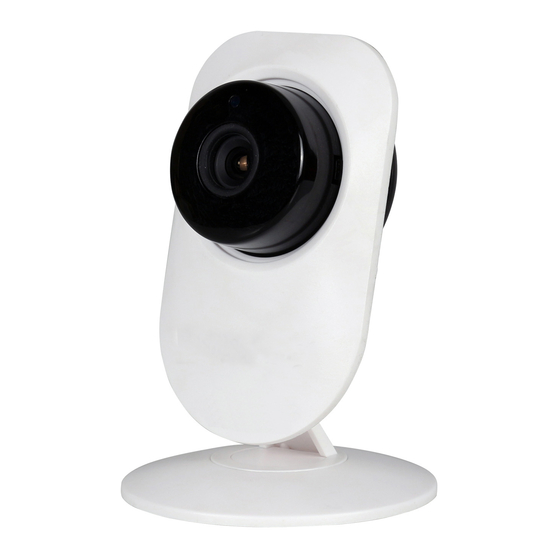
Page 4: What Comes In The Box?/Camera Features
What comes in the box? WIP21 HD IP Camera DC Power Supply Screw Pack Support Page Card Insert Camera Features... -
Page 5: Connecting The Ip Camera
The camera will take a few moments to turn on. Wait for the ringing tone before you move onto the next step. Downloading the APP Please download and install the Ipixo cam Application from the Google Play Store (Android) or Apple App Store (IOS) before setting up the Camera. -
Page 6: Step Wifi Setup
3 Step WiFi Setup Step 1 - Click the “+“icon in the top right- hand corner. Then click “Wireless Installation” Step 2 - Your Internet Router name will appear under SSID. Enter the Router password and click “Apply”. The WIFI Setup will now begin and you will hear a high pitch sound wave from your phone. -
Page 7: The Home Screen
Click on it and enter the Camera password (found on the sticker at the bottom of the Camera) and Click “done” to see your Camera online. Simply click on your camera to view the live feed. The Home Screen The menu along the bottom of the screen shows the following: Screens You are able to add up to four cameras to the Screen page to monitor at one time. -
Page 8: Viewing The Camera Feed
Viewing the camera feed Click on the connected Camera to view your camera full screen in real time. Flip or mirror the image Go back to Camera List Turn Speaker on Take an image of live-feed Record live-feed Switch from Standard view or High-Definition Press and hold to speak through Microphone... -
Page 9: App Management
App Management Swipe right on any screen to open up the App Management. This allows you to see various information relating to your Camera. Skin Style You are able to change the appearance of the App from here. Choose from a variety of colours. -
Page 10: Voice Message
Voice Message Activate or deactivate the Alarm Sounds Network Limitations Here you may set the App so that recorded video may only be played back if the device is connected to WIFI in order to save cellular data. Traffic Statistics Here the WIFI/Cellular data usage is shown. -
Page 11: Help
Help Here you will find the User Guide for the Camera. Push You may configure whether you want to receive alarm notifications, or not. Once turned off, the App will not receive any alarm messages anymore. -
Page 12: Camera Settings
Camera List You will find all the connected cameras under the Camera section. Click “Edit” to delete or rename any of the connected cameras To add a new camera, press the “+” icon To access the camera settings, simply click on the settings cog on the right- side of the camera ... -
Page 13: Edit Password
Edit Password You are able to change the default password of the camera from this section. Alarm Setting Turn the Motion Detection On & Off and adjust the sensitivity. -
Page 14: Action With Alarm
Action with Alarm Choose how you would like to be alerted when motion is detected. You have the options of: Smartphone Push Notifications Motion Alarm Recording Email Alerts FTP Upload You can also set how many images you would like to see per notification. -
Page 15: Timing Record
Timing Record Set how long you would like each recording to be (from 15-900 seconds) and enable or disable recording. Please note if you turn this on the camera will record continuously. (SD Card required) Audio Setting Adjust the Speaker & Microphone volume. -
Page 16: Video Setting
Video Setting See video settings including Frame Rate per Second and Image quality. WIFI Setting WIFI setting is for the activation or deactivation of the camera access via WIFI. This is a good way to test the signal strength from your router to your camera. You may require a signal booster if the distance from your router to your camera is too far away. -
Page 17: Sd Card Setting
SD Card Setting Check the status and storage space of the Micro SD Card (Max 128GB). You can also format the SD Card from here. To insert an SD card into the camera please see the image below: Time Setting Click “Sync with Phone time”... -
Page 18: Email Setting
Email Setting Setup your mailbox to receive email notifications when motion has been detected. SMTP Server: Select the appropriate SMTP server according to your email address Server Port: Enter the correct Server port according to your email address Encrypt Type: Enter the applicable Encrypt Type Authentication: Ensure the Authentication is always turned on... -
Page 19: Ftp Setting
FTP Setting Set up an FTP server to save recordings. Server Address: This is the IP Address of your server Server Port: Enter the FTP Port number User Name: Enter User Name Password: Enter Password Passive mode: Keep the passive mode on Path: Enter the FTP Server path... -
Page 20: Picture/Video Playback
Picture / Video Playback Click the Picture/Video symbol on the bottom toolbar to access captured images or recorded videos. Click on the desired camera and see a list of all Planned and Alarm recordings. Simply click on a recording to play. Filter the recordings by clicking the “Search”...
Need help?
Do you have a question about the WIP21 and is the answer not in the manual?
Questions and answers