Advertisement
Quick Links
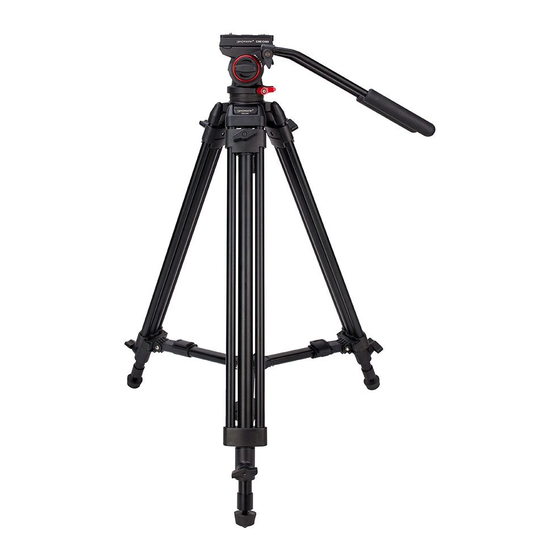
Congratulations on your purchase of this ProMaster CT60K Cine tripod kit. Please read these instructions
thoroughly to ensure proper assembly, operation, and adjustment of your new tripod kit. With proper use and
adjustments your Cine tripod kit will provide many years of excellent service.
ASSEMBLY
Attaching the handles
When you unpack the kit you will notice the CH60 Cine Head is already attached to the CT60 Cine Legs. One
Handle (6) is already installed on the head. Check inside the carry bag for the second handle. Unzip the inside
compartment. You will find one Handle (6) along with an allen wrench. Set the wrench aside. You do not
need it for installing the handle. Notice the two Handle Connection Ports (4) on the CH60 head, one of which
is open. Simply turn the knob on the handle and thread it into the connection port. It is normally ideal to
install each handle so the bend in it creates a position pointing slightly down from the head. Notice the ribbing
around each Handle Connection Port (4) and on the mating side of each handle. This means you can position
each handle in a place you find most comfortable. It is OK to install just one handle on the left or right side of
the head or both at the same time. Customize your CT60K to your liking!
Mounting the Quick Release platform to your camera
Locate the Quick Release Plate (1). It should already be connected to the top of the head. Simply turn the
Quick Release Knob (3) to loosen the head's quick release jaws and remove the Quick Release Plate (1). The
plate comes with two camera attachment screws, a male ¼"-20 screw and a 3/8" male screw. Use whichever is
correct for your camera and remove the other screw from the plate. You can store it in the zippered
compartment inside your carry bag. Align the quick release plate screw with the female threaded port on the
bottom of your camera and orient the plate so it lines up with the direction of your lens (in a front-to-back
orientation). Tighten the screw so the platform is snug. You can use a coin or flat head screwdriver to aid in
tightening this screw.
Mounting your camera
The Quick Release Knob (3) should already be loose from removing the plate. It opens the jaws of the quick
release receiver on the CH60 head. Place your camera onto the head with the Quick Release Plate (1) inside of
the channel. Notice the plate has two protruding bolts on its bottom side. These bolts create safety stopping
points to help prevent the plate (and camera) from sliding off the head. Now start to tighten the Quick Release
Knob (3) but not to make the plate completely tight yet. You want to be able to slide the plate with some
resistance.
Advertisement

Related Manuals for Promaster Cine Tripod CT60K


Summary of Contents for Promaster Cine Tripod CT60K
- Page 1 Congratulations on your purchase of this ProMaster CT60K Cine tripod kit. Please read these instructions thoroughly to ensure proper assembly, operation, and adjustment of your new tripod kit. With proper use and adjustments your Cine tripod kit will provide many years of excellent service.
- Page 2 Now you can try different positions for the plate and the camera/lens you are using to find a good balance point on the head. Start in the center, tighten the Quick Release Knob (3) and check the balance of the rig with the head's Drag Control (5) loose.
- Page 3 ONE YEAR UNCONDITIONAL WARRANTY If for any reason, this ProMaster product fails within ONE YEAR of the date of purchase, return this product to your ProMaster dealer and it will be exchanged for you at no charge. ProMaster products are guaranteed for ONE FULL YEAR against defects in workmanship and materials.