
Related Manuals for ABB AX400 Series


Summary of Contents for ABB AX400 Series
- Page 1 AX400 Series User Guide Models AX460 and AX466 Single and Dual Input pH/Redox (ORP) Analyzers 7 . 0 0 7 . 0 0 M o n i t o r i n g 7. 0 0 7. 0 0 Mo ni to ri ng pH...
- Page 2 We are an established world force in the design and manufacture of instrumentation for industrial process control, flow measurement, gas and liquid analysis and environmental applications. Cert. No. Q05907 As a part of ABB, a world leader in process automation technology, we offer customers application expertise, service and support worldwide. EN 29001 (ISO 9001) We are committed to teamwork, high quality manufacturing, advanced technology and unrivalled service and support.
-
Page 3: Table Of Contents
Page Section Page INTRODUCTION ............2 INSTALLATION ............39 System Description ..........2 Siting Requirements ......... 39 AX400 Series Analyzer Options ......2 Mounting ............40 6.2.1 Wall-/Pipe-mount Analyzers ....40 6.2.2 Panel-mount Analyzers ....... 41 OPERATION ..............3 Connections, General ........42 Powering Up the Analyzer ........ -
Page 4: Introduction
1 INTRODUCTION 1.1 System Description 1.2 AX400 Series Analyzer Options The AX400 Series pH/Redox (ORP) analyzers and associated Table 1.1 shows the range of configurations that are possible for electrode systems have been designed for continuous the AX400 Series analyzers. The analyzer automatically detects monitoring and control of pH and Redox (ORP). -
Page 5: Operation
2 OPERATION 2.1 Powering Up the Analyzer 2.2.1 Key Functions Caution. Ensure connections made Menu 1 correctly, especially to the earth stud – see Section 6.3. Advance to next menu 1) Ensure the input sensor(s) is/are connected correctly. Menu 2 2) Switch on the power supply to the analyzer. - Page 6 …2 OPERATION Use the Menu Key to scroll through Use the Sidescroll Key to scroll through the Pages within each Menu the Menus Section 2.3, Page 6 Section 3.1, Page 12 Section 3.2, Page 13 Section 3.3, Page 13 Section 3.4, Page 14 Section 3.5, Page 14 Section 3.6, Page 17 OPERATING PAGE...
- Page 7 2 OPERATION… Use the Menu Key to scroll through Use the Sidescroll Key to scroll through the Pages within each Menu the Menus Section 5.4, Page 30 CONFIG.ALARMS Config. Alarm 1 Config. Alarm 2 Config. Alarm 3 Config. Alarm 4 Config.
-
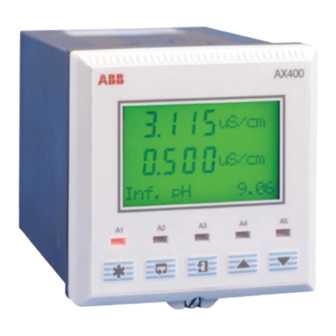
Page 8: Operating Page
…2 OPERATION 2.3 Operating Page 2.3.1 Single Input pH Measured Values 7. 0 0 24. 4 Deg.C Temperature. Monitoring pH Measured Millivolts Millivolts. Millivolts % Slope and pH Check Value 100. 0 % slope value. A value between the programmed minimum % slope value (see in the Set Min Slope 7. -
Page 9: Dual Input Ph
2 OPERATION… …2.3 Operating Page 2.3.2 Dual Input pH Measured pH 7. 0 0 Sensor A. 7. 0 0 Sensor B. Monitoring pH Measured Temperature 25. 6 Deg.C Sensor A. 24. 4 Deg.C Sensor B. Temperature Measured Millivolts Sensor A. -256 Sensor B. -
Page 10: Wash Function
…2 OPERATION …2.3 Operating Page 2.3.3 Wash Function Note. Applicable only if Alarm 3 ( ) is set to in the page – see Section 5.4. A3: Type Wash CONFIG. ALARMS Wash Function Manual – Wash function off. Lower display line of shows Operating Page WASH INHIBITED... -
Page 11: Single Input Redox (Orp)
2 OPERATION… …2.3 Operating Page 2.3.4 Single Input Redox (ORP) Measured Values Millivolts. 25. 6 Deg.C Temperature. Monitoring Redox Note. If is set to in the page (see Section 5.3), Probe Type CONFIG. SENSORS the lower display line shows Monitoring ORP Sensor A Offset Displays the offset value for the sensor set in –... -
Page 12: Dual Input Redox (Orp)
…2 OPERATION …2.3 Operating Page 2.3.5 Dual Input Redox (ORP) Measured Millivolts Sensor A. -256 Sensor B. Dual Redox Note. If Sensor A Sensor B is set to in the Probe Type both page (see Section 5.3), the lower display line shows Dual ORP CONFIG. -
Page 13: Dual Input Ph And Redox (Orp)
2 OPERATION… …2.3 Operating Page 2.3.6 Dual Input pH and Redox (ORP) Measured pH and Millivolts 7. 0 0 Sensor A. -256 Sensor B. pH/Redox Note. The for Sensors A and B can be set to any combination of Probe Type in the page –... -
Page 14: Operator Views
3 OPERATOR VIEWS 3.1 View Set Points Note. The parameter names and units of measurement displayed in the page depend on the View Set Points Probe Type settings for Sensors A and B in the page – see Section 5.3. Those shown below are given as examples only. CONFIG. -
Page 15: View Outputs
3 OPERATOR VIEWS… 3.2 View Outputs Theoretical Analog Output There are up to four analog outputs, each showing information for one sensor. ----- Note. Analog outputs 3 and 4 are available only if the optional analog output board is fitted. VIEW OUTPUTS 12. -
Page 16: View Software
…3 OPERATOR VIEW 3.4 View Software ----- VIEW SOFTWARE Issue Shows the version number of the operating software. 1. 0 0 AX400/2000 Issue Optional analog output board fitted set to in the and Logbook CONFIG. VIEW LOGBOOK page (Section 5.8) – see Section 3.5. LOGBOOK (optional analog output board not fitted) –... - Page 17 3 OPERATOR VIEWS… …3.5 Logbook Alarms View Logbook Cals Use the keys to access the logbook. Errors Power ----- Errors Errors VIEW LOGBOOK Errors Sen.A logbook contains up to 5 entries (entry 1 is the most recent), each comprising Errors the sensor letter, error number and the date and time of the occurrence.
- Page 18 …3 OPERATOR VIEWS …3.5 Logbook Power View Logbook Errors Use the keys to access the logbook. Cals Alarms ----- Cals VIEW LOGBOOK Calibration Sen.A logbook contains up to 5 entries (entry 1 is the most recent), each comprising 2 Cals frames.
-
Page 19: View Clock
3 OPERATOR VIEWS 3.6 View Clock Note. The function is available only if the optional analog output board is fitted. VIEW CLOCK ----- VIEW CLOCK Date Shows the current date. ----- Date 01:01:01 Time Shows the current time. ----- Time 12:00 –... -
Page 20: Setup
Buffer Type Continued below. User TECH. MERCK Buffer Type Select the relevant type of buffer solution (see Appendix A): NIST – ABB supplied buffer solution. ----- NIST – NIST buffer solution. Buffer Type – DIN 19266 buffer solution. MERCK –... - Page 21 4 SETUP… …4.1 Sensor Calibration …4.1.1 Set Buffer Type (pH Only) Set Buffer 1 Set the pH value of the buffer 1 solution – see Appendix A for pH tables. 4.O1pH ----- Set Buffer 1 Set Buffer 2 Set the pH value of the buffer 2 solution. ----- 9.18pH Note.
-
Page 22: Set Up User Defined Buffers (Ph Only)
…4 SETUP …4.1 Sensor Calibration 4.1.2 Set Up User Defined Buffers (pH Only) Buffer Type set to User (see section 4.1.1) Solution A: Enter point 1 (to 5) 15. 0 Deg.C are shown alternately on the upper display line. Using the Deg.C Adjust keys, adjust the temperature reading (in 5°... -
Page 23: Adjust Offset (Redox/Orp Only)
4 SETUP… …4.1 Sensor Calibration 4.1.3 Adjust Offset (Redox/ORP Only) Calibrate Sensor A ----- Sensor Cal. A Sensor B (dual input analyzers only) calibration is identical to Sensor A Sensor Cal. B calibration. for Sensor B (dual input analyzers only) set to SENSOR CAL Probe Type Redox... -
Page 24: Automatic And Manual, Single- And Two-Point Calibration (Ph Only)
…4 SETUP …4.1 Sensor Calibration 4.1.4 Automatic and Manual, Single- and Two-Point Calibration (pH Only) Sensor A: Buffer Method (pH probes only) Auto Select the type of calibration required: Auto 1-Pt – Automatic, single-point calibration ----- 1-Pt Auto 2-Pt – Automatic, two-point calibration Man 1-Pt –... - Page 25 4 SETUP… …4.1 Sensor Calibration …4.1.4 Automatic and Manual, Single- and Two-Point Calibration (pH Only) 2-Pt cal 1-Pt Calibrate Buffer 2 (Two-Point Calibration only) 9. 1 8 Immerse Sensor A in the second buffer solution and continue as for Buffer 1. 20.
-
Page 26: Grab Calibration (Ph Only)
…4 SETUP …4.1 Sensor Calibration 4.1.5 Grab Calibration (pH Only) A: Buffer Method set to Grab (see section 4.1.4) Adjust Value (Grab only) 9. 1 8 are shown alternately on the upper display line. The displayed pH value is the Adjust reading sampled by the analyzer as this frame opened and is held until the display 25. -
Page 27: Programming
5 PROGRAMMING 5.1 Security Code Enter the required code number (between 0000 and 19999), to gain access to the secure parameters. If an incorrect value is entered, access to subsequent programming pages is prevented and the display reverts to the –... -
Page 28: Configure Display
…5 PROGRAMMING 5.2 Configure Display ----- CONFIG. DISPLAY Set Language Sets the language to be used on all displays. ----- Set Language Language Page Use the keys to select the required language. ----- English Deutsch Francais Espanol Italiano Set Language Set Temperature Units ----- Set Temp. -
Page 29: Configure Sensors
5 PROGRAMMING… 5.3 Configure Sensors ----- CONFIG. SENSORS Configure Sensor A ----- Config. Sensor A Sensor B (dual input analyzers only) configuration is identical to Sensor A Config. Sensor B configuration. A: Probe Type Select the required probe type. Redox –... - Page 30 …5 PROGRAMMING …5.3 Configure Sensors pH Electrode Type Select the type of pH electrode used, Glass or Antimony. Antim. ----- Glass A: Electrode Temperature Compensation Select to enable the analyzer to compensate automatically for fluctuations in sample Auto Manual temperature. ----- Auto A: Temp.
- Page 31 5 PROGRAMMING… …5.3 Configure Sensors Sample Compensation Select to enable boiling water compensation. ----- A: Sample Comp. selected – see below. A: Sample Coeff. selected – see below. A: Set Min Slope Sample Coefficient If sample compensation is enabled, enter the temperature coefficient of the sample, in pH/°C, within the range 0.020 to –0.050 (in –0.001 increments).
-
Page 32: Configure Alarms
…5 PROGRAMMING 5.4 Configure Alarms ----- CONFIG. ALARMS Configure Alarm 1 ----- Config. Alarm 1 Configuration of Alarms 2 to 5 is identical to Alarm 1 configuration. Config. Alarm 2 Alarm 3 can also be configured as a Wash alarm if is set to A3: Type Wash... - Page 33 5 PROGRAMMING… …5.4 Configure Alarms Alarm 1 Failsafe Select to enable failsafe action, otherwise select See also Figs. 5.2 to 5.6. ----- A1: Failsafe Alarm 1 Action Select the alarm action required, High High See also Figs. 5.2 to 5.6. ----- A1: Action Alarm 1 Set Point...
-
Page 34: Wash Cycle Configuration (Applicable Only To Alarm 3)
…5 PROGRAMMING …5.4 Configure Alarms 5.4.1 Wash Cycle Configuration (applicable only to Alarm 3) A3: Type set to Wash Wash Mode The wash can be configured as continuous or pulsed. If is selected, the relay remains Cont. Cont. energized for the wash duration. If is selected, the relay is switched on and off every Pulsed -----... - Page 35 5 PROGRAMMING… …5.4 Configure Alarms Process Variable Process Variable High Set Point High Set Point Relay Energized, LED Off Relay Energized, LED On Relay De-energized, LED Off Relay De-energized, LED On Fig. 5.2 High Failsafe Alarm without Fig. 5.5 High Non–Failsafe Alarm without Hysteresis and Delay Delay and Hysteresis Process Variable...
-
Page 36: Configure Outputs
…5 PROGRAMMING 5.5 Configure Outputs ----- CONFIG. OUTPUTS Configure Output 1 ----- Config. Output 1 Output 2 configuration (and Outputs 3 and 4 if optional analog output board Config. Output 2 is fitted) is identical to Output 1 configuration. Temp.B Assign Sen.B Select the sensor and analog output required:... - Page 37 5 PROGRAMMING… …5.5 Configure Outputs Zero Value 7. 0 0 0. 0 ) and are shown alternately on the center display line. Deg.C Deg.F Adjust Use the keys to adjust the displayed reading to the required zero value: AO1: Zero Value Note.
-
Page 38: Configure Clock
…5 PROGRAMMING 5.6 Configure Clock Note. The function is available only if the optional analog output board is fitted. Config. Clock ----- CONFIG. CLOCK Set Clock Set the system clock. ----- Set Clock? Return to main menu. CONFIG. CLOCK Modbus option board fitted – see Supplementary Manual IM/AX400–MOD. CONFIG. -
Page 39: Configure Security
5 PROGRAMMING… 5.7 Configure Security ----- CONFIG. SECURITY Alter Security Code Set the security code to a value between 0000 and 19999. 0000 Alter Sec. Code Alter Calibration Code Set the sensor calibration access code to a value between 0000 and 19999. 0000 Alter Cal. -
Page 40: Test Outputs And Maintenance
…5 PROGRAMMING 5.9 Test Outputs and Maintenance ----- TEST/MAINTENANCE Test Outputs Displays the output test details for the four channels. Test Output 1 only is shown; the remaining outputs are identical. ----- Test Outputs Note. Outputs 3 and 4 are available only if the optional analog output board is fitted. See below. -
Page 41: Installation
6 INSTALLATION 6.1 Siting Requirements Caution. • Mount in a location free from excessive vibration. • Mount away from harmful vapours and/or dripping fluids. Information. It is preferable to mount the analyzer at eye level, allowing an unrestricted view of the front panel displays and controls. -
Page 42: Mounting
…6 INSTALLATION 6.2 Mounting 6.2.1 Wall-/Pipe-mount Analyzers – Figs. 6.2 and 6.3 Dimensions in mm (in.) 94 (3.7) 210 (8.23) 192 (7.56) 96 (3.76) Fig. 6.2 Overall Dimensions 61 (2 ) OD Position 'U' bolts on pipe Vertical or Horizontal Position plate over 'U' bolts Drill suitable Post... -
Page 43: Panel-Mount Analyzers
6 INSTALLATION… …6.2 Mounting 6.2.2 Panel-mount Analyzers – Figs. 6.4 and 6.5 Dimensions in mm (in.) +0.8 +0.03 (3.62 –0 –0 137.50 (5.41) (0.98) 96 (3.78) +0.8 –0 Panel Cut-out +0.03 (3.62 –0 5.40 (0.2) Fig. 6.4 Overall Dimensions Cut a hole in the panel (see Fig. 6.4 for dimensions). Instruments may be close stacked to DIN 43835. -
Page 44: Connections, General
…6 INSTALLATION 6.3 Connections, General Warning. The power supply earth (ground) must be connected to ensure safety to personnel, reduction of the effects of RFI interference and correct operation of the power supply interference filter. Information. • Earthing (grounding) – a case earth (ground) stud is fitted to the analyzer case for bus-bar earth (ground) connection – see Fig. -
Page 45: Relay Contact Protection And Interference Suppression
6 INSTALLATION… …6.3 Connections, General 6.3.1 Relay Contact Protection and Interference Suppression – Fig. 6.6 If the relays are used to switch loads on and off, the relay contacts can become eroded due to arcing. Arcing also generates radio frequency interference (RFI) which can result in analyzer malfunctions and incorrect readings. To minimize the effects of RFI, arc suppression components are required;... -
Page 46: Cable Entry Knockouts,
…6 INSTALLATION …6.3 Connections, General 6.3.2 Cable Entry Knockouts, Wall-/Pipe-mount Analyzer – Fig. 6.7 The analyzer is supplied with 7 cable glands, one fitted and six to be fitted, as required, by the user – see Fig. 6.7. Release the captive screws and remove the terminal cover plate Factory-fitted cable gland... -
Page 47: Wall-/Pipe-Mount Analyzer Connections
6 INSTALLATION… Warning. Before making any connections, ensure that the power supply, any high voltage-operated control circuits and high common mode voltages are switched off. 6.4 Wall-/Pipe-mount Analyzer Connections 6.4.1 Access to Terminals – Fig. 6.8 Release Captive Screws and Remove Terminal Cover Plate Terminal Block C (Analog Option Board) -
Page 48: Connections
…6 INSTALLATION …6.4 Wall-/Pipe-mount Analyzer Connections 6.4.2 Connections – Fig. 6.9 Terminal Block C (Analog Option Board) Terminal Block B Temperature Compensator Temperature Compensator Connections Connections Terminal block A pH/Redox (ORP) pH/Redox (ORP) Terminal Block B without solution earth with solution earth Sensor B Sensor A (standard input) -
Page 49: Panel-Mount Analyzer Connections
6 INSTALLATION… Warning. Before making any connections, ensure that the power supply, any high voltage-operated control circuits and high common mode voltages are switched off. 6.5 Panel-mount Analyzer Connections 6.5.1 Access to Terminals – Fig. 6.10 Terminal Block A Case Earth (Ground) Stud Terminal Block C Terminal Block B (Analog Option Board) -
Page 50: Connections
…6 INSTALLATION …6.5 Panel-mount Analyzer Connections 6.5.2 Connections – Fig. 6.11 Terminal block A Terminal Block C Terminal Block B (Analog Option Board) Line Common Neutral Third Lead Earth (Ground) Temperature Compensator Connections Relay 1 Earth (Ground) Relay 2 Relay 4 Common A10 C C10 C... -
Page 51: Calibration
7 CALIBRATION Notes. • The analyzer is calibrated by the Company prior to dispatch and routine recalibration is not necessary. High stability components are used in the analyzer's input circuitry and, once calibrated, the Analog to Digital converter chip self- compensates for zero and span drift. -
Page 52: Factory Settings
…7 CALIBRATION 7.3 Factory Settings Use the Sidescroll Key to scroll through the Pages within each Menu Section 7.3, Page 51 FACTORY SETTINGS Factory Set Code Cal. Sensor A Cal. Sensor B Cal. Output 1 A:mV Zero (-1V) B:mV Zero (-1V) O1: Adjust 4mA Use the Menu A:mV Span (+1V) - Page 53 7 CALIBRATION… …7.3 Factory Settings ----- FACTORY SETTINGS Factory Settings Access Code Enter the required code number, between 0000 and 19999, to gain access to the factory settings. If an incorrect value is entered, access to subsequent parameters is prevented 0000 and the display reverts to the top of the Factory Settings Page...
- Page 54 …7 CALIBRATION …7.3 Factory Settings Temperature Zero (1k0) 0. 4 54 Volts Set the temperature simulator to 1000Ω 0. 4 54 Calib The display advances automatically to the next step once a stable and valid value is A:T.Zero (1K0) recorded. Temperature Span (1k5) 0.
- Page 55 7 CALIBRATION… …7.3 Factory Settings Calibrate Output 1 Note. When adjusting the 4 and 20mA outputs, the display reading is unimportant ----- and is used only to indicate that the output is changing when the keys are pressed. Cal. Output 1 See below.
- Page 56 …7 CALIBRATION …7.3 Factory Settings Load/Save Configuration Select whether a configuration is to be loaded or saved. ----- Note. If is selected, pressing the key has no effect. Load/Save Config See below. Alter Fact. Code – see Section 2.3. Monitoring pH Operating Page selected –...
-
Page 57: Simple Fault Finding
8 SIMPLE FAULT FINDING 8.1 Error Messages b) Use the pH simulator to carry out an impedance check on If erroneous or unexpected results are obtained the fault may be the analyzer, i.e. glass to reference, glass to earth and indicated by an error message –... -
Page 58: A1 Buffer Solutions
25°C, the internationally accepted standard. The following tables include the pH values for US Tech, NIST, DIN, Merck, and ABB buffer solutions. Standards are for 4, 7 and 9pH values, from 0 to 100°C. °C °F... - Page 59 APPENDIX A… …A1 Buffer Solutions °C °F °C °F Table A3 MERCK Buffer Solutions Table A4 NIST Buffer Solutions...
- Page 60 …APPENDIX A …A1 Buffer Solutions °C °F Table A5 US Tech Buffer Solutions...
-
Page 61: Specification
SPECIFICATION pH/Redox (ORP) Control Function – AX460 Only Inputs Controller Type 1 or 2* pH or mV inputs (*AX466 only) and solution earth P, PI, PID (Configurable) 1 or 2* temperature sensors (*AX466 only) Control Outputs Permits connection to glass or enamel pH and reference sensors and Redox (ORP) sensors Analog Current output control (0 to 100%) - Page 62 …SPECIFICATION Sensor cleaning function Environmental Data Operating temperature limits Configurable cleaning action relay contact –20 to 65°C (–4 to 149°F) Continuous Pulse in 1s on and off times Storage temperature limits –25 to 75°C (–13 to 167°F) Frequency 5 minutes to 24 hours, fully configurable Operating humidity limits Up to 95%RH non condensing Duration...
- Page 63 SPECIFICATION… Relay Outputs – On/Off Safety Number of relays General safety Three, supplied as standard EN61010-1 Five, when ordered with option card Overvoltage Class II on inputs and outputs Pollution category 2 Set point adjustment Fully configurable as normal or failsafe high/low or Cable Entry Types diagnostic alert Standard...
- Page 64 NOTES...
- Page 65 NOTES…...
- Page 66 …NOTES...
- Page 67 Service and Repair Centre. – Food & Beverage – Manufacturing United Kingdom – Metals and Minerals – Oil, Gas & Petrochemical ABB Limited – Pulp and Paper Tel: +44 (0)1453 826661 Fax: +44 (0)1453 827856 Drives and Motors United States of America •...
- Page 68 ABB has Sales & Customer Support The Company’s policy is one of continuous product improvement and the right is reserved to modify the expertise in over 100 countries worldwide information contained herein without notice. www.abb.com Printed in UK (01.03) © ABB 2003 ABB Limited ABB Inc.
Need help?
Do you have a question about the AX400 Series and is the answer not in the manual?
Questions and answers