Table of Contents
Advertisement
Quick Links
Advertisement
Table of Contents

Related Manuals for Bluebird RT080


Summary of Contents for Bluebird RT080
- Page 1 Smart Rugged Tablet Computer RT080 USER Manual...
- Page 2 BLUEBIRD is an emerging global brand, striving to lead the market in performance and mobility. Their products represent reliability, innovation, and innovative technology. Bluebird is a registered trademark from the global brand of Bluebird Inc. and is copyright protected. • Bluebird and stylized Bluebird Logo are registered trademarks and symbols of Bluebird Inc.
-
Page 3: Table Of Contents
Contents This user manual is protected by copyright. Registered Trademark User’s Guidance Revision History Contents 1 About This Manual 2 Safety Information 2.1 Symbols ............................... 2 2.2 Device ..............................2 2.3 Environment ............................3 2.4 Battery and Charging ........................... 3 2.5 Distraction ............................ - Page 4 Contents 5.6 Customizing Your Home Screen ......................20 5.6.1 Adding Shortcuts or Widgets ......................20 5.6.2 Arranging Shortcuts or Widgets ....................20 5.6.3 Removing Shortcuts or Widgets ....................20 5.7 Using Your Device with Ease ......................21 5.7.1 Quick Actions ..........................21 5.7.2 Setting Date and Time ........................
- Page 5 Contents 6.8 Clock ..............................44 6.8.1 Alarm and clock ..........................45 6.8.2 Timer ............................46 6.8.3 Stopwatch ............................ 46 6.8.4 Settings ............................47 6.9 Downloads ............................48 6.10 Calculator ............................48 6.11 Google Apps ............................ 48 6.11.1 Chrome ............................48 6.11.2 Gmail ............................
- Page 6 Contents Appendix B Accessories Appendix C Troubleshooting Appendix D Safety Regulatory Appendix E Warranty and Support...
-
Page 7: About This Manual
• Modifying the device’s operating system or installing software from unknown sources may cause device malfunction or data loss. Improper or unauthorized use of the device is a violation of the Bluebird license agreement and void your one-year limited warranty. -
Page 8: Safety Information
2 Safety Information 2.1 Symbols This manual uses the following symbols to indicate hazards and additional information. Symbol Name Description Warning Indicates situations that could cause injury to yourself or others. Indicates situations that could cause damage to your device or other Caution equipment. -
Page 9: Environment
2 Safety Information 2.3 Environment • Do not use the device while driving or operating heavy machinery. Doing so may result in death or serious injury. • Do not use the device in locations with combustible goods. Doing so may result in an explosion. •... -
Page 10: Overview
3 Overview 3.1 Package Contents The package includes: RT080 device Battery Battery cover USB cable (Type C) • The illustrations may differ from your actual items. • To purchase additional accessories, contact your sales representative. • You can download your User Manual from www.mypidion.com. The paper version may be available... -
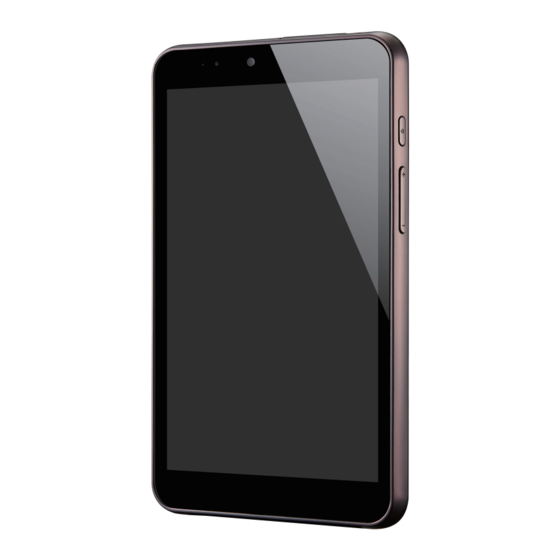
Page 11: Your Device
3 Overview 3.2 Your Device 3.2.1 Front No. Name Description Indicates the status of the battery. The charging LED turns red when the Charging LED battery is charging and turns green when the battery is fully charged. Charging contacts Allows the device to be charged. Touchscreen Displays apps and acts as a multi-touch interface. -
Page 12: Back
3 Overview 3.2.3 Back No. Name Description Rear camera Takes photos and record videos (8 Megapixel). Flash Illuminates your surroundings when using the camera and related apps. Speaker Emits sound. External device Connects external devices such as an RFID reader (optional). connector Battery cover Protects the battery and inner part of the device. -
Page 13: Getting Started
4 Getting Started 4.1 Cards There are four slots for micro SD and micro SIM cards in the inner compartment on the back of your device. • A micro SD card is required for external storage. • A micro SIM card is required for using mobile services. All cards should be purchased separately if necessary. -
Page 14: Battery
To remove the micro SD and SIM card Pull the cards out to remove it. 4.2 Battery RT080 uses a 6,000 mAh Lithium-ion rechargeable battery. Install the provided battery before charging the device. 4.2.1 Installing the Battery Use the notch and lift the battery cover. Remove the cover completely. - Page 15 4 Getting Started Slide down the battery locks to unlock the battery compartment. • When removing the battery cover, be careful not to damage your fingernail. • Do not try to pull the battery cover excessively. It may damage the cover. Insert the battery.
-
Page 16: Removing The Battery
4 Getting Started Replace the cover. Insert the top of the cover first and then press around the edges of the cover until it clicks into place. 4.2.2 Removing the Battery Remove the battery cover as described in Installing the Battery on page 8. Use your fingernail to lift the battery out of the compartment as shown in the image below. - Page 17 4 Getting Started To charge with the charger Plug the end of the charger into the device’s multi-purpose jack. Connect the USB cable of the charger with power adapter. Plug the charger into a power outlet. When the battery is extremely low on power, the device may not turn on. Charge the device enough and try to turn it on again.
-
Page 18: Extending The Battery Life
4 Getting Started 4.2.4 Extending the Battery Life You can improve the battery life in various ways. The easiest way is to use battery saver mode. When the device goes into battery saver mode, some background features and app settings may not function normally. -
Page 19: Basics
5 Basics 5.1 Turning the Device On and Off To turn on the device, press and hold the Power button for a few seconds. To turn off the device, press and hold the Power button, then tap Power off. • To turn the screen on or off, press the Power button. •... -
Page 20: Resetting The Device
5 Basics 5.2 Resetting the Device If your device does not work properly or freezes due to unknown errors, you can force the device to restart. To reset the device’s hardware Press the Power button while the device is turning on. Press and hold the Power button for a few seconds, and tap Reboot >... -
Page 21: Using The Touchscreen
5 Basics 5.3 Using the Touchscreen Use finger gestures to use the touchscreen effectively. • Do not touch the screen with any sharp objects. • Do not apply too much pressure to the touchscreen. Gesture Name Description Briefly touch an item to open, launch, or select it. Place two fingers on the screen and spread them apart to zoom Zoom in or out in. -
Page 22: Locking And Unlocking The Device
5 Basics 5.4 Locking and Unlocking the Device Lock the screen to protect your device and its data. The device locks if it is not in use for a specified period by default. To unlock the device, press the Power button to turn on the screen and drag upward from the bottom of the screen. -
Page 23: Using The Home Screen
5 Basics 5.5 Using the Home Screen The Home screen is the starting point for all apps and features. It displays icons, shortcuts, and widgets for apps. No. Description Status bar Widget Location indicator App icons Back/Home/Menu button The Home screen has multiple pages. To view other pages, swipe left or right. The white bar at the bottom of the Home screen indicates the current page you are viewing. -
Page 24: Viewing The Status Bar
5 Basics 5.5.1 Viewing the Status Bar The status bar appears at the top of the screen. It displays the status icons and the current time on the right, and the notification icons on the left. No. Description Notification icons Status icons and the current time 5.5.2 Notification Icons Notification icons in the status bar alert you to notifications, such as upcoming events, messaging, emails,... -
Page 25: Status Icons
5 Basics 5.5.3 Status Icons The status icons in the status bar provides information about your device’s status, such as GPS, signal strength, roaming, battery charge, data, alarm, etc. Icon Description Indicates that GPS is in on. Indicates that your device is searching for location data. Indicates that the alarm is set. -
Page 26: Customizing Your Home Screen
5 Basics Icon Description Indicates that your device is connected to an EDGE network. Indicates that your device is connected to an GPRS network. Indicates that there is no SIM card installed. • Other than the icons described in the table above, there are various other notifications and status icons that are displayed on the status bar depending on the situation. -
Page 27: Using Your Device With Ease
5 Basics 5.7 Using Your Device with Ease Make it easier to see, hear, and use the device with its built-in accessibility features. On the Home screen, tap > Accessibility and make the text size bigger, increase text contrast, and more to fit your individual needs. For more information on configuring Accessibility settings, refer to Accessibility on page 61. -
Page 28: Setting Date And Time
5 Basics 5.7.2 Setting Date and Time The date and time are automatically set based on the network you are connected to. To set the date and time manually On the Home screen, tap > Date & time, then disable Automatic date & time. If you turn off this option, the options for setting date and time will be activated. -
Page 29: Connectivity
5 Basics 5.8 Connectivity 5.8.1 Wi-Fi Connecting to a Wi-Fi network is an easy way of accessing the Internet. When you are out, you can connect to Wi-Fi networks in public places. On the Home screen, tap > Wi-Fi. Make sure to turn Wi-Fi on. Tap the network you want to join. - Page 30 5 Basics To pair with a Bluetooth device Pair your device with Bluetooth compatible devices. On the Home screen, tap > Bluetooth. Turn the Bluetooth On. • Make sure the devices you want to pair with have Bluetooth enabled. • You may need to start the pairing process from the headset. For details, see your headset user guide.
-
Page 31: Applications
On the Home screen, tap to view all the apps on your device. Icon Name Description Bluebird File Use to organize and manage your files. Manager Use to listen to the radio. You can set up regional settings, audio output FM Radio mode, record duration, etc. - Page 32 6 Applications Icon Name Description Use to add, view, and edit your contacts. For more information, refer to Contacts Contacts on page 36. Use to view all downloaded files. For more information, refer to Downloads Downloads on page 48. Use to send or view emails. For more information, refer to Gmail on page Gmail Phone Use to make phone calls.
-
Page 33: Phone
6 Applications 6.3 Phone 6.3.1 Making Calls On the Home screen, tap > You can simply dial the number, tap on a number on the call log, or choose a number in your contacts. To make a call on the dialer screen On the Home screen, tap >... - Page 34 6 Applications To use options during your call Icon Description Turn the speakerphone on. Mute your microphone. Open the keypad. Hold a call. Add another person to the call. End the call.
- Page 35 6 Applications To make a call from contacts list On the Home screen, tap > on your Phone app. Tap a name in your contacts list and then tap a phone number to dial the number.
- Page 36 6 Applications To make a call from call log On the Home screen, tap > on your Phone app. You can also open the call log by tapping > Call History. to dial the number.
- Page 37 6 Applications To make a call from speed dial You can make quick calls without entering a phone number or searching for a contact with the speed dial function. You should assign a speed dial number to a contact first. For more information on creating new speed dial, refer to Making Speed dial on page 34.
-
Page 38: Answering Calls
6 Applications 6.3.2 Answering Calls When you receive a phone call, the incoming call screen opens with the caller ID, and any other available information, such as the caller’s name, if saved in the contacts list. Tap and drag to one of the following icons: Icon Description Answer an incoming call. -
Page 39: Viewing Call Log
6 Applications 6.3.3 Viewing Call Log The call log displays the dialed, missed, and received calls. On the Home screen, tap > on your Phone app. You can also open the call log menu by tapping > Call History. Icon Description Missed incoming calls Outgoing calls... -
Page 40: Making Speed Dial
6 Applications 6.3.6 Making Speed dial To create a new speed dial On the Home screen, tap > on your Phone app. Tap a name in your contacts. to add the number you selected as a speed dial. To edit speed dial On the Home screen, tap >... - Page 41 6 Applications Speed dial settings • Voicemail: Tap to set up your voicemail. – Service: Tap to set the provider of the voicemail service. – Setup: Tap to set the voicemail number. – Sound: Tap to select the ringtone to alert you of a new voicemail message. –...
-
Page 42: Contacts
6 Applications Accessibility • TTY mode: Tap to select the TTY mode. – TTY Off: TTY mode is off. – TTY Full: Turn TTY on. – TTY HCO: Enable HCO (Hearing Carry over). HCO feature is designed for the people who can hear, but have difficulty speaking on the phone. -
Page 43: Editing Contacts
6 Applications 6.4.2 Editing Contacts To edit contact details On the Home screen, tap > All your contacts are listed in the ALL tab. Tap the name of a contact to view their details. Tap When you are finished, tap on the top right of the screen. -
Page 44: Finding Contacts
6 Applications 6.4.3 Finding Contacts You can search for contacts by name or number. On the Home screen, tap > All your contacts are listed in the ALL tab. and enter letters of their name or digits of their phone number. As you type, contacts that includes the letters or numbers will appear below the search box. -
Page 45: Snapdragon Camera
6 Applications 6.6 Snapdragon Camera Use this app to take photos or record videos. On the Home screen, tap > . You can also directly open the camera app from the lock screen. Swipe the screen to left while tapping •... -
Page 46: Recording Videos
6 Applications 6.6.3 Recording Videos On the Home screen, tap > and select to switch to video mode. Aim the camera at the object and adjust the image. To zoom in or out, spread or pinch two fingers on the screen. -
Page 47: Video Settings
6 Applications – White balance: Tap to select a suitable light source for your photo. – Chroma Flash: Tap to enable or disable the chroma flash for high-quality photos even in low lighting conditions. – Redeye Reduction: Tap to reduce the red-eye effect in photos which often occurs when the flash is used in dark conditions. -
Page 48: Calendar
6 Applications 6.7 Calendar Use this app to create, view, and manage events. On the Home screen, tap > . You can also add and tap a widget Settings on the Home screen. To add events, you must set up an account. For information about how to set up an account, refer to Accounts on page 57. -
Page 49: Editing And Deleting Events
6 Applications 6.7.4 Editing and Deleting Events On the Home screen, tap > > Schedule, Day, 3 Day, Week or Month. In Schedule, Day, 3 Day or Week view, tap an event to view its details. If you try to view an event’s details in Month view, tap an event and the screen will switch to Day view. -
Page 50: Clock
6 Applications 6.8 Clock Use this app to set an alarm, view the time in cities around the world, or use a timer or a stopwatch. On the Home screen, tap > No. Description Alarm Clock Timer Stopwatch More options Current time and date of the location depending on your connected mobile network service Current time and date of the added cities Add cities... -
Page 51: Alarm And Clock
6 Applications 6.8.1 Alarm and clock You can set alarms or edit clock options with the Clock app. To set an alarm On the Home screen, tap > > and set the time for the alarm and tap OK. Select the Repeat checkbox and select the days you want the alarm to sound on. If you want to change the alarm ringtone, tap Default ringtone. -
Page 52: Timer
6 Applications 6.8.2 Timer On the Home screen, tap > > Tap the keypad to specify the time period. It is entered in the following order: hour, minute, second. If you want to delete the number you entered, tap to start the timer. The following icons are displayed on the timer screen. -
Page 53: Settings
6 Applications 6.8.4 Settings You can modify various clock options. This clock settings menu can only be accessed through this app. On the Home screen, tap > > Settings on any tab of Clock app. Clock • Style: Tap and set the style of the Clock screen to analog or digital. •... -
Page 54: Downloads
6 Applications 6.9 Downloads Use this app to view your downloaded files. On the Home screen, tap > . You can view the file list by name or by date. Select a file to open with an appropriate app. 6.10 Calculator Use this app for mathematical calculations. -
Page 55: Photos
6 Applications 6.11.7 Photos Manage photos, albums, and videos that you have saved on the device. 6.11.8 Voice Search Search quickly for items by saying a keyword or phrase. -
Page 56: Settings
7 Settings Use this app to configure your Android™ device. On the Home screen, tap . You can also add and tap a widget Settings on the Home screen. Tap enter your search term to search the Settings menu. 7.1 Wi-Fi On the Home screen, tap >... -
Page 57: Data Usage
7 Settings 7.3 Data Usage On the Home screen, tap > Data usage. • Data saver: Tap to turn on this option to prevent some apps from sending or receiving data in the background. – Unrestricted data access: Tap to select apps to use unrestricted data when Data Saver is on. •... -
Page 58: Display
7 Settings 7.5 Display Use this setting to change the screen brightness and wallpaper, enable screen rotation, set the sleep time, change the font size, and configure other features of the display. On the Home screen, tap > Display. • Brightness level: Tap and move the slider to adjust the screen brightness. •... -
Page 59: Notifications
7 Settings 7.6 Notifications Use this setting to configure notification settings such as notification display or system app display. On the Home screen, tap > Notifications. • Tap for notification options. – Show system: Tap to display Android system apps. –... -
Page 60: Apps
7 Settings – Turn on notifications: Tap to display emergency alert broadcasts. – Alert reminder: Tap to select an alert reminder or turn it off. – Vibrate: Tap to set your device to vibrate on receiving alerts. – Speak alert message: Tap to set your device to speak emergency alert messages. –... -
Page 61: Battery
7 Settings 7.10 Battery Use this setting to monitor battery usage. On the Home screen, tap > Battery. • Battery saver: Tap to enable or disable the battery saver. • You can check: – Battery charging status – How long your device has been running on battery power –... -
Page 62: Location
7 Settings 7.14 Location Switch this option to On to detect your device’s location. On the Home screen, tap > Location. • Mode: Tap and select the method for determining your location such as GPS, Wi-Fi and cellular networks. • Location services: Tap to view and configure settings for location services. •... -
Page 63: Accounts
7 Settings Passwords • Make passwords visible: By default, the device hides passwords for security when you enter them. Turn on this option to make the passwords visible as they are entered. Device administration • Device administrators: Tap to manage device administrators. •... -
Page 64: Google
7 Settings 7.17 Google Use this setting to manage your Google account and services. On the Home screen, tap > Google > to set the following options. • Usage & diagnostics: Turn on this option to automatically send diagnostic and usage data to Google. •... -
Page 65: Language And Input
7 Settings 7.18 Language and Input Use this setting to change language and input method. On the Home screen, tap > Languages & input. • Languages: Tap and select the default language for all menus and apps. • Spell checker: Turn on this option to enable the spell checker and configure its settings and language. •... -
Page 66: Backup And Reset
7 Settings 7.19 Backup and Reset Use this setting to perform factory reset. On the Home screen, tap > Backup & reset. • Back up my data: Turn on this option to back up app data, Wi-Fi passwords and other data to Google servers. -
Page 67: Accessibility
7 Settings 7.22 Accessibility Use this setting to customize your device to improve its accessibility. On the Home screen, tap > Accessibility. Services • TalkBack – Tap and switch this option to On to set your device to provide spoken feedback to help blind and visually impaired users. -
Page 68: Printing
7 Settings 7.23 Printing Use this setting to print documents from your device directly with app that support the Wi-Fi or Cloud printing feature. You can specify the default printer. On the Home screen, tap > Printing. 7.24 About Phone Use this setting to view the following information about your device: System updates, Status, Legal information, Model, Android version, Android security patch level, Baseband version, Kernel version, and Build number. -
Page 69: Appendix A Device Specification
Appendix A Device Specification Physical Characteristics Dimensions (L x W x D) 215.8 X 128.8 X 12.95 mm Weight 450 g 8.0 inch, FHD (1920 X 1200) Display Capacitive Touch Screen Battery User replaceable battery, 3.8 V, 6,000 mAh Customer-accessible microSD slot for removable memory cards with a Expansion slot capacity of up to 64 GB (SDHC) SIM/SAM slot... - Page 70 Appendix A Device Specification User Environment Characteristics Durability TankSmith™ Technology Operating temperature -10 °C to 60 °C (14 °F to 140 °F) Storage temperature -20 °C to 65 °C (-4 °F to 149 °F) Humidity 90%, non-condensing Communication Options WWAN Radio (optional) LTE, HSPA+/HSPA/UMTS, EDGE/GSM 802.11 a/b/g/n/ac (802.11n 2.4 GHz and 5 GHz) WLAN Radio (optional)
- Page 71 Appendix B Accessories Cradles • One Slot Cradle: Charging only The power adapter, AC power plug and AC power cable require the use of charging cradles. Battery/Battery Cover • Battery: 6,000 mAh • Battery cover Vehicle Accessories • Vehicle charger •...
- Page 72 You can contact your local sales representative or you can send the device via a delivery service to Bluebird’s Korean headquarters. When sending the package, make sure you pay for the shipping fee in advance. When the repair is finished, Bluebird will cover the shipping cost.
- Page 73 Appendix D Safety Regulatory FCC compliance information This device complies with Part 15 of the FCC’s Rules. Operation is subject to the following two Conditions: • This device may not cause harmful interference, and • This device must accept any interference received, including interference that may cause undesirable operation.
- Page 74 Hereby, Bluebird Inc. declares that the radio equipment type EF501 is in compliance with Directive 2014/53/EU. This device can be operated in at least one Member state without infringing applicable requirements on the use of radio spectrum.
- Page 75 Bluebird will repair or replace the defective product according to its warranty policy. • If the defective product within the range of warranty is not repairable or replaceable, Bluebird shall refund the purchasing price within a designated period from the date of receiving a notice of defect.
- Page 76 • We receive the products for our after-sales service through mail, delivery services and hand delivery only in principle. • If you bought the product from a party other than Bluebird or an authorized Bluebird reseller, you need to register the product before using our after-sales service.
- Page 77 Appendix E Warranty and Support Charged services • In the following cases, it will be charged when requesting for after-sales service. – Service request due to inappropriate use of the device by the customer – Loss of PIN number – Use of programs that might affect the program (over-clock, forceful changes in the input of the system, personal developments) •...
- Page 78 #1103, Gplus Kolon Digital Tower 11F, (GMT Time: +9 Hours) Digital-ro 26-gil 123, Guro-gu, Seoul, The center is closed on Saturdays, Republic of Korea(08390) Sundays, and Korean national holidays. Bluebird constantly strives to bring utmost satisfaction to all our customers.
Need help?
Do you have a question about the RT080 and is the answer not in the manual?
Questions and answers