Table of Contents
Advertisement
Quick Links
Advertisement
Table of Contents
Troubleshooting

Related Manuals for Bluebird ET100


Summary of Contents for Bluebird ET100
- Page 1 PREMIUM ENTERPRISE TABLET ET100 USER Manual...
-
Page 2: Registered Trademark
This product’s program is legally protected. Illegal copying, transmitting, or erasing of the program is prohibited. This user manual has been created by the Bluebird Inc. We have done our best not to create typos, editing errors, and leaving out any information. -
Page 3: Table Of Contents
Contents 1 Safety Precautions 1.1 Symbols ..............................01 1.2 Device ................................. 01 1.3 Environment ..............................01 2 Product Overview 2.1 Package Components ..........................02 2.2 Front ................................03 2.3 Back ................................04 2.4 Bottom ................................ 05 3 Getting Started 3.1 Inserting USIM Cards ..........................06 3.2 Charging the Device ............................ - Page 4 10.5 Backing Up Windows ..........................44 10.6 Recovering Windows ..........................45 11 Help and Support 11.1 Preparing for Service ..........................46 11.2 Bluebird Customer Service ........................46 11.3 Conditions for After-sales Service ......................47 11.4 Charged Service ............................47 Appendix A Specifications...
-
Page 5: Safety Precautions
1 Safety Precautions 1.1 Symbols This manual uses the following symbols to indicate hazards and additional information. Symbol Name Description Indicates a potential hazard that could result in a minor injury or damage Caution to the device. Indicates additional information that can help you get the most out of the Note device. -
Page 6: Product Overview
2.1 Package Components The device includes the following components. If any of these components are missing, please contact the retailer who sold you the device. ET100 tablet Power adapter AC power cord The images in this manual may not reflect the color and shape of the actual device. These illustrations... -
Page 7: Front
2 Product Overview 2.2 Front No. Name Description Front camera Captures pictures and video (2.0 megapixels). Detects the ambient light to automatically adjust the brightness of the screen and Light sensor the exposure of the camera. Indicates the status of the battery. • The battery LED turns red when the battery is charging. -
Page 8: Back
2 Product Overview 2.3 Back No. Name Description Purges hot air from the device. Air exhaust Blocking the air exhaust may cause the device to overheat. Rear camera Captures photos and video (5 megapixels). LED flash Provides additional lighting for photos and videos in low-light areas. Cools the components inside the device with outside air. -
Page 9: Bottom
2 Product Overview 2.4 Bottom No. Name Description Cradle connector Connects the device to a cradle (optional). Allows you to insert USIM (universal subscriber identity module) cards. USIM slot For more information, see 3.1 Inserting USIM Cards on page 06. Allows you to insert SAM (secure access module) cards. -
Page 10: Getting Started
3 Getting Started This chapter explains the basics of how to use the device, including how to charge the device, turn it on or off, and lock it. Subsequent chapters teach you how to navigate Windows and customize the device, but the information in this chapter will help you start the device for the first time and configure basic settings. -
Page 11: Charging The Device
3 Getting Started 3.2 Charging the Device The device charges when connected to the power adapter or resting in the cradle (optional). • Do not attempt to charge the device with anything other than the adapter it shipped with. • Charge the device fully before using it for the first time. Failure to do so may decrease the life of the battery. -
Page 12: Turning On The Device
3 Getting Started 3.3 Turning On the Device Press the power button on the left edge of the device to turn on the device. • The Status LED turns on to indicate that the device is operational. • To turn off the device, see 4.9 Turning Off the Device on page 19. The power button is also used: • To turn off the screen without turning off the device. -
Page 13: Using Touch Gestures
3 Getting Started 3.4 Using Touch Gestures Touch gestures allow you to interact with Windows and the applications installed on the device. Gesture Name Description Lightly touch an item to launch apps, interact with buttons, and select options. Touch two points on the screen and move your fingers Zoom together to zoom out or move them apart to zoom in. -
Page 14: Starting The Device For The First Time
3 Getting Started 3.5 Starting the Device for the First Time When you start the device for the first time, you are prompted to create a user account and configure basic settings. To configure Windows upon initial startup, follow these steps: When the Region and language screen appears, select the desired Country or region, App language, Keyboard layout, and Time zone, and then tap Next. -
Page 15: Locking The Device
3 Getting Started 3.6 Locking the Device On the left edge of the device, press the lock button. When the lock screen appears, the device is locked. You can also press the power button on the top left edge of the device to turn off the display and lock the device. -
Page 16: Windows 8.1 Tutorials
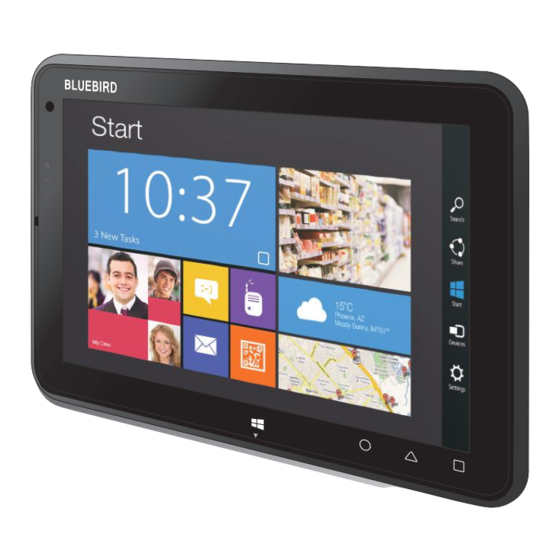
4 Windows 8.1 Tutorials Windows 8.1 includes features optimized for touch screens, such as the new Start screen, Charms menu, and gestures for switching and closing apps. The next few sections will teach you about these features and help you feel comfortable in this new environment. 4.1 Start Screen The Start screen provides easy access to the apps and information most important to you. -
Page 17: Desktop
4 Windows 8.1 Tutorials 4.2 Desktop The desktop provides a familiar experience to those who have used previous versions of Windows. It is also where you will use certain apps, such as the File Explorer and Office applications. If you want to boot directly into the desktop, see 7.5 Booting to the Desktop on page 29. -
Page 18: Charms Menu
4 Windows 8.1 Tutorials 4.3 Charms Menu The Charms menu provides quick access to frequently used functions from any screen. The functions in the Charms menu may differ based on the current app. To open the Charms menu, follow these steps: Swipe in from the right edge of the screen. - Page 19 4 Windows 8.1 Tutorials Tap the desired charm: Icon Name Function Search Finds things on the device or the web. Share Shares files, photos, or links from the current app. Start Opens the Start screen or desktop. Devices Allows you to play, print, or project from peripheral devices. From apps: Changes the settings for the current app.
-
Page 20: Switching Between The Start Screen And Desktop
4 Windows 8.1 Tutorials 4.4 Switching between the Start screen and desktop Swipe in from the right edge of the screen. In the Charms menu, tap Start. 4.5 Apps Screen The Apps screen displays all of the applications installed on the device. The apps that you use most frequently appear on the left side of the Apps screen. -
Page 21: Switching Between Apps
4 Windows 8.1 Tutorials 4.6 Switching Between Apps Drag your finger inwards from the left edge of the screen. Drag the app to the center of the screen, and release the app thumbnail. You can swipe in repeatedly from the left side of the screen to quickly cycle through all open apps. -
Page 22: Viewing Two Apps At Once
4 Windows 8.1 Tutorials 4.7 Viewing Two Apps at Once To display two apps at the same time: From any app, drag your finger inwards from the left edge of the screen. When the second app appears, drag it to the left or right side of the screen. Release the app. -
Page 23: Closing Active Apps
4 Windows 8.1 Tutorials 4.8 Closing Active Apps From the app, slide your finger downwards from the top edge of the screen. When the app snaps to the bottom of the screen, release it. If the app appears in the window, tap the close button in the top right corner of the window. 4.9 Turning Off the Device In the top right corner of the Charms screen, tap the button. -
Page 24: Connecting To Networks
5 Connecting to Networks The device can connect to Wi-Fi and mobile wireless networks. The device can connect to Wi-Fi networks right out of the box, but you will need to insert a USIM card to connect to mobile networks. Connecting to and using mobile networks may incur charges from your mobile carrier. -
Page 25: Sharing A Mobile Connection
5 Connecting to Networks 5.3 Sharing a Mobile Connection To share a connection to a mobile network with other devices, follow these steps: Swipe in from the right edge of the screen. In the Charms menu, tap Settings. In the Settings menu, tap Change PC settings. In the PC settings menu, tap Network. -
Page 26: Connecting To External Devices
6 Connecting to External Devices 6.1 Connecting to a Bluetooth Device Swipe in from the right edge of the screen. In the Charms menu, tap Settings. At the bottom of the Settings sidebar, tap Change PC settings. In the PC Settings menu, tap PC and devices. In the PC and devices menu, tap Bluetooth. -
Page 27: Connecting To Usb Devices
6 Connecting to External Devices 6.2 Connecting to USB Devices Open the cover on the left side of the device. Plug the USB cable into the port on the right. Before you connect a USB device, make sure that the connector is oriented correctly and that it can physically fit into the port. -
Page 28: Customizing The Device
7 Customizing the Device After learning how to navigate Windows and getting a feel for the device, you will probably want to customize its style and functionality. You can customize the Start screen, lock screen, and function buttons easily by following the instructions in this section. 7.1 Configuring the Start Screen The Start screen is where it all begins, so you should add your own flair to make it your own. - Page 29 7 Customizing the Device Adding Tiles Tiles allow you to add your favorite apps, websites, and contacts directly to the Start screen. Place your finger in the center of the Start screen and swipe upwards. On the Apps screen, press and hold an app until the context menu appears at the bottom of the screen To add multiple apps at the same time, tap the desired apps while the context menu is open.
- Page 30 7 Customizing the Device Removing Tiles On the Start screen, press and hold an app until the context menu appears at the bottom of the screen. Tap the tiles that you wish to delete. In the context menu, tap Unpin from Start. Resizing Tiles On the Start screen, press and hold the app until the context menu appears at the bottom of the screen.
- Page 31 7 Customizing the Device Grouping Tiles You can group tiles based on function, frequency of use, or even personal preference. Once grouped, the tiles will remain together until moved to another group or removed from the Start screen. On the Start screen, press and hold an app until the context menu appears at the bottom of the screen. Drag the app to the desired group or drag the app to a blank area of the screen to create a new group.
-
Page 32: Changing Your Account Picture
7 Customizing the Device 7.2 Changing Your Account Picture To change the picture associated with your Microsoft account, follow these steps: Swipe in from the right edge of the screen. In the Charms menu, tap Settings. In the Settings menu, tap Change PC settings. In the PC Settings menu, tap Accounts. -
Page 33: Booting To The Desktop
7 Customizing the Device 7.5 Booting to the Desktop To boot to the desktop instead of the Start screen, follow these steps: Swipe in from the right edge of the screen. In the Charms menu, tap Search. In the Search box, type Taskbar. In the search results, tap Taskbar and Navigation. -
Page 34: Using Quick Settings
7 Customizing the Device In the Type dropdown menu, select None, Key event, or Run app. • None: The function button does nothing. • Key event: The function button performs the same function as the associated key. • Run app: The function button opens the specified app. In the Key select dropdown menu, select a key. - Page 35 7 Customizing the Device Tap an icon to enable or disable that feature. A white icon indicates that the feature is enabled. A dark blue icon indicates that the feature is disabled. Icon Feature Description Accelerometer Measures the acceleration of the device along the x, y, and z axes. Changes the brightness of the screen based on the light in the usage Ambient Light environment.
-
Page 36: Using The Card Slots
8 Using the Card Slots This chapter explains how to insert cards into the device. 8.1 Inserting USIM Cards See 3.1 Inserting USIM Cards on page 06. 8.2 Removing a USIM Card Open the cover on the bottom of the device. Press the card into the slot until it clicks. -
Page 37: Inserting Sam Cards
8 Using the Card Slots 8.3 Inserting SAM Cards You should install a SAM card if you intend to use the device to handle secure information or secure transactions, such as credit and debit card payments. Open the cover on the bottom of the device. Insert the SAM card into the bottom slot on the left until you hear it click. -
Page 38: Removing A Sam Card
8 Using the Card Slots 8.4 Removing a SAM Card Open the cover on the bottom of the device. Gently press the card into the slot until it clicks. Release the card to allow it to partially eject. Remove the card from the slot. -
Page 39: Inserting Microsd Cards
8 Using the Card Slots 8.5 Inserting MicroSD Cards MicroSD cards increase the storage capacity of the device. Open the cover on the bottom of the device. Insert the microSD card into the slot on the right until you hear it click. Do not insert the microSD card into an incorrect slot. -
Page 40: Removing A Microsd Card
8 Using the Card Slots 8.6 Removing a MicroSD Card Open the cover on the bottom of the device. Gently press the card into the slot until it clicks. Release the card to allow it to partially eject. Remove the card from the slot. -
Page 41: Accessing Data On Microsd Cards
8 Using the Card Slots 8.7 Accessing Data on MicroSD Cards Insert the microSD card into the device (see 8.5 Inserting MicroSD Cards on page 35). Swipe in from the right edge of the screen. In the Charms menu, tap Search. -
Page 42: Using The Camera
9 Using the Camera The Bluebird Camera app allows you to capture photos and record videos using either of the cameras on the device. After capturing photos or recording videos, you can then view the photos or videos stored on the device. -
Page 43: Opening The Camera App
9 Using the Camera 9.2 Opening the Camera App Swipe upward on the Start screen to see the list of apps. Bluebird Camera to open the app. 9.3 Taking Pictures Ensure that the icon appears in the top right corner of the screen. If the appears instead, tap the icon to switch to photo mode. -
Page 44: Recording Video
9 Using the Camera 9.4 Recording Video Ensure that appears in the top right corner of the screen. If appears instead, tap the icon to switch to video mode. Tap StartRecord to start recording the video. Tap StopRecord to stop recording the video and save it on the device. • Tap the resolution button in the lower right corner of the screen to change the resolution of the video. -
Page 45: Maintenance And Troubleshooting
10 Maintenance and Troubleshooting Despite its robust design, the device still requires a small amount of maintenance to continue operating optimally. Regular maintenance involves cleaning the touchscreen and ensuring the optimal battery life for the device. However, if you run into major problems with the device, then you may want to try the steps described in the Troubleshooting and Recovering Windows sections. -
Page 46: Troubleshooting
10 Maintenance and Troubleshooting 10.3 Troubleshooting Attempt the following remedies before contacting the service center. Issue Remedy The device got wet. • Allow the device to dry for at least 24 hours before you power on the device. • If the device does not power on, then contact your local service center. The device won’t power on. -
Page 47: Updating Windows
10 Maintenance and Troubleshooting 10.4 Updating Windows Unless you specify otherwise, Windows automatically downloads and installs updates when they become available. However, you may need to manually update Windows when you start the device for the first time or if Windows is not updating correctly. To manually update Windows: Plug in the device. -
Page 48: Backing Up Windows
10 Maintenance and Troubleshooting 10.5 Backing Up Windows Backing up the device creates a system image, which contains Windows as well as the applications, system settings, and files on the device. You can use this system image to recover the contents of the computer if a critical error occurs on the device. -
Page 49: Recovering Windows
To restore the OS to its original state, press the reset button of the device using a small thin pointed piece like a pin. When the OS is restored to its original state, the drivers provided by Bluebird are not installed. -
Page 50: Help And Support
11 Help and Support Bluebird is committed to ensuring that you get the most out of the device. If you encounter any problems while using the device, then please use the following methods to contact us for service and support. -
Page 51: Conditions For After-Sales Service
• You must enclose the device in protective packaging before delivering it to the service center. We recommend packaging the product in the box it came in. • Bluebird is not responsible for any damage or loss that may occur during delivery, and such damage will not be repaired under warranty. -
Page 52: Appendix A Specifications
Appendix A Specifications Physical Characteristics Dimensions (W x H x D) 264 x 182 x 17.7 mm (10 x 7.1 x 0.7 inch) Weight 985 g (2.1 Ib) Display 10.1" (1280 x 800) IPS, 10 point multi-touch, direct-bonded Gorilla Glass Storage 128 GB SSD (256 GB optional) Keypad... - Page 53 Appendix A Specifications User Environment Durability Drop: - Multiple 1.2 m (4 ft.) drops per MIL-STD-810G without the rugged plug - Multiple 1.5 m (5 ft.) drops per MIL-STD-810G with the rugged plug Sealing: IP65 Vibration 4 Gs peak, 5 Hz to 2 kHz, 1 hour duration per axis Operating Temp.
-
Page 54: Appendix B Accessories
Appendix B Accessories Smart Plugs • Type 1: MSR and ICC module for mobile payments and 1 SAM slot (Attaches to the right side of the device.) • Type 2: Barcode scanner (2D imager with a laser aimer), IC card reader, 2 SAM slots, ScanKey scanner, and a spin handstrap (Attaches to the back of the device.) • Type 3: IC card reader, 1 SAM slot, and a spin handstrap (Attaches to the back of the device.) • Type 4: Spin handstrap (Attaches to the back of the device.) -
Page 55: Other Accessories
Appendix B Accessories Other Accessories • Power Adapter • AC Power Cord • Vehicle Charger • Rugged Plug • Shoulder Strap • Blue Pen • Tether for the Blue Pen • Leather Case • HDMI Cable • Screen Guard Use only the adapter listed below. Manufacturer: Borasen Fuyuang Electronic Co.,Ltd Model: FY1206000 Input: 100-240 V, 50-60 Hz... -
Page 56: Appendix C Safety And Regulatory Compliance
Appendix C Safety and Regulatory Compliance FCC Class B Notice This device complies with Part 15 of the FCC Rules. Operation is subject to the following two conditions: • This device may not cause harmful interference. • This device must accept any interference received, including interference that may cause undesired operation. Note: This equipment has been tested and found to comply with the limits for a Class B digital device, pursuant to Part 15 of the FCC Rules. -
Page 57: Appendix D Warranty Information
Bluebird does not guarantee interruption-free or error-free performance. Bluebird shall service only those accessories that appear on the sales list of the service center. Any repair or replacement of accessories that do not appear on the sales list will be at the customer’s expense. - Page 58 Monday to Friday 9:30 A.M. - 6:30 P.M. B 703, SSang-young IT twintower, (GMT Time: +9 Hours) 442-5 Sangdaewon-dong, Joongwon-gu, The center is closed on Saturdays, Seongnam-si, Gyeonggi-do 13216, Sundays, and national holidays. Republic of Korea Bluebird constantly strives to bring utmost satisfaction to all our customers.
Need help?
Do you have a question about the ET100 and is the answer not in the manual?
Questions and answers