
Related Manuals for dji OSD


Summary of Contents for dji OSD
- Page 1 (On Screen Display) User Manual V1.0 2012-09-12 www.dji-innovations.com ©2012 DJI Innovations. All Rights Reserved.
-
Page 2: Disclaimer
Thank you for purchasing product(s) from DJI Innovations. Please read the instructions carefully before installing the hardware and software for this product, this will ensure trouble free operation of your OSD. Please use DJI products in accordance with the provisions of your local authorities and regulations. -
Page 3: Table Of Contents
DJI OSD is specially designed for DJI autopilot system during the FPV flight or other aero-modeling activates. DJI OSD can transmit video and OSD information in real time, which will help you to obtain the aircraft status information during a FPV flight. It can display power voltage, flight velocity, height, distance from the home point, horizontal attitude, GPS satellite number, etc. -
Page 4: Contents
Connect the OSD with video input source (i.e. camera or DJI Z15) for video input and power supply. Only when you use the DJI Z15, you can use the bi-port cable directly for the connection. Otherwise, you can use the one-port cable for your own connection in accordance with the wiring diagram. -
Page 5: Assembly
STEP1. Fix the OSD controller on your aircraft. STEP2. Connect the OSD with the video signal source, wireless video TX module, DJI autopilot system and R/C receiver. Make sure the connection is correct in accordance with the wiring diagram. STEP3. - Page 6 Video Input Port · If you use wireless video transmission module · If you use the DJI Z15, please connect the OSD to specified by DJI, connect through the bi-port the GCU of the Z15 through a bi-port cable as cable as shown.
-
Page 7: Display Description
Display Description The OSD information is displayed on screen as shown below. 12.0V 45~179 45~179 Function Display Description The aircraft power battery voltage, unit in V. :First level protection alarm 、 、 blink Power voltage blink:Second level protection alarm Channel CH1、CH2、……CH8... - Page 8 Orientation-1 Orientation-2 Orientation-5 Orientation-4 Display Screen :Upward speed Vertical velocity 、 :Downward speed Use attitude line for aircraft attitude observation craft up: craft down: Attitude line craft left: craft right: ©2012 DJI Innovations. All Rights Reserved.
-
Page 9: Test
Test Please use the following procedures to test your installation, in order to make sure the OSD is working properly. STEP1. Ensure batteries are fully charged for R/C transmitter, OSD and all the other devices on your aircraft. STEP2. Make sure all connections and wiring is correct and secure. -
Page 10: Appendix
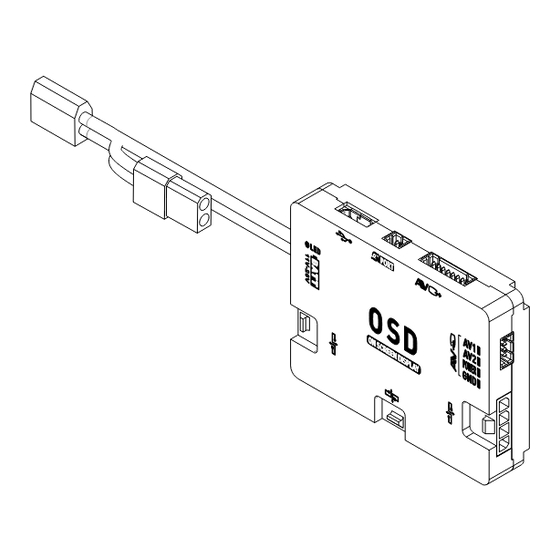
POWER:11~13V, supply power for video input source GND:Ground Micro-USB Port:Connects the OSD with PC for firmware upgrade CAN-Bus : Communication of the OSD with autopilot system through CAN-Bus LED indicator for power ©2012 DJI Innovations. All Rights Reserved. -
Page 11: Specifications
OSD Information Transmission Video Transmission,2 Video Signal input Channels/Switchable Remote channel selection of the Wireless Video Transmitter Module, when using the video transmitter specified by DJI Built-in BEC DJI Z15 Supported ©2012 DJI Innovations. All Rights Reserved. -
Page 12: Trouble Shooting
Trouble Shooting What How to Make sure the connection between Only OSD information, Video input error. OSD controller and video input port video signal loss. is OK. Connection between Make sure the connection between OSD controller and Only video signal, OSD OSD controller and DJI autopilot information loss.
Need help?
Do you have a question about the OSD and is the answer not in the manual?
Questions and answers