Table of Contents
Advertisement
Advertisement
Table of Contents

Related Manuals for Valleylab RapidVac


Summary of Contents for Valleylab RapidVac
- Page 1 User’s Guide RapidVac™ Smoke Evacuator System...
-
Page 2: Foreword
This manual and the equipment it describes are for use only by qualified medical professionals trained in the particular technique and surgical procedure to be performed. It is intended as a guide for using the RapidVAc Smoke Evacuator only. Additional users information is available in the RapidVac™ Smoke Evacuator Service Manual. - Page 3 RapidVac™ Smoke Evacuator User’s Guide...
-
Page 4: Warranty
This warranty does not apply to any product, or part thereof, which has been repaired or altered outside Valleylab’s factory in a way so as, in Valleylab’s judgment, to affect its stability or reliability, or which has been subjected to misuse, neglect, or accident. - Page 5 District Court of the County of Boulder, State of Colorado, USA. Valleylab, its dealers, and representatives reserve the right to make changes in equipment built and/or sold by them at any time without incurring any obligation to make the same or similar changes on equipment previously built and/or sold by them.
-
Page 6: Conventions Used In This Guide
Caution Indicates a hazardous situation which, if not avoided, may result in minor or moderate injury. Notice Indicates a hazard that may result in product damage. Important Indicates an operating tip or maintenance suggestion. RapidVac™ Smoke Evacuator User’s Guide... -
Page 7: Table Of Contents
Table of Contents Foreword ................................... ii Warranty .................................. iv Conventions Used in this Guide .......................... vi Chapter 1. Introducing the RapidVac Smoke Evacuator Parts Shipped with the Smoke Evacuator ......................1-2 About the RapidVac Smoke Evacuator ......................1-2 Features ...............................1-3 RapidVac+ System .............................1-3... - Page 8 Tubing ................................4-3 Sponge Guard ............................. 4-3 Filter Life Indicator ............................4-3 Chapter 5. After Surgery Preparing the RapidVac Smoke Evacuator for Reuse ................... 5-2 Removing the Tubing ..........................5-2 Cleaning the Smoke Evacuator ......................... 5-2 Chapter 6. Troubleshooting Inspecting the RapidVac Smoke Evacuator ....................
-
Page 9: Chapter 1. Introducing The Rapidvac Smoke Evacuator
RapidVac Smoke Evacuator. Caution Read all warnings, cautions, and instructions provided with this smoke evacuator before using. Read the instructions, warnings, and cautions provided with electrosurgical accessories before using. Specific instructions are not included in this manual. RapidVac™ Smoke Evacuator User’s Guide... -
Page 10: Parts Shipped With The Smoke Evacuator
It can be used in both open and laparoscopic procedures. The RapidVac Smoke Evacuator is designed with a high suction, high flow rate centrifugal action pump. The ultra-quiet motor is used to draw the smoke from the surgical site through the vacuum tubing and into the system where it is processed by a series of filters. -
Page 11: Features
RapidVac+ System The RapidVac Smoke Evacuator incorporates The RapidVac+ mode which controls the flow of the smoke evacuator when using a Valleylab electrosurgical pencil. When the electrosurgical pencil is activated, the smoke evacuator operates in the preselected flow setting. When the pencil is deactivated, the air flow reduces to a low-flow purge setting. -
Page 12: Power
Patient and Operating Room Safety General Warning Only trained personnel are to operate the RapidVac Smoke Evacuator. Operators should avail themselves of preclinical training, a review of pertinent literature, and other appropriate education before attempting to use the RapidVac. During initial set up, inspect the smoke evacuator for any damage that may have been caused during shipping. - Page 13 Inspect the smoke evacuator before each use. If there is evidence of damage, do not use the smoke evacuator. Call Valleylab for service assistance. The RapidVac Smoke Evacuator filter is a disposable component that captures potentially hazardous particles. Handle used filters as you would any biohazardous material.
- Page 14 Using any unapproved filter or accessory with the smoke evacuator may cause damage and will void the warranty. The RapidVac Smoke Evacuator functions properly only when the ULPA filter is correctly installed. If the filter is installed incorrectly, the amber Replace Filter indicator flashes and the Service Required indicator is illuminated.
-
Page 15: Maintenance
Patient and Operating Room Safety Notice The RapidVac Smoke Evacuator has been specially designed to fit on Valleylab mounting carts only. Do not install the smoke evacuator on a cart other than a Valleylab cart. Installing the smoke evacuator inside a cart with improper ventilation may result in overheating or may adversely affect the stability of the cart. - Page 16 Patient and Operating Room Safety RapidVac™ Smoke Evacuator User’s Guide...
-
Page 17: Chapter 2. Controls, Indicators, And Receptacles
C h a p t e r Controls, Indicators, and Receptacles This chapter describes the front and rear panels on the smoke evacuator, including all controls, indicators, receptacles, and ports. RapidVac™ Smoke Evacuator User’s Guide... -
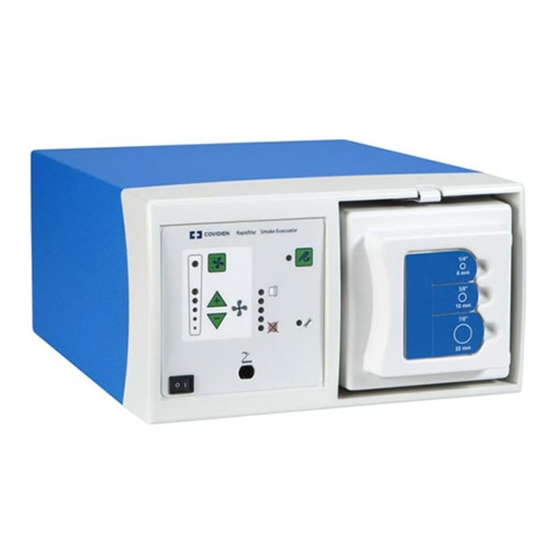
Page 18: Front Panel
Power On/Off switch Air-flow indicators (LED) Turbo button Air-flow controls Power on indicator (LED centered in fan symbol) Filter life indicators (LED) RapidVac+ button Service required indicator (LED) Footswitch jack Air filter with tubing connectors RapidVac™ Smoke Evacuator User’s Guide... -
Page 19: Power On/Off Switch
IEC 60601-1-1. If in doubt, contact Valleylab. The electronic system controls on the RapidVac Smoke Evacuator are easy to understand and simple to use. The control panel contains power and suction controls, LED indicators, and connectors. -
Page 20: Filter Life Indicator
Reading the Filter Life Indicator Install an unused RapidVac filter into the system. When the smoke evacuator is on, all five of the filter life indicator LEDs illuminate indicating the new filter has 100% filter life. The indicator will regress through subsequent LEDs until the final LED is illuminated indicating less than 5 hours of filter life remaining. -
Page 21: Rear Panel
If the system is overheated or if there is an electrical surge in the electrical system, fuses will open and the system will not operate. To re-start the system, unplug the power cord and replace the fuses. RapidVac™ Smoke Evacuator User’s Guide... -
Page 22: Remote Activator Jack
Rear Panel Remote Activator Jack A Generator Interlink Cable (SEA3730) and Remote Switch Activator (SEA3740) are available for the automatic remote activation of the RapidVac Smoke Evacuator. The Generator Interlink Cable is compatible with the Valleylab Force FX™, ForceEZ™, and ForceTriad™ generators. It attaches to a generator’s RF activation port and to the smoke evacuator’s Remote Activator jack. -
Page 23: Chapter 3. Before Surgery
Caution Read all warnings, cautions, and instructions provided with this smoke evacuator before using. Read the instructions, warnings, and cautions provided with smoke evacuator accessories before using. Specific instructions are not included in this manual. RapidVac™ Smoke Evacuator User’s Guide... -
Page 24: Periodic Inspection
Obvious external or internal damage to the system. Initial Installation To prepare the RapidVac Smoke Evacuator for use, you must verify that the filter is installed, connect the appropriate tubing, and check the performance of the smoke evacuator indicators and controls. - Page 25 The smoke evacuator performs a self test. Verify that all LEDs are illuminated during the test. When the test is complete, the RapidVac is placed in standby mode signified by an illuminated power on LED within the fan symbol and no active suction.
-
Page 26: Checking The Smoke Evacuator
Troubleshooting. Checking the Remaining Filter Life RapidVac Smoke Evacuator filters have a use duration of 25 hours. As a filter is used, information about the amount of time the individual filter has been used is stored on the filter’s RFID tag. Whenever a new or previously used filter is inserted, the smoke evacuator reads the stored information from the tag. -
Page 27: Changing The Filter
40% motor speed 60% motor speed 80% motor speed 100% motor speed Turbo Mode (100%) Verify that the filter is installed properly. Ensure that the power cord is plugged into a hospital grade power receptacle. RapidVac™ Smoke Evacuator User’s Guide... -
Page 28: Installing And Testing The Footswitch (Optional)
) button repeatedly to regress through the settings to the lowest setting. Installing and Testing the Footswitch (optional) Only use the Valleylab Footswitch with the smoke evacuator. Other footswitches are not compatible. Turn on the smoke evacuator. Connect the footswitch cord to the footswitch jack on the front panel. -
Page 29: Installing And Testing The Remote Switch Activator (Optional)
Repeat the programming instructions beginning with step 8. The Remote Switch Activator is now programmed. Powering on and off the RapidVac Smoke Evacuator is now controlled by the generator and Remote Switch Activator. RapidVac™ Smoke Evacuator User’s Guide... -
Page 30: Installing And Testing The Generator Interlink Cable (Optional)
Installing and Testing the Generator Interlink Cable (optional) The Generator Interlink Cable attaches to a RapidVac Smoke Evacuator and a compatible Valleylab generator to synchronize smoke evacuation with the activation of the generator. The cable is compatible with the Valleylab generator models Force FX™, ForceEZ™, and ForceTriad™. -
Page 31: Setting Up The Smoke Evacuator
After the initial installation, set up the smoke evacuator for use Mounting the Smoke Evacuator The smoke evacuator may be mounted in the following locations: • The Valleylab UC8009 Universal Mounting Cart—primary, secondary, or suspended shelf • ForceTriad Cart FT900 •... -
Page 32: Open Procedure-Evacuating Smoke And Incidental Fluids
Connecting multiple lengths of tubing together may cause the smoke evacuator to overheat. Verify the installed filter has enough available filter life to complete the procedure. Insert a fluid canister in-line with the smoke evacuator tubing. 3-10 RapidVac™ Smoke Evacuator User’s Guide... -
Page 33: Chapter 4. During Surgery
C h a p t e r During Surgery This chapter covers the following topics: • Minimizing airflow noise • Changing and adjusting airflow • Checking the tubing • Checking the prefilter • Checking the sponge guard RapidVac™ Smoke Evacuator User’s Guide... -
Page 34: Initiating Airflow
This device is not intended for the evacuation of fluid. If fluid is expected to be aspirated to the smoke evacuation filter, a fluid collection device must be installed with the vacuum hose assembly. Failure to install a fluid collection device could cause filter blockage and electrical damage. Contact Valleylab Service for additional information. Caution To maximize patient safety, the tubing or wand should not come in direct contact with tissue. -
Page 35: Variables Affecting Airflow
If a sponge guard is in use, ensure it is fully attached to the sterile tubing to prevent suction of surgical materials. Filter Life Indicator Monitor the remaining life of the filter by viewing the Filter Life Indicator LEDs on the smoke evacuator front panel. RapidVac™ Smoke Evacuator User’s Guide... - Page 36 Periodic Checks RapidVac™ Smoke Evacuator User’s Guide...
-
Page 37: Chapter 5. After Surgery
C h a p t e r After Surgery This chapter covers the following topics: • Preparing the smoke evacuator for reuse • Cleaning the smoke evacuator RapidVac™ Smoke Evacuator User’s Guide... -
Page 38: Preparing The Rapidvac Smoke Evacuator For Reuse
Preparing the RapidVac Smoke Evacuator for Reuse Preparing the RapidVac Smoke Evacuator for Reuse After surgery, prepare the smoke evacuator for reuse by performing the following procedures: • Remove the tubing • Clean the smoke evacuator Caution Do not reuse or resterilize accessories labeled “disposable” or “single use only.”... - Page 39 Wear protective gloves when cleaning around filter ports. Do not place fingers into ports or touch the internal surface of the ULPA filter. Contaminants may be present. Ensure the smoke evacuator is completely dry before use. Reconnect the power cord to the wall receptacle. RapidVac™ Smoke Evacuator User’s Guide...
- Page 40 Cleaning the Smoke Evacuator RapidVac™ Smoke Evacuator User’s Guide...
-
Page 41: Chapter 6. Troubleshooting
This chapter describes solutions to problems that may occur when operating the smoke evacuator. If the smoke evacuator is not functioning properly, use the information in this section to help identify and correct the malfunction. RapidVac™ Smoke Evacuator User’s Guide... -
Page 42: Inspecting The Rapidvac Smoke Evacuator
Inspecting the RapidVac Smoke Evacuator Inspecting the RapidVac Smoke Evacuator If there is a problem with the operation of the smoke evacuator, inspect the unit for obvious conditions that can cause a malfunction: • Check for visible signs of damage •... - Page 43 Malfunction in smoke evacuator Contact Valleylab service. ESU remote does not activate Generator interlink cable incorrectly Ensure the generator interlink is when RapidVac mode is selected installed properly connected to the rear panel of the smoke evacuator and the Valleylab generator.
- Page 44 Correcting Specific Malfunctions RapidVac™ Smoke Evacuator User’s Guide...
-
Page 45: Chapter 7. Maintenance And Repair
C h a p t e r Maintenance and Repair Refer to this chapter for information on: • Routine maintenance • The manufacturer’s responsibility • Returning the smoke evacuator for service • Service centers RapidVac™ Smoke Evacuator User’s Guide... -
Page 46: Routine Maintenance
Dispose of the filter with other operative waste materials according to the procedures for your institution. Responsibility of the Manufacturer Valleylab is responsible for the safety, reliability, and performance of the smoke evacuator only under the following circumstances: • Installation and setup procedures in this manual are followed. -
Page 47: Obtaining A Return Authorization Number
When you receive the Return Authorization Number, ship the smoke evacuator prepaid according to Valleylab's instructions. Service Centers For a complete list of service centers worldwide, please refer to the Valleylab website: http://www.valleylab.com/valleylab/international/service-world.html RapidVac™ Smoke Evacuator User’s Guide... - Page 48 Service Centers RapidVac™ Smoke Evacuator User’s Guide...
- Page 49 C h a p t e r Accessories The accessories listed in this chapter are recommended for use with the RapidVac Smoke Evacuator. Accessories can be ordered through your Valleylab Sales Representative. Product Catalog No RapidVac Filter SEA3700 Tubing, 6 mm x 3 m (1/4 in x 10 ft), sterile...
- Page 50 RapidVac™ Smoke Evacuator User’s Guide...
Need help?
Do you have a question about the RapidVac and is the answer not in the manual?
Questions and answers