
Related Manuals for Vivaldi GIOVE FREENET


Summary of Contents for Vivaldi GIOVE FREENET
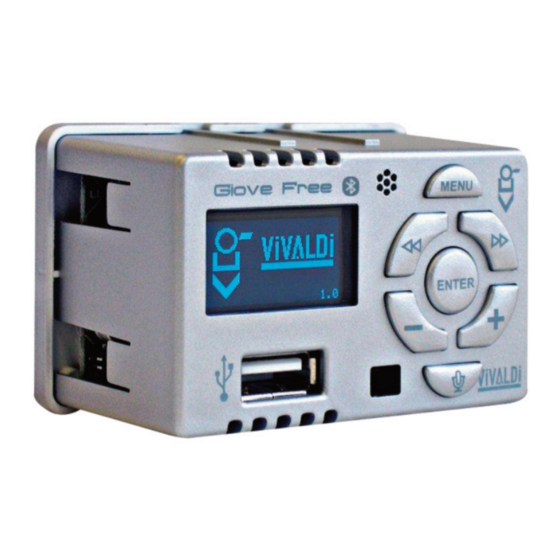
- Page 1 GIOVE FREENET IN-BUILT MICRO MULTIROOM ALL IN ONE WITH RS485 PORT USER MANUAL ° STEREO 25+25W ° RADIO FM WITH RDS ° USB PLAYER ° MICROPHONE FOR MESSAGING ° AUXIN ° RS-485 PORT ° BLUETOOTH www.vivaldigroup.it...
- Page 2 3 ° Integrated microphone pag 3 ° IR receiver pag 4 ° Keys features pag 4 ° Use of the Giove FREENET pag 5 ° The TCIR5 remote control device pag 10 ° Wirings pag 11 ° Wiring diagrams pag 14 °...
- Page 3 Supplied with an integrated D class digital amplifier, it can supply up to 25+25W maximum power. The GIOVE FREENET has been conceived to spread audio in a sin- gle zone of maximum 50mq. The integrated FM Tuner and the USB port, make of the Giove FREE- NET a device that can be installed in every environment, independen- tly.
- Page 4 USB source, scans the USB key contents, searching the audio files and starts reading the first track. The Giove FREENET remote control can read MP3, WMA and AAC tracks on the pen drives with FAT16 or FAT32 file systems and maxi- mum capacity of 8 GB.
- Page 5 The keys – and + allow the volume regulation and the menu navigation. ENTER key By keeping pressed for a long time the Giove FREENET is switched on/off, by short pressure the MUTE function is activated. When listening to the USB key content, the track playing is paused.
- Page 6 << or >> keys for tuning on the desired fre- quency. When a USB key is inserted, after few seconds the Giove FREENET starts playing the first track, between those stored inside. For returning to the TUNER source put off the pen drive or press the MENU key until the menu appears, from the SOURCE function it is possible to select the various sources including the TUNER.
- Page 7 The Giove FREENET is equipped with 7 memories, for memorizing a station proceed as follows: 1 Keep pressed for a long time the MENU key until the display shows the menu. 2 Search the SETUP function by means of the << and >> keys and press the ENTER key.
- Page 8 MIC OUT source The MIC OUT source allows to use the Giove FREENET as a mi- crophone base, able to send the signal of its own internal microphone towards other devices. The signal, of analog monophonic typology, is...
- Page 9 Giove FREENET is installed. It is required in the system to be installed two or more Giove FREENET by means of the wirings, as described below. By recalling the BABY OUT function in a Giove FREENET and the func- tion BABY IN in one or more Giove FRENET, it is possible to listen to what happens in close proximity to the first device.
- Page 10 As soon as the 4 numbers are inserted, the following menus appear, please, view APPENDIX 4 on pp. 23-24: INFO: Information screen with regard to the firmware and hardware version of the Giove FREENET, dated as the last firmware release. Visualizes also the set ID in the CONFIGNET menu.
- Page 11 Amplifier protection If the internal amplifier registers a power overload for 5 times, the pro- blem is signalled on the display, the outputs are inhibited and it is re- quired restoring implemented user. After the intervention, the outputs audio level is restored with an auto- matic decrease of 10 steps volume.
- Page 12 The two procedures are activated by pressing the << or >> keys. Wirings In order to start and use the Giove FREENET, it is sufficient to power supply, wiring at least a speaker and the FM antenna. This can be made of a 1 mt long cable reel, fully vertically extended, connected to the ANT terminal.
- Page 13 The terminal named IL constitutes an “Open Collector” output for the control of an auxiliary device. With Giove FREENET off the IL terminal is connected to the ground. It is possible to connect, for example, the Giove PS7, the Giove PS20...
- Page 14 Terminals for microphone MIC+ / IR function For using the messaging functions by the internal microphone of the Giove FREENET, it is necessary to connect the MIC+ terminal between the various Giove FREENET in parallel. Such connection must be implemented by means of 2x0,22 shielded cable or good quality similar cable (e.g.
-
Page 15: Wiring Diagrams
WIRING DIAGRAMS Audio system with CA20/CA21, FREENET and ICONTROLIGHT:... - Page 16 Audio system with FREENET supervised by home automation system:...
- Page 17 Audio system with FREENET supervised by ICONTROLIGHT:...
- Page 18 Wiring the Giove FREENET with the CA20:...
- Page 20 Wiring the Giove FREENET with the CA21:...
- Page 22 Special wirings of speakers 8 ohm (3pcs – 4pcs – 6pcs): Minimum impedance 4 Ohm for channel...
-
Page 23: Power Supply
Technical features POWER SUPPLY: Voltage:_________________________________________ 19-24 Vcc Max voltage (switched):_________________________________ 1,5A USB: Socket typology:__________________________________________A Supported formats: MP3____________extension .mp3, .mp2, .mp1 WMA_________________extension .asf, .wma AAC______________________extension .m4a Supported media:_________________ SD, SDHC, MMC, mini-SDcard Total folders number:__________________________________ 65534 File systems supported:_________________________ FAT16, FAT32 Maximum support capacity:_______________________________8GB TUNER FM Tuning band:_______________________________ 87,5 - 108,0 MHz... - Page 24 ---LPF: acronym for Low Pass Frequency, activable only when it has been first chosen the MONO modality, it allows to set up a cut-off fre- quency in the Giove FREENET outputs. Settable values OFF, 55 Hz, 85 Hz, 120 Hz and 160 Hz. Once chosen the desired value, press the...
- Page 25 Default value is 10 Db. Once chosen the desired value, press the ENTER key and confirm with the arrow key on the right >>. ---SRC: it allows to select the source on which the Giove FREENET is switched on, after that the power supply is physically disconnected. Set- table functions: TUNER, USB, AUXIN, MIC OUT, MIC IN, AUX2, BLUET.
- Page 26 ---NAME: it allows to change the name of the Bluetooth device of the Giove FREENET. Default name: VIVALDI. Scroll by the + and – keys the letters from A to Z and the numbers from 1 to 9. By means of the arrow keys <<...
- Page 27 5 minutes, after this time it will enter in stand- by modality. It is necessary to press the + key for reactivating or swit- ching off and switching on again the Giove FREENET by the ENTER key or by the remote control device.
- Page 28 FREENET.BTI. Select the Bluetooth source (BLUET.) from the sources menu of the Giove FREENET.BTI, now the Bluetooth is active and is visible from each mobile device. Once identified the device as VIVALDI (default name, for modifying please, view on p.
- Page 32 D90-03/16 VIVALDI srl via E. Fermi, 8 Z.I. Est 30020 - Noventa di Piave Venezia Italia +39-0421-307825 info@vivaldigroup.it www.vivaldigroup.it...
Need help?
Do you have a question about the GIOVE FREENET and is the answer not in the manual?
Questions and answers