Table of Contents
Advertisement
Advertisement
Table of Contents

Related Manuals for DS18 MRX2


Summary of Contents for DS18 MRX2
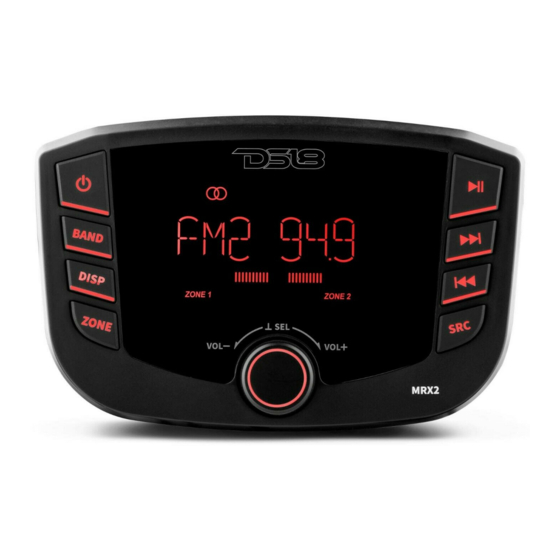
- Page 1 MRX2 MARINE & POWERSPORT HEAD UNIT...
- Page 2 MARINE & POWERSPORT HEAD UNIT Please read the instruction manual carefully before operating the unit.
-
Page 3: Table Of Contents
CONTENT SAFETY INSTRUCTIONS......1 SPECIFICATIONS ....... . . 2 INSTALLATION / MOUNTING . -
Page 4: Safety Instructions
SAFETY INSTRUCTION CAUTION This symbol with ”CAUTION” is intended to alert the user to the presence of important instructions. Failure to heed the instructions could result in injury or unit damage. To prevent injury and damage to the unit, please read and follow the instructions in this manual. -
Page 5: Specifications
SPECIFICATIONS GENERAL: Operating Voltage: 10.5 – 16 Volts Low Voltage Warning Alert: YES (< 11V) Waterproof Rating: IPX6 UV/Salt Protection: Buttons: Rubber + RGB Backlit (synced with LCM) Screen Panel: Gorilla Glass with OCA Full Bonding DISPLAY: Type: 3” Liquid Cristal Module Backlight: 7 Colors Selectable (Auto / White / Red / Blue / Green / Purple / Cyan / Yellow) -
Page 6: Installation/ Mounting
INSTALLATION/ MOUNTING ACCESSORIES 1. Main Unit 2. Power/Speaker Harness 3. Screws X 2PCS 4. Hex Head Screws X 2PCS 5. U Bracket 6. Instruction Manual CAUTION 1. This player should be installed by a professional technician. 2. Please read the instruction and operation of the equipment carefully before installing. - Page 7 2. After the hole is cut slide the unit and wiring through the hole. 3. Take the U bracket and slide over the two studs on the back of the unit. Tighten down with supplied nuts. 4. Plug in all wiring harnesses and cables. Refer to the wiring diagram for wire harness connection types.
-
Page 8: Wiring Connection
WIRING CONNECTION... - Page 9 CAUTION 1. This player can only be used by the 12V DC cathode grounding electrical system. 2. Do not connect the battery terminals until the player is fully assembled. 3. Please make sure to connect the yellow wire to the positive of the battery(+).
-
Page 10: Basic Operation
BASIC OPERATION 1) POWER / button Press t button to turn on. Press the key again to turn off the unit. 2) BAND / button Press BAND button to FM1/FM2/FM3/AM1/AM2/WB. Press and hold BAND button for 3 seconds to auto store the stations. 3) DISP / button Shortly press DISP button to show the clock, then press and hold DISP button again to set time, Rotate Vol to set hour time display, press DISP key again to turn to minute time display, rotate... - Page 11 8) SRC button Press SRC button to Mode change Radio / BT / USB / AUX-IN. 9) VOL / SEL button Rotate the Vol to adjust the volume. SEL BUTTON FUNCTIONS: 1. IN ZONE1 or ZONE2, AUX/BT mode: Shortly press SEL button to BAS / TRE / SUB / EQ (rotate the VOL to select FLAT / OFF, S-BASS, VOCAL, POWERFUL, CLARITY) / LOUD (ON / OFF) / COLOR LIGHT (rotate the VOL to select AUTO, WHITE, PURP, CYAN, YELLOW, RED, GREEN) / BEEP (OFF/ON) one by one.
-
Page 12: Function Setting Operation
FUNCTION SETTING / OPERATION SETTINGS DX / LOC (Distance / Local): LOC: Receive the strong signal station only in seek station. DX: Receive strong and weak signal station in seek station. STEREO / MONO: STEREO: Receive FM stereo signal. MONO: Change FM stereo to monophonic. It can reduce the noise when the signal is weak. RESET THE UNIT Press and hold button for 5 seconds to reset the unit. -
Page 13: Aux (Auxiliary Input) Operation
Press the SRC button to select the BLUETOOTH source option. Then searching and selecting the Bluetooth device "MRX2" from your phone and input password "0000" If it needs. When paired successfully, the BT symbol will be shown on LCD. -
Page 14: Troubleshooting
TROUBLESHOOTING Check fuse of the unit, replace with correct Blown fuse rating. If connected following the instructions, the Vehicle's ignition is off unit will not operate with ignition off Unit does not turn on Check battery, connections and fuses and Voltage applied to Red wire is repair or replace as necessary. - Page 15 MARINE & POWERSPORT HEAD UNIT...
- Page 16 PLEASE VISIT DS18.COM We LIKE IT LOUD FCC ID: 2AYOQ-MRX2 This device complies with part 15 of the FCC Rules. Operation is subject to the following two conditions: (1) this device may not cause harmful interference, and (2) this device must...
Need help?
Do you have a question about the MRX2 and is the answer not in the manual?
Questions and answers