Table of Contents
Advertisement
Quick Links
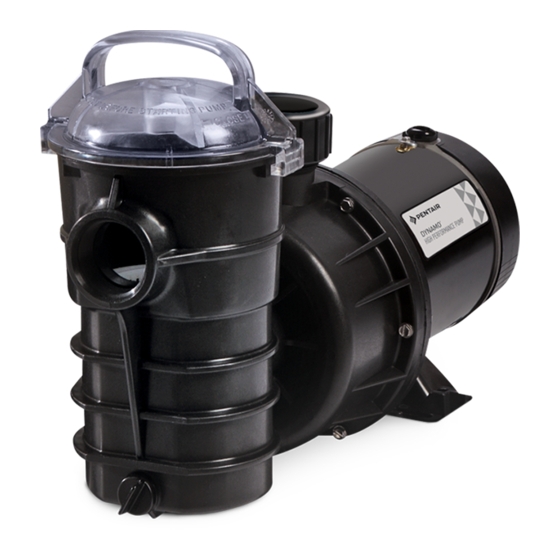
SWIMMING POOL OR SPA PUMPS
Aquatools
293 Wright Street, Delavan, WI 53115
North America: 800-752-0183, FAX 800-582-2217
International: 414-728-5551, FAX: 414-728-4461, TELEX: ITT 4970245
© 1997. Printed in U.S.A
O
W N E R '
INSTALLATION, OPERATION & PARTS
MODELS
3/4 HP
1 HP
1-1/2 HP
S
M
A
N
U
AT210701
AT211001
AT211501
A
L
This manual should be furnished to the
end user of this system; its use will re-
duce service calls and chance of injury
and will lengthen system life.
AT237 (Rev. 8/22/97)
Advertisement
Table of Contents

Subscribe to Our Youtube Channel
Summary of Contents for AquaTools 3/4 HP
- Page 1 SWIMMING POOL OR SPA PUMPS W N E R ’ INSTALLATION, OPERATION & PARTS MODELS 3/4 HP AT210701 1 HP AT211001 1-1/2 HP AT211501 This manual should be furnished to the end user of this system; its use will re- duce service calls and chance of injury and will lengthen system life.
-
Page 2: Table Of Contents
To avoid unneeded service calls, prevent possible injuries, and get the most out of your pump and filter, READ THIS MANUAL CAREFULLY! The Aquatools self-priming centrifugal pump is designed to be used as a fil- tration or circulation system pump for in-ground swimming pools, spas, hot tubs, and solar systems. -
Page 3: Safety Instructions
• BE SURE all air is out of system before testing. BEFORE WORKING • Tighten Aquatools trap lids to 30 ft. lbs. (4.1 kg-cm) ON PUMP OR MOTOR: torque for testing. • Water pressure for test must be less than 25 PSI Unplug pump motor. -
Page 4: Installation
GENERAL NOTICE: Pump suction and discharge connections have molded-in thread stops. DO NOT try to screw pipe in Pump has been carefully assembled, tested, inspected and beyond these stops. Tighten pump/trap fittings only as re- packed at our factory. Note any damage to product on de- quired to ensure tight connection (1-1/2 turns past hand livery ticket and file claim promptly with carrier or store of tight). -
Page 5: Electrical
FITTINGS For size of GFCI required and test procedures for GFCI, see manufacturer’s instruction. Fittings restrict flow. Use fewest possible fittings. In case of power outage, check GFCI for tripping (which Avoid fittings that could cause an air trap. will prevent normal water circulation). Reset if neces- Pool and spa fittings must conform to International sary. -
Page 6: Operation
GROUNDING (Fig. 5) OPERATION Permanently ground motor; use size and type wire re- NEVER run pump dry. quired by code. Running pump dry may Ground connection must be made to green grounding damage seals, causing leak- screw under motor canopy or access plate. age and flooding. -
Page 7: Pump Service
valves are open when pump is running. See Trouble- pump. Remove pump hold down bolts. Disconnect shooting Guide. pipe unions or clamps adjacent to pump. Withdraw complete pump/motor assembly. POOL, SPA OR TUB WATER 2. Remove 6 screws (Key No. 3, Page 10) and withdraw Keep water level 2"... -
Page 8: Storage/Winterizing
seal plate (Key No. 4, Page 10). DRAINING PUMP 7. Install the slinger (2) on the end of the impeller sleeve. Explosion hazard. Purging the system with 8. Steps (3) through (7) result in subassembly of seal compressed air can cause components to explode, with plate, diffuser, impeller, seal and slinger (Key Nos. -
Page 9: Troubleshooting Guide
TROUBLESHOOTING GUIDE MECHANICAL TROUBLES / NOISE Only qualified personnel should electrically test pump motor. 1. Make sure suction and discharge piping are sup- DISCONNECT POWER TO MOTOR BEFORE ported. WORKING ON PUMP. Close suction and dis- 2. Securely mount pump on concrete platform for qui- charge gate valves. -
Page 10: Repair Parts List
AQUATOOLS POOL PUMP 3/4 through 1-1/2 HP Models 228 0893 Repair Parts Part Part Description Qty. Motor Chart at Right Screw, #10-32x1/2” U30-692SS Bonding Lug U17-568 Water Slinger C69-23 Capscrew, #10-24x5/8” Lg. U30-152SS Seal Plate 17140-0012 “O” Ring 17140-0026 Shaft Seal... -
Page 11: Warranty
Retain Warranty Certificate (upper portion) in a safe and convenient location for your records. DETACH HERE: Fill out bottom portion completely and mail within 10 days of purchase/installation to: AquaTools, Attn: Warranty Dept., 293 Wright St., Delavan, WI 53115 Warranty Registration Card...


Need help?
Do you have a question about the 3/4 HP and is the answer not in the manual?
Questions and answers