Table of Contents
Advertisement
Quick Links
Advertisement
Table of Contents

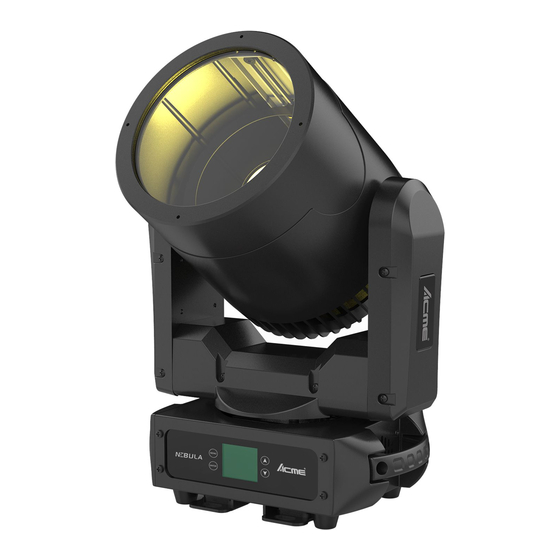
Summary of Contents for ACME NEBULA
-
Page 2: Table Of Contents
CONTENTS 1. Safety Instructions ..........................2 2. Technical Specifications ........................3 3. Control Panel ............................ 4 4. How to set the fixture ........................5 4.1 Menu .............................. 5 5. Control by DMX 512 controller ...................... 12 5.1 DMX Connection .......................... 12 5.2 DMX Address Setting ........................ -
Page 3: Safety Instructions
1. Safety Instructions Please read carefully the instruction, which includes important information about the installation, usage and maintenance. WARNING Please keep this User Guide for future consultation. If you sell the unit to another user, be sure that they also receive this instruction booklet. ... -
Page 4: Technical Specifications
moisture. DO NOT open the unit within five minutes after switching off. The housing, the lenses, or the ultraviolet filter must be replaced if they are visibly damaged. Caution: There are no user serviceable parts inside the unit. DO NOT open the housing or attempt any repairs yourself. -
Page 5: Control Panel
CM-250Z WW/3000K CM-250Z CW /5700K Color temperature Beam Angle: 10-40 Degree Dimension/ Weight: 310x218x451.5mm, 10.3Kg 12.2"x8.6"x17.8"in, 22.7lbs 3. Control Panel 1. Monitor (Batter Back-up display): 2. Button: MENU To enter into move backward or leave the menu To go backward to move up in the menu DOWN To go to move down in the menu... -
Page 6: How To Set The Fixture
4/5. FMX input /output: DMX 512 link, use 5 XLR cable to link the unit and DMX controller. 6. Power In: To connect to the mains supply 7. Power Out: To connect to the next lamp supply 4. How to set the fixture 4.1 Menu To select any of the given functions, press the MENU button up to when the required one is showing on the display. - Page 8 DMX Functions Enter MENU mode, select DMX Functions, press the ENTER button to confirm, use the UP/DOWN button to select DMX Address, DMX Channel Mode, View DMX Value or WDMX Setting. DMX Address To select DMX Address, press the ENTER button to show the DMX ADDRESS on the display. Use the UP/DOWN button to adjust the address from 001 to 512, press the ENTER button to setup.
- Page 9 Press the MENU button back to the last menu or let the unit idle one minute to exit menu mode. P/T Feedback To select P/T Feedback, press the ENTER button to show the P/T Feedback on the display. Use the UP/DOWN button to select No (normal) or Yes (tilt inverse), press the ENTER button to setup.
- Page 10 setup. Press the MENU button back to the last menu or let the unit idle one minute to exit menu mode. Display Setting Enter MENU mode, select Display Setting, press the ENTER button to confirm, use the UP/DOWN button to select Display Inverse, Backlight Switch, Backlight Intensity ,Temperature unit or Language.
- Page 11 button back to the last menu or let the unit idle one minute to exit menu mode. Fixture Test Enter MENU mode, select Fixture Test, press the ENTER button to confirm, use the UP/DOWN button to select Auto Test or Manual Test Auto Test To select Auto Test, press the ENTER button to show the AUTO TEST on the display.
- Page 12 Press the ENTER button to confirm, use the UP/DOWN button to select No or Yes (the fixture will reset to factory settings and exit menu mode). DMX START 0-512 MANUFAC TURER ACME DEVICE MODEL DESCRIPTION CM-250Z DMX PERSONALITY 10CH...
-
Page 13: Control By Dmx 512 Controller
5. Control by DMX 512 controller 5.1 DMX Connection 1. Connect the fixture together in a “daisy chain” by XLR plug cable from the output of the fixture to the input of the next fixture. The cable cannot be branched or split to a “Y” cable. Inadequate or damaged cables, soldered joints or corroded connectors can easily distort the signal and shut down the system 2. -
Page 14: Dmx Configuration
512 so that the units can receive DMX signal. Press the MENU button up to when the DMX Address is showing on the display. Pressing ENTER button and the display will blink. Use DOWN and UP button to change the DMX512 address. Once the address has been selected, press and keep ENTER button pressed up to when the display stops blinking or storing automatically 8 seconds later. -
Page 16: Troubleshooting
6. Troubleshooting Following are a few common problems that may occur during operation. Here are some suggestions for easy troubleshooting: A. The unit does not work, no light and the fan does not work 1. Check the connection of power and main fuse. 2. -
Page 17: Fixture Cleaning
2. If the DMX LED is on and no response to the channel, check the address settings and DMX polarity. 3. If you have intermittent DMX signal problems, check the pins on connectors or on PCB of the unit or the previous one. 4. - Page 20 Declaration of Conformity We declare that our products (lighting equipments) comply with the following specification and bears CE mark in accordance with the provision of the Electromagnetic Compatibility (EMC) Directive 89/336/EEC. EN55103-1: 2009+A1:2012; EN55103-2: 2009; EN61000-3-2: 2014; EN61000-3-3: 2013. & Harmonized Standard EN 60598-1:2015;...


Need help?
Do you have a question about the NEBULA and is the answer not in the manual?
Questions and answers