Table of Contents
Advertisement
Quick Links
Advertisement
Table of Contents

Related Manuals for Bold Flame Nuxcio


Summary of Contents for Bold Flame Nuxcio
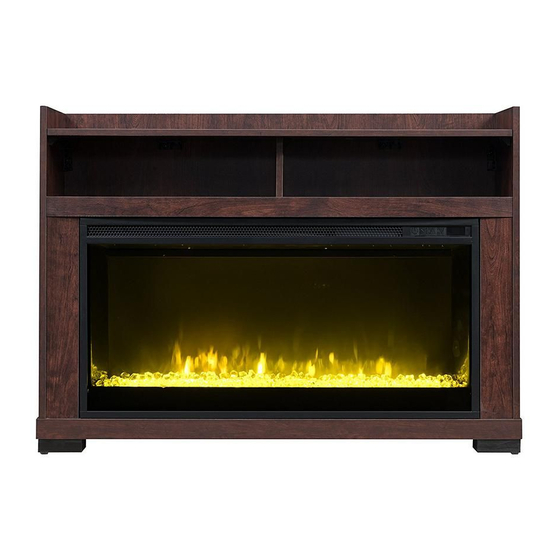
- Page 1 SP5292 Nuxcio USER MANUAL Please carefully check the unit and make sure there is no damage when you open the carton. QUESTIONS, PROBLEMS, OR MISSING PARTS? Please Contact Customer Service Before Returning to Store www.soupro.com cs@soupro.com +1-800-239-0689 Keep this manual for future reference...
-
Page 2: Table Of Contents
Table of Contents • GENERAL INFORMATION Package Contents Safety Instructions Maximum Load Warning Warranty • ASSEMBLY INSTRUCTIONS Preparation Assembly • FIREBOX OPERATIONS FCC/IC Information Safety Information Operating Instructions Care And Maintenance Troubleshooting Package Contents Fireplace Mantel Firebox Remote Control SP5292 SP3618-HE-FGPB... -
Page 3: Safety Instructions
Safety Instructions Please read and understand this entire manual before attempting to assemble, operate or install the product. IMPORTANT NOTICE When using electrical appliances, basic precautions should always be followed to reduce the risk of fire, electric shock and injury to persons, including the following: WARNING: Place this unit in a location that avoids direct sunlight and high temperatures. -
Page 4: Warranty
1-YEAR LIMITED WARRANTY Source Pro USA Inc. (hereinafter referred to collectively as “the Company”) warrants that your new Bold Flame Electric Fireplace is free from manufacturing and materials defects for a period of one (1) year from date of purchase. Subject to the... -
Page 5: Preparation
Preparation IMPORTANT INFORMATION 1. Before you begin, locate the instructions and hardware. Be sure you have all of the parts and can identify them. 2. To avoid scratching the finish, assemble the product on a soft, non-abrasive surface such as carpet or cardboard. - Page 6 Preparation Parts List Base Panel Centre Up Panel Side Panel, Left Back Panel Side Panel, Right Cabinet Top Panel Front Panel, Left Front Panel, Right Media Shelf...
-
Page 7: Assembly
Assembly Do not fully tighten screws during assembly. Only tighten when all parts are installed in place. Unscrew two screws from each side, located behind the side flanges. Keep them for later use. Caution: Do Not let front face panel fall forward once the screws are removed. - Page 8 Assembly Do not fully tighten screws during assembly. Only tighten when all parts are installed in place. Spread the Acrylic Shards onto the emberbed area. Then Re-Install the face frame. Align the front frame with the body, plug in the wire bundle to the control panel. Install the four screws.
- Page 9 Assembly Do not fully tighten screws during assembly. Only tighten when all parts are installed in place. BB x 2 EE x 2 BB x 4...
- Page 10 Assembly Do not fully tighten screws during assembly. Only tighten when all parts are installed in place. BB x 3 EE x 3 BB x 6 II x 4...
- Page 11 Assembly Do not fully tighten screws during assembly. Only tighten when all parts are installed in place. BB x 4 CC x 2 JJ x 2 II x 2...
- Page 12 Assembly Do not fully tighten screws during assembly. Only tighten when all parts are installed in place. BB x 5 JJ x 6 II x 4...
- Page 13 Assembly Do not fully tighten screws during assembly. Only tighten when all parts are installed in place. BB x 4...
- Page 14 Assembly Do not fully tighten screws during assembly. Only tighten when all parts are installed in place.
- Page 15 Assembly Do not fully tighten screws during assembly. Only tighten when all parts are installed in place.
- Page 16 Assembly Do not fully tighten screws during assembly. Only tighten when all parts are installed in place. Anti-Tipping Device KK x 2 LL x 2 MM x 2 NN x 4 OO x 2 WARNING: • If installing the mantel on drywall or other hollow wall applications, the safety mounting tape (KK) must be fastened to studs, headers, or other structural wall members. The included plastic wall anchors (OO) are intended for use with solid wall applications only (tile or concrete).
-
Page 17: Fcc/Ic Information
Firebox Model SP3618-HE-FGPB ATTENTION: • Find a location for the firebox that is protected from direct sunlight. • Failure to read all instructions may result in a possible electric shock, fire hazard and/or injury and will void the warranty. WARNING: •... -
Page 18: Safety Information
Safety Information Use this firebox only as described in the manual. Any other use is NOT recommended by the manufacturer and may cause fire, electric shock or injury to persons. CAUTION: • If possible, ALWAYS unplug this firebox when not in use. •... -
Page 19: Operating Instructions
Operating Instructions Power Button Flame Brightness Mode • The Flame Brightness Mode sets the flame brightness. • Press the POWER button to turn ON or OFF the unit. • Use UP arrow button or DOWN arrow button to scroll • When the unit is in ON mode, the power icon indicator through the flame brightness settings: F0 (no flame), light will be shown green. -
Page 20: Care And Maintenance
Care And Maintenance CLEANING INFORMATION: • Make sure the unit is turned off, unplugged and the heating elements of heater are cool whenever you are cleaning the heater. • Clean the metal trim using a water-dampened, soft, and clean cloth. DO NOT use brass polish or household cleaners as these products will damage the metal trim. -
Page 21: Troubleshooting
Care And Maintenance DISPOSAL OF USED BATTERY: A battery may contain hazardous substances that could be endangering to the environment and human health. • This symbol marked on the battery and/or packaging indicates that used battery shall not be treated as municipal waste. Instead it shall be left at the appropriate collection point for recycling. •... - Page 22 QUESTIONS, PROBLEMS, OR MISSING PARTS? Please Contact Customer Service Before Returning to Store www.soupro.com cs@soupro.com +1-800-239-0689 Crafted in China Distributed by Source Pro USA Inc., 26300 SC HWY 121, Whitmire, SC 29178 USA Ver. 3...
Need help?
Do you have a question about the Nuxcio and is the answer not in the manual?
Questions and answers