Table of Contents
Advertisement
Available languages
Available languages
Quick Links
allen + roth
is a registered trademark
®
of LF, LLC. All Rights Reserved.
Serial Number
Questions, problems, missing parts? Before returning to your retailer, call our customer service department at 1-866-439-9800, 8 a.m. - 8
p.m., EST, Monday - Sunday. You may also contact us anytime at Lowes.com/allenandroth
VR20206
Purchase Date
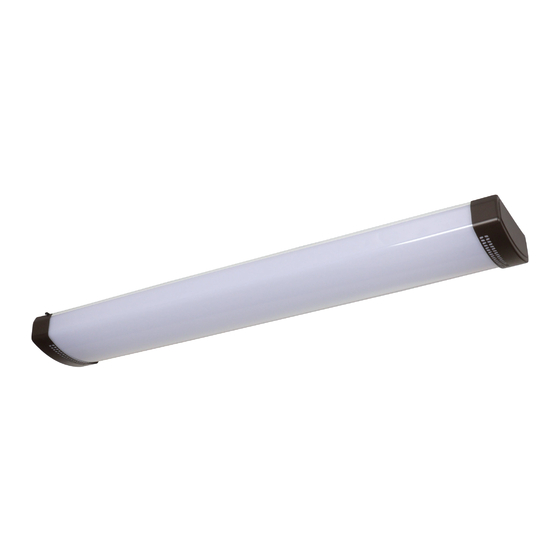
LED Linear Decorative Light
1
ITEM #2592462
MODEL #LF1281-BR4-46LFC-R
Français p. 9
Español p. 17
ATTACH YOUR RECEIPT HERE
JOIGNEZ VOTRE REÇU ICI
ADJUNTE SU RECIBO AQUÍ
Français p.
Français p.
Advertisement
Chapters
Table of Contents

Related Manuals for Allen + Roth LF1281-BR4-46LFC-R


Summary of Contents for Allen + Roth LF1281-BR4-46LFC-R
- Page 1 ITEM #2592462 LED Linear Decorative Light MODEL #LF1281-BR4-46LFC-R allen + roth is a registered trademark ® of LF, LLC. All Rights Reserved. Français p. Français p. 9 Français p. Español p. 17 ATTACH YOUR RECEIPT HERE JOIGNEZ VOTRE REÇU ICI ADJUNTE SU RECIBO AQUÍ...
-
Page 2: Table Of Contents
TABLE OF CONTENTS PACKAGE CONTENTS ............................2 HARDWARE CONTENT ............................3 PREPARATION ................................ 3 SAFETY INFORMATION ............................3 5 LIGHT SETTING BUTTON ............................ 4 ASSEMBLY INSTRUCTIONS ..........................4 CARE AND MAINTENANCE ............................ 8 TROUBLESHOOTING ............................. 8 WARRANTY ................................8 REPLACEMENT PARTS LIST ..........................8 PACKAGE CONTENTS PART DESCRIPTION... -
Page 3: Hardware Content
HARDWARE CONTENT (shown actual size) Mounting Screw Wire Nut Qty. 4 Qty. 1 Wood Screw Qty. 2 (Pre-installed on the fixture as picture.6) Wire Connector Washer Green Ground Screw Mounting Bracket Qty. 2 Qty. 2 Qty. 1 Qty. 1 Support Chain Qty. -
Page 4: Light Setting Button
5 Light Setting Button The 5 light Setting Button (E) is located along the top edge side of the fixture that allows the color temperature of the light to be adjusted between 5 values: 2700K,3000K, 4000K, 5000K, 6500K. Press button until desired color temperature is achieved. NOTE: Default setting is 4000K Removable button Optional: To remove the 5 light Setting Button (E) from view, pull the... - Page 5 3. Attach mounting bracket (AA) to the electrical box, using existing electrical box screws (BB). Hardware Used Mounting Bracket Qty. 1 3/8 in./ 1 cm Mounting Screws Qty. 2 4. Using support chain (DD), connect one end to back of fixture pan (B) in the specially designed slots.
- Page 6 5b. Option 2: If a metal electrical box is used as part of a grounded system, attach the ground wire from the back of the fixture pan with the green ground screw (GG) and attach the grounding wire to the mount- ing bracket (AA).
- Page 7 8a. DRYWALL: For added support on the outer ends, use a hand held Phillips head screwdriver to install the pre-installed ReadyAnchorTM (D). As the ReadyAnchor (D) turns, it will break free from its plastic base. Continue turning to puncture into the drywall and tighten until the ReadyAnchor (D) bottoms out.
-
Page 8: Care And Maintenance
CARE AND MAINTENANCE Periodically clean the fixture and diffuser using a mild, non-abrasive cleaner and soft cloth. When cleaning the fixture, make sure the power is turned off. Do not spray cleaner directly onto any part of the fixture or LEDs. TROUBLESHOOTING PROBLEM POSSIBLE CAUSE... - Page 9 ARTICLE #2592462 Lampe d’éclairage décoratif linéaire à DEL allen + roth est une marque de commerce ® MODÈLE #LF1281-BR4-46LFC-R déposée de LF, LLC. Tous droits réservés. Numéro de série : Date d’achat : Des questions, des problèmes, des pièces manquantes? Avant de retourner l’article au détaillant, appelez notre service à la clientèle au 1 866 439-9800, entre 8 h et 20 h (HNE), du lundi au dimanche.
-
Page 10: Contenu De L'emballage
TABLE DES MATIÈRES CONTENU DE L’EMBALLAGE ..........................10 QUINCAILLERIE INCLUSE ............................. 11 PRÉPARATION ................................ 11 CONSIGNES DE SÉCURITÉ ........................... 11 BOUTON DE RÉGLAGE DE LA LUMIÈRE À 5 POSITIONS ................... 12 INSTRUCTIONS POUR L’ASSEMBLAGE ....................... 12 ENTRETIEN ................................16 DÉPANNAGE ................................16 GARANTIE ................................ -
Page 11: Quincaillerie Incluse
QUINCAILLERIE INCLUSE (grandeur réelle) Vis de montage Capuchon de connexion Qté : 4 Qté : 1 Vis à bois Qté : 2 Raccordement instantané déjà installés comme illustré 6 Support de fixation Rondelle Vis de mise à Qté : 1 Qté... -
Page 12: Bouton De Réglage De La Lumière À 5 Positions
Bouton de réglage de la lumière à 5 positions Le bouton de réglage de la lumière à 5 positions (E) est situé sur le bord supérieur du luminaire et permet d’ajuster la température de cou- leur de la lumière entre 5 valeurs : 2 700 K, 3 000 K, 4 000 K, 5 000 K, 6 500 K. - Page 13 3. Fixez le support de fixation (AA) au coffret de branchement à l’aide des vis du coffret de branchement existantes. Quincaillerie utilisée Support de fixation Qté : 1 3/8 in./ 1 cm Vis de montage Qté : 2 4. Fixez une extrémité de la chaîne de support (DD) à l’arrière du sup- port du luminaire (B) dans les fentes spécialement conçues à...
- Page 14 5b. Option 2 : Si un coffret de branchement métallique est utilisé com- me élément d’un système mis à la terre, fixez le fil de mise à la terre par l’arrière du support du luminaire avec la vis de mise à la terre verte (GG) et reliez le fil de mise à...
- Page 15 8a. CLOISON SÈCHE : Pour un soutien accru des extrémités extérieures, utilisez un tournevis cruciforme à main pour installer le ReadyAnchor (D) préalablement positionné. Lorsque le ReadyAnchor (D) tourne, il se libère de sa base en plastique. Continuez de le tourner pour percer la cloison sèche, puis serrez jusqu’à...
-
Page 16: Entretien
ENTRETIEN Nettoyez périodiquement le luminaire et le diffuseur à l’aide d’un nettoyant pour vitres doux et non abrasif et d’un linge doux. Assurez-vous que le luminaire est éteint avant de le nettoyer. Ne vaporisez pas de produit nettoyant directement sur les pièces du luminaire ou sur les ampoules à DEL. DÉPANNAGE PROBLÈME CAUSE POSSIBLE... - Page 17 ARTÍCULO n.º2592462 Luz decorativa lineal LED MODELO # LF1281-BR4-46LFC-R allen + roth son marcas registradas de LF, ® LLC. Todos los derechos reservados. Número de serie: Fecha de compra: ¿Preguntas, problemas, piezas faltantes? Antes de volver a la tienda, llame a nuestro Departamento de Servicio al Cliente al 1-866-439-9800 de 8 a.m.
-
Page 18: Contenido Del Paquete
ÍNDICE CONTENIDO DEL PAQUETE ..........................18 ADITAMENTOS ................................ 19 PREPARACIÓN ................................ 19 INFORMACIÓN DE SEGURIDAD ..........................19 BOTÓN DE LUZ DE 5 CONFIGURACIONES ......................20 INSTRUCCIONES DE ENSAMBLAJE ........................20 CUIDADO Y MANTENIMIENTO ..........................24 SOLUCIÓN DE PROBLEMAS ..........................24 GARANTÍA ................................ -
Page 19: Aditamentos
ADITAMENTOS (se muestra en tamaño real) Tornillo de montaje Empalme plástico Cant. 4 Cant. 1 Tornillo para madera Cant. 2 preinstalados de acuerdo con la ilustración 6 Soporte de montaje Arandela Tornillo Cant. 1 Cant. 2 verde de puesta a tierra Cant. -
Page 20: Botón De Luz De 5 Configuraciones
Botón de luz de 5 configuraciones El botón de luz de 5 configuraciones (E) se encuentra a lo largo del lado superior del borde de la lámpara que permite ajustar la tempera- tura de color de la luz entre 5 valores: 2700K, 3000K, 4000K, 5000K, 6500K. - Page 21 3. Fije el soporte de montaje (AA) a la caja eléctrica con los tornillos existentes de la caja eléctrica (BB). Aditamentos utilizados Soporte de montaje Cant. 1 3/8 in./ 1 cm Tornillo de montaje Cant. 2 4. Con la cadena de soporte (DD), conecte un extremo a la parte posterior de la bandeja de la lámpara (B) en las ranuras especialmente diseñadas.
- Page 22 5b. Opción 2: si se utiliza una caja eléctrica metálica como parte de un sistema con conexión a tierra, conecte el cable de tierra de la parte posterior de la bandeja de la lámpara con el tornillo verde de puesta a tierra (GG) y conecte el cable de puesta a tierra al soporte de montaje (AA).
- Page 23 8a. PANEL DE YESO: para lograr un mayor soporte en los extremos exteriores, use un destornillador Phillips manual para instalar la ReadyAnchorTM (D) preinstalada. A medida que comience a girar la ReadyAnchor (D), se irá separando de la base de plástico. Continúe girando para perforar el panel de yeso y apriete hasta que la ReadyAnchor (D) haga tope.
-
Page 24: Cuidado Y Mantenimiento
CUIDADO Y MANTENIMIENTO Limpie periódicamente el accesorio para iluminación y el difusor utilizando un limpiador suave que no sea abrasivo y un paño suave. Cuando limp- ie el accesorio para iluminación, asegúrese de que la alimentación eléctrica esté desconectada. No rocíe limpiador directamente sobre ninguna parte del accesorio para iluminación de luces LED.
Need help?
Do you have a question about the LF1281-BR4-46LFC-R and is the answer not in the manual?
Questions and answers