Table of Contents
Advertisement
Available languages
Available languages
Quick Links
welcoming • sophisticated • inspiring
allen + roth
is a registered trademark
®
of LF, LLC. All Rights Reserved.
ATTACH YOUR RECEIPT HERE
Serial Number
Purchase Date
Questions, problems, missing parts? Before returning to your retailer, call our customer
service department at 1-866-439-9800, 8 a.m. – 8 p.m., EST, Monday - Friday.
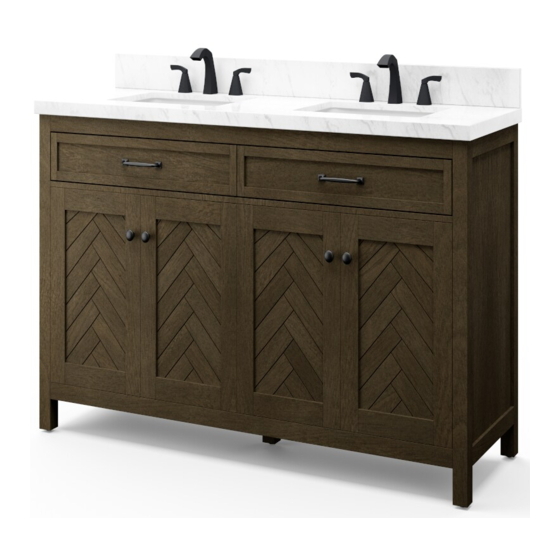
VANITY WITH TOP
MODEL #LWSH60VW
Français p. 9
Español p. 17
1
PACKAGE CONTENTS
PART
C
A
B
HARDWARE CONTENTS
Note: Hardware shown not actual size.
AA
x 1
Touch-up Pen
SAFETY INFORMATION
Please read and understand this entire manual before attempting to assemble or install the product.
WARNING
Do not stand on vanity. Use vanity on level ground. Base
vanity supports a maximum weight of 200 lbs. Exceeding
maximum weight limit will compromise the integrity of the
vanity structure and could cause the vanity to fail.
CAUTION
Failure to follow cautions could result in serious injury.
Do not hang from the vanity.
Do not taking off the vanity top to avoid damaging the vanity.
Clean all fluids from the stone surface to prevent stains. Wipe off the soap or toothpaste immediately to prevent
permanent damage to the stone surface.
PREPARATION
Before beginning assembly of product, make sure all parts are present. Compare parts with package contents list and
hardware contents list. If any part is missing or damaged, do not attempt to assemble the product.
Estimated Assembly Time: 30 minutes
Tools Required (not included): Silicone compound, Phillips screwdriver, Level, Stud Finder, Pencil, Variable Speed Drill.
DESCRIPTION
QUANTITY
A
Vanity Top
1
B
Vanity Base
1
C
Backsplash
1
Maximum load 200 lb. (90.71 kg)
Maximum load 10 lb. (4.54 kg)
Maximum load 50 lb. (22.7 kg)
2
Advertisement
Table of Contents

Related Manuals for Allen + Roth LWSH60VW


Summary of Contents for Allen + Roth LWSH60VW
- Page 1 Maximum load 10 lb. (4.54 kg) Maximum load 50 lb. (22.7 kg) CAUTION allen + roth is a registered trademark ® of LF, LLC. All Rights Reserved. Failure to follow cautions could result in serious injury.
- Page 2 ASSEMBLY INSTRUCTIONS ASSEMBLY INSTRUCTIONS Step 4: Step 1: Move vanity (B) into proper place against the wall. Remove stone top and the packaging material under the stone top. Step 2: Step 5: a. Apply a thin bead of silicone compound (not included) to Install faucet, drain and supply lines (none included) to the top of the vanity base (B).
- Page 3 ASSEMBLY INSTRUCTIONS ASSEMBLY INSTRUCTIONS Step 7: Step 10: To mount the backsplash (C) to the wall, apply a thin bead Plastic Holder a. The door panels are reversible. of silicone compound (not included) to the unpolished b. The doors of this unit are shipped with the trim facing back side and bottom of the backsplash (C).
-
Page 4: Care And Maintenance
CARE AND MAINTENANCE REPLACEMENT PARTS LIST For replacement parts, call our customer service department at 1-866-439-9800, 8 a.m. - 8 p.m., EST, • Dust the vanity regularly with a soft, non-lint producing cloth or household dusting product. Monday - Friday. •... - Page 5 90,71 kg. Si le poids maximum est dépassé, cela compromettra l’intégrité de la Charge maximale 50 lb. (22,7 kg) structure du meuble-lavabo et celui-ci pourrait se détériorer. allen + roth est une marque de commerce ® déposée de LF, LLC. Tous droits réservés.
-
Page 6: Instructions Pour L'assemblage
INSTRUCTIONS POUR L’ASSEMBLAGE INSTRUCTIONS POUR L’ASSEMBLAGE Étape 1: Étape 4: Retirez le dessus en pierre et le matériau d’emballage Placez le meuble-lavabo (B) contre le mur à l’endroit désiré. sous le dessus en pierre. Étape 2: Étape 5: a. Appliquer un mince cordon de mastic silicone (non Installez le robinet, le drain et les conduites d’alimentation (non inclus) au comptoir de meuble-lavabo (A) selon les inclus) sur le dessus de la base de vanité... - Page 7 INSTRUCTIONS POUR L’ASSEMBLAGE INSTRUCTIONS POUR L’ASSEMBLAGE Étape 7: Étape 10 Support en Pour installer le dosseret (C) au mur, appliquez un mince plastique a. Les panneaux de porte sont réversibles. trait de composé de silicone (non inclus) sur les surfaces b.
- Page 8 SOIN ET ENTRETIEN LISTE DES PIÈCES DE RECHANGE • Époussetez régulièrement le meuble-lavabo à l’aide d’un linge doux et non pelucheux ou d’un ac- Pour obtenir des pièces de rechange, communiquez avec notre service à la clientèle au 1 866 439- cessoire pour l’époussetage domestique.
- Page 9 Carga máxima 50 lb. (22.7 kg) del tocador y este podría fallar. PRECAUCIÓN allen + roth es una marca registrada de ® LF, LLC. Todos los derechos reservados. No tomar en cuenta las precauciones podría provocar lesiones serias.
- Page 10 INSTRUCTIVO DE ENSAMBLE INSTRUCTIVO DE ENSAMBLE Paso 4: Paso 1: Mueva el tocador (B) hasta su ubicación adecuada contra Retirar la tapa de piedra y el material de envió bajo la la pared. tapa de piedra. Paso 2: Paso 5: a.
- Page 11 INSTRUCTIVO DE ENSAMBLE INSTRUCTIVO DE ENSAMBLE Paso 10: Paso 7: Soporte de Para montar el protector contra salpicaduras (C) en la a. Los paneles de la puertas son reversibles. plástico pared, aplique una cantidad pequeña de compuesto de b. Las puertas de esta unidad se envían con el reborde Silicone silicona (no se incluye) en la parte posterior sin pulir y mirando hacia la parte delantera de la unidad.
-
Page 12: Mantenimiento Y Cuidados
MANTENIMIENTO Y CUIDADOS LISTA DE PARTES DE REPUESTO • Limpie el tocador regularmente con un paño suave que no deje pelusas o con un producto Para obtener piezas de repuesto, llame a nuestro Departamento de Servicio al Cliente al 1-866-439- delimpieza doméstico.
Need help?
Do you have a question about the LWSH60VW and is the answer not in the manual?
Questions and answers