Table of Contents
Advertisement
Advertisement
Table of Contents

Related Manuals for FITLIGHT Trainer FLB10002DC


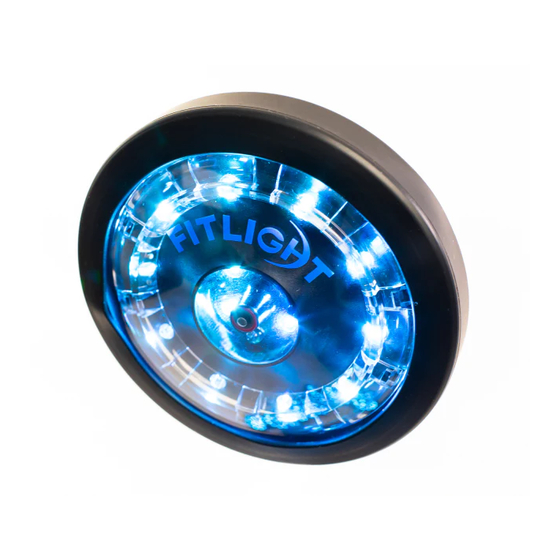
Summary of Contents for FITLIGHT Trainer FLB10002DC
- Page 1 USER MANUAL FITLIGHT Trainer User Manual ™...
-
Page 2: Table Of Contents
OPERATIONAL TIPS SYSTEM OPERATION QUICK GUIDE: MAIN MENU PARAMETER EXPLANATIONS RANDOM TRAINING SET-UP PROGRAM OR EDIT SEQUENCE MULTIPLE FITLIGHT™ ACTIVATIONS PROGRAM EXAMPLE SAVE & NAME A PROGRAM DELETE A STEP EDIT/INSERT A STEP RUN PROGRAMMED SEQUENCE SPLIT TIME TRAINING HAND/EYE COORDINATION FITLIGHT™... - Page 3 SETTINGS While the information contained in this manual is deemed to be accurate at the time of publishing, FITLIGHT Sports Corp. reserves the right to make changes and additions, deletions without notice. This publication cannot be copied without the prior written consent of FITLIGHT Sports Corp.
-
Page 4: General Information
US FCC Modification warning (FCC Part 15.21) Warning: Any changes or modifications not expressively approved by FITLIGHT SPORTS CORP. could void the user’s authority to operate this equipment... -
Page 5: Registration & Support
GENERAL INFORMATION REGISTRATION & SUPPORT REGISTER your FITLIGHT Trainer™ to comply with the Warranty Serial Number Requirements. Please go to www.Fitlighttraining.com and click on the “Register” icon located at the top right of the webpage. Please have your serial number nearby, located on the inside cover of your Charger Case. -
Page 6: Handling Instructions
It is recommended that you keep all of the information included with your FITLIGHT Trainer™ in a safe place in the event you need to reference it again. Should you lose it, you can either request another copy by emailing info@ or selecting the “lost your password?”... -
Page 7: Important Notices
The FITLIGHT Trainer™ should not be recharged in any environment that is exposed to rain or water. Recharging of the FITLIGHT Trainer™ should be done under dry conditions when used externally. r Do not attempt to alter the characteristics of the FITLIGHT Trainer™ in any way that can lead to damage to the FITLIGHT Trainer™ or personal injury. -
Page 8: Warranty
Subject to the exclusions, limitations and conditions stated, FITLIGHT Sports Corp. warrants to the original purchaser that FITLIGHT™ products shall be free from defects in material and workmanship for the period of one year under normal consumer use, unless specified otherwise on your product package and / or contained in your user documentation, from the original date of purchase. - Page 9 FITLIGHT Sports Corp. may direct with a copy of the sales receipt or dated itemized receipt. Shipping and handling charges may apply except where prohibited by applicable law.
- Page 10 FITLIGHT Sports Corp. may refund to Customer the purchase price paid for the product or part. Parts removed by FITLIGHT Sports Corp. shall become the sole property of FITLIGHT Sports Corp.
-
Page 11: System Information
SYSTEM INFORMATION WHAT’S INCLUDED? The following items are included with each FITLIGHT Trainer™ system. FITLIGHTS™ CHARGER CASE TABLET CONTROLLER TABLET POWER SUPPLY CHARGER POWER SUPPLY VELCRO PADS... -
Page 12: Technical Specs
Power Consumption: 30 Watts. PHYSICAL DATA COMPLIANCE RATING Weight: 0.3 kg (10oz / .7lbs) per FITLIGHT™ The FITLIGHT Trainer™ has been tested against industry Weight: 12 Light System : 8.2 kg (18 lbs) standards and is approved to the following:... -
Page 13: Charging The System
CHARGING THE SYSTEM CHARGING INSTRUCTIONS 4 EASY STEPS TO CHARGE THE FITLIGHT TRAINER™ FITLIGHTS™ properly nested in charger case Insert the Charger case power supply into the with the white dots visible (as shown). electrical outlet. Now insert the Charger Power Supply into Connect the Tablet Controller power supply the dual jack as shown. - Page 14 Charger Case until the FITLIGHTS™ are inserted correctly. Interrupted power to the Charger Case is easily determined by removing one FITLIGHT™ at a time and the remaining FITLIGHTS™ will come on once the misaligned FITLIGHT™ is removed. Reposition the FITLIGHTS™ in the Charger Case until they are illuminated.
-
Page 15: Operational Tips
It is important that the FITLIGHTS™ are positioned in the charging case correctly and are seated in the cradle. Always place the FITLIGHTS™ in the Charger with the Velcro attachment on the FITLIGHT™. When the FITLIGHTS™ are inserted correctly and the system is powered up, the FITLIGHTS™ will be either yellow (this indicates charging) or red (this indicates that the batteries are low) which means the batteries are low. - Page 16 OPERATIONAL TIPS The Tablet Controller enables you to operate the FITLIGHT Trainer™. You can program routines, collect and store data, edit drills and create various programs. The Tablet Controller can also be used to upload your saved data to the Dashboard further analysis.
-
Page 17: System Operation
QUICK GUIDE: MAIN MENU Indicates the status of the dongle Multiple screens of the Tablet Controller Indicates the status of the FITLIGHT™ set up Volume control of the Tablet Controller (increases the volume) Indicates the status of the wireless connection Menu for recording Data Indicates the status of the FITLIGHT™... -
Page 18: Parameter Explanations
The time between more than 1 FITLIGHT™: (The interval between FITLIGHTS™ activating in succession). DISTANCE: Indicates the deactivation range from the center of the FITLIGHT™. The distance can be set from 10 cms to 80 cms and can be changed with the use of the +/- buttons. - Page 19 Select “Define hits per colour” and a new menu screen will appear for the selection of hits per colour. Select the number of hits per FITLIGHT™ by moving the slide bar to the desired number of hits per colour. The number of hits per colour will be illustrated and the total hits will be deducted from the original set-up.
-
Page 20: Random Training Set-Up
RANDOM TRAINING SET-UP DISTANCE: Indicates the deactivation range from the center of to be deactivated upon impact). the FITLIGHT™. The distance can be set from 10 cms to 80 cms. DELAY: Select the “Delay”, for the interval between FITLIGHTS™ TIMEOUT: The time out can be set from 0.10 seconds to 120... - Page 21 SYSTEM OPERATION 14. LOAD PRESET: Select “Load Preset” if the set-up has been saved Select if sound (Beep) is required. before. 11. SAVE DATA: Select “Save Data” if you require the results/data of the routine to be saved and uploaded to the Dashboard. 15.
-
Page 22: Program Or Edit Sequence
Once the number appears in the window, touch “OK”. In this example, FITLIGHT™ #1 is selected. Once “Ok” is selected a new screen will appear which will allow the selection of all the FITLIGHT™ parameters. Repeat the process as per the previous step for all subsequent FITLIGHTS™ required for the routine... - Page 23 Indicates the deactivation range from the center of LIGHT MODE: There are 3 choices of Light mode: Center only, the FITLIGHT™. The distance can be set from 10 cms to 80 cms. Full light and Ring only. Please refer to “Parameter Explanations” for more information.
- Page 24 The higher the value the less sensitive the deactivation requires (i.e. the more force that is required for the FITLIGHT™ CLEAR: This removes all data. A drop-down menu will appear to be deactivated upon impact).
-
Page 25: Multiple Fitlight™ Activations Program Example
FITLIGHT™/step, first create a new step of the correct FITLIGHT™, To generate a new sequence, select “New” or select “Ok” to return to adjacent to the FITLIGHT™ that you wish to remove or edit. Once the Main Menu. this is done move to the next part of the edit process. -
Page 26: Run Programmed Sequence
SYSTEM OPERATION RUN PROGRAMMED SEQUENCE Select Performance & Training Select Run Programmed Sequences... - Page 27 RANDOM START: This will start the Sequence at a random point in the Sequence. SINGULAR: This will select one FITLIGHT™ in a row of FITLIGHTS™. This option is used when there are more than 2 FITLIGHTS™ in a row.
-
Page 28: Split Time Training
SYSTEM OPERATION SPLIT TIME SET-UP This set-up allows the user to track and measure the time between each deactivated FITLIGHT™ Select Performance & Training Select Split Time Test... - Page 29 Indicates the deactivation range from the center of RETRIGGER: This feature will automatically restart the routine. the FITLIGHT™. The distance can be set from 10 cms to 80 cms. SAVE DATA: Allows the user to save the split times to the...
- Page 30 The Running and Total time will be displayed at the top. Using the Start By Light feature, the 1st split is “zeroed”. Group Time of deactivated FITLIGHT™ Running Time Split Times will be recorded at each FITLIGHT™ and displayed here...
-
Page 31: Hand/Eye Coordination
SYSTEM OPERATION HAND/EYE COORDINATION SET-UP Select Performance & Training Select Hand/Eye Coordination... - Page 32 Indicates the deactivation range from the center of required. The higher the value the less sensitive the deactivation the FITLIGHT™. The distance can be set from 10 cms to 80 cms. requires (i.e. the more force that is required for the FITLIGHT™...
- Page 33 SYSTEM OPERATION LIGHT MODE: There are 3 choices: Center only, Full light and 13. DELETE PRESET: If the set-up has been saved before, select Ring only. Please refer to “Parameter Explanations” for more “Delete preset” to remove it. information. 14. DYNAMIC DELAY: This enables the system to follow the users 10.
-
Page 34: Fitlight Game
FITLIGHT™, a red FITLIGHT™ is triggered on the opponents' side. The opponent is required to deactivate the red FITLIGHT™, at the same time trying to activate a red FITLIGHT™ on their opponents’ side. As the red FITLIGHTS™ are missed, the players are assigned a point depending on who misses the red FITLIGHT™. -
Page 35: Data/Results
SYSTEM OPERATION DATA / RESULTS Indicates the Group or Groups in the routine Indicates the number of hits actually performed in the routine Indicates the numbers of misses from the routine Indicates the average time per hit/deactivation Indicates the total time used to complete the routine “Stop”... -
Page 36: Athlete Database Set-Up
SYSTEM OPERATION ATHLETE DATABASE SET-UP Select Athletes Database Select New Athlete To learn more about the features (Import, Export and New Group) please refer to the Saving, Searching and Grouping Manual. Ensure that the “Save Data” box is selected prior to starting the particular routine. -
Page 37: Export Training Data Set-Up
SYSTEM OPERATION EXPORT TRAINING DATA SET-UP Please note that you can export the data via the Dashboard (once logged in). Select Export Training Data We recommend that you select “unexported data only” when prompted. This will export only the data that was recently recorded since the last time an export data was performed. -
Page 38: Wireless Group Set-Up
SYSTEM OPERATION WIRELESS GROUP SET-UP A video of this set-up is also available on the online portal under Tutorials. Select Connect Fitlights HOW TO CREATE 1 GROUP Select Create New Set-up... - Page 39 Once the FITLIGHTS™ have been assigned to the group, select Ok. The FITLIGHT Trainer™ will then ask if you would like to “switch to new setup”. If you select yes, then this current setup will become your new set-up. If you select No the FITLIGHT Trainer™ will then save this set-up for you to use another time (where you can load it be selecting Load Setup).
- Page 40 SYSTEM OPERATION HOW TO CREATE MULTIPLE GROUPS Select the number of groups. This example will assign 4 groups of 2 FITLIGHTS™ per Select group. After selecting the number 4, follow Create New Setup the steps below: Select “A” and tap 2 FITLIGHTS™ to change from RED to PURPLE Select “B”...
- Page 41 SUPPORT TROUBLE SHOOTING TABLET CONTROLLER ISSUES The Controller does not turn on/no Power to the Tablet Controller Make sure that the battery is fully charged. If unsure recharge again until the fully charged indicator is visible. Battery has discharged and is no longer rechargeable. Service required. TABLET DISPLAY ISSUES The Display does not turn on/not visible Make sure that the Tablet Controller is fully charged.
- Page 42 Make sure that the batteries are fully charged, if unsure recharge again until the Light is green. Try a different set of fully charged batteries. If the FITLIGHT™ works it indicates that the replaced battery life has been depleted and the batteries should be discarded according to your local disposal regulations for batteries.
- Page 43 Check that the polarities of the batteries in the FITLIGHTS™ are installed correctly, positive (+) to positive (+) / negative (-) to negative (-). Try a different set of batteries. If the FITLIGHT™ charges it indicates that the replaced battery life has been depleted and the batteries should be discarded according to your local disposal regulations for batteries.
- Page 44 SUPPORT WIRELESS TEST Select Connect Fitlights Select Wireless Test When prompted if you would like to perform a network test select “Yes”.
- Page 45 The results of the test, indicate that the wireless connection is performing to specifications. This shows that there is 100% connectivity for the 1 FITLIGHT™ that was tested. Should there be poor wireless connectivity, then Manual Channel selection is recommended. You can locate this by selecting the Settings menu item in the main screen and then selecting Settings again.
- Page 46 Need to install or replace the battery in your FITLIGHT™? First identify which FITLIGHTS™ that you have. If your FITLIGHT Trainer™ was purchased in 2015 or earlier follow the instructions below to correctly replace the batteries located in the FITLIGHT™.
- Page 47 SUPPORT If your FITLIGHT Trainer™ was purchased in 2016 or later follow the instructions below to correctly replace the batteries located in the FITLIGHT™. Step 1 Remove the Rubber Guard removed and 4 Unscrew the cover, Locate the Battery Rubber Guard screws exposed.
- Page 48 Do clean the FITLIGHT Training™ System with a damp cloth only for optimum visual performance. Do keep your FITLIGHT Trainer™ properly charged at all times. The FITLIGHT Trainer™ is never off and so it should be left charged at all times.
- Page 49 Dispose of the battery per local/country regulations. POWER SUPPLY CAUTION/WARNING ELETRICAL SHOCK For indoor use only, do not expose to moisture, liquid or heat. Do not use any other power supply with your FITLIGHT Training™ system. Warning: Please be aware that the use of the Flashing Option of the FITLIGHTS™may cause a reaction to persons prone to Epilepsy.
- Page 50 SUPPORT POWER SYSTEM SAFETY INFORMATION EU BATTERY DIRECTIVE The FITLIGHT Trainer™ has been tested to and is in compliance to The FITLIGHT Trainer™ has been tested to and is in compliance to the following standards: the following standards: EN 60950-1:2006...
- Page 51 SUPPORT SETTINGS Select Settings And then select Settings again.
- Page 52 SUPPORT SETTINGS Dongle Selection Selection for a wired or Bluetooth wireless Dongle. *DO NOT change unless your FITLIGHT Trainer™ has a Bluetooth Dongle LED Intensity FITLIGHT™ intensity settings are used to adjust the brightness of the FITLIGHTS™. Sun Filter Preset Use in the event that bright direct sunlight is triggering the FITLIGHTS;...
- Page 53 Enable Dashboard Select if you wish to connect your tablet to the Dashboard. User Enter the username for your FITLIGHT™ account (created when registering on the FITLIGHT website). Password Enter the password associated with your FITLIGHT™ user account. *Upload all previous saved runs to dashboard. Upload all stored run data from the Tablet Controller to the Dashboard.
- Page 54 If a new version is available please follow the onscreen instructions and select OK. Once the update is complete, the software will shut down and the home screen of the Tablet Controller will be shown. Here, simply select the FITLIGHT Trainer™ software icon to launch it.
Need help?
Do you have a question about the Trainer FLB10002DC and is the answer not in the manual?
Questions and answers