
Subscribe to Our Youtube Channel
Related Manuals for TEL AFA4000/1/AS


Summary of Contents for TEL AFA4000/1/AS
- Page 1 AFA4000/1/AS Airflow Monitor with Auto Sash Controller Installation and calibration guide...
-
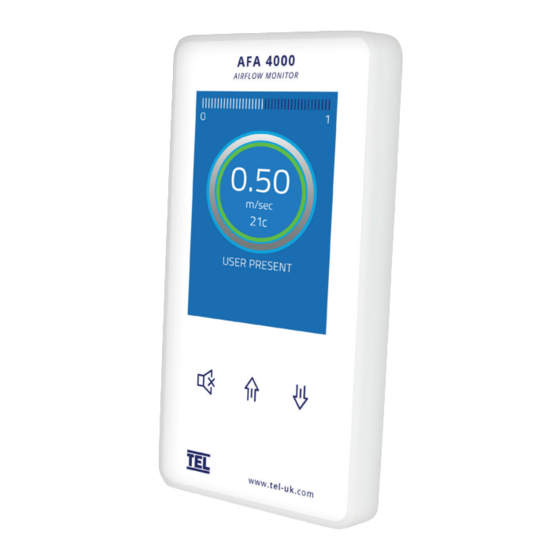
Page 2: Operator Panel
& Alarm Mute Overview The AFA4000/1/AS Airflow monitor is integrated with the Auto Sash Controller, to Set up the Airflow monitor, the Auto Sash controller should be Disabled, Disconnected or Not Configured, this ensures that the sash is under manual control whilst the Airflow monitor is commissioned. - Page 3 Mute, the monitor will then sample the airflow for 5 seconds. I f the calibration is successful the monitor will return the Main Menu, select RUN to go to normal operating mode and check the velocity reading is accurate and stable. I f the airflow sample is unstable the monitor will display “Deviations too High”, follow the instructions to repeat the sample or quit the calibration. T he monitor will display “Increase higher airflow sample” if the second sample value is too close to the first value entered, close the sash a little and repeat the higher sample. The minimum difference between the samples that the monitor will accept is 0.3m/sec (60fpm). T he monitor will display “Sensor diff too low” if the monitor doesn’t detect any difference in the sensor output between the 2 airflow samples, check that the sensor hose is connected and repeat the calibration. 10. I f the calibration is stable and accurate Press and Hold the Mute button for 5 seconds until the Main Menu is displayed. 11. The monitor will return to the MAIN MENU, select RUN to go to normal operating mode. AFA4000/1/AS Airflow Monitor /...
- Page 4 Do not use fully open and fully closed sash positions for the calibration points, the recommended positions are normal operating height (e.g. 500mm 20”) for the first sample and approximately half the sash opening (e.g. 250mm 10”) for the second sample. Airflow Monitor Coms Settings The MONITOR CONFIG menu includes the following coms parameters: - PROTOCOL – Sets Modbus RTU, BACnet MS/TP or TEL protocol. MODBUS SETTINGS – Sets Slave ID, Baud Rate and Parity for the Modbus protocol. BACnet SETTINGS – Sets the Device Instance, Station ID, Baud Rate, Parity and Max Masters for the BACnet protocol. The TEL protocol is used to connected to TEL Config Manager software and the TEL AFA5000 Room Space Controller, the Modbus Slave ID is used when set to TEL protocol.
-
Page 5: Troubleshooting
If Sensor Error message still displayed replace the sensor cable. If Sensor Error message still displayed replace the monitor. Audible alarm not working Check for screen messages - if SETBACK is displayed the monitor has been remotely muted. Check if alarm has been disabled in Cal Config menu. RS485 Coms not connected See Diagnostics menu, Coms Data. Check the correct Protocol, Slave ID, Baud Rate, Parity have been set. Tx & Rx = 0 - AFA4000 is not connected to the network Tx & Rx >0 but fixed values – AFA4000 has lost connection to the network Rx is counting but Tx is a fixed value – AFA4000 Is connected to the network but the Master is offline or not polling the AFA4000. AFA4000/1/AS Airflow Monitor /... -
Page 6: Diagnostics Menu
Coms Data Displays the following: - Protocol, Slave ID, Baud Rate, Parity Tx – Number of Data Packets transmitted (increments when transmitting) Rx – Number of Data Packets received (increments when receiving) I/O Status Input Data Displays the following: - Input 1 – On/Off or Analogue Voltage status Input 2 – On/Off or Analogue Voltage status Input 3 – On/Off or Analogue Voltage status Output Data Displays the following: - Relay 1 – On/Off status Relay 2 – On/Off status Relay 3 – On/Off status Sensor Data Displays the following: - Airflow sensor status 0-100% (100% = 0 airflow, 0% = max flow) Temperature °C or °F (Optional with additional Temperature sensor fitted) AFA4000/1/AS Airflow Monitor /... - Page 7 Auto Sash Controller Features The Tiptronic Auto Sash Controller contains the following features: - Auto Close Auto Open (user selectable - enabled/disabled/auto open if auto closed only) Tiptronic Open/Close -touch sensitive sash movement (menu selectable) Sash Lock (Drive disable with alarm) Manual sash operation AFA4000 Pushbutton Open/Close Footswitch Open/Close (optional) BMS inputs: Open/Close + Emergency Open/Close + Fire Alarm Close B MS outputs: Sash Open/Closed volt free contact+ Sash position (0-10v/4-20mA) + External Alarm Sounder output AFA4000/1/AS Airflow Monitor /...
-
Page 8: Operation
Auto open back to its calibrated position. The sash will not Auto open if: - a. The sash beam is broken (object detected in the sash opening). b. The controller detects no movement in the sash when the motor is driving. AFA4000/1/AS Airflow Monitor /... - Page 9 (e.g. fully open). An audible and visual alarm will activate following a preset alarm delay period to remind the user to lower the sash. This function is used when the sash needs to remain in the open position for a prolonged period of time to allow loading or setting up of equipment inside the Fume Cupboard. AFA4000/1/AS Airflow Monitor /...
- Page 10 If the unit has not been calibrated, when the Tilt switch input is open the display will show “Sash Drive Inhibited”, when the Tilt switch input is closed the status window will show “Auto Sash Not Configured”. Calibration — Tiptronic 1, 2 or 3 position calibration Press and Hold the MUTE button for approx 5 seconds or Until the MAIN MENU appears. Using the ↑ / ↓ buttons select SETUP AUTO SASH, the display will show “TEL SASH CLOSER” P ress the Mute button show the current Hardware and Software versions e.g. “1. HW2.0 FW1.1” Press the ↓ button to scroll down and select “SETUP MENU” and press Mute. Enter the PASSWORD (Factory default is 1-0-0-1) using the ↑ and Mute buttons. In the Setup menu the controller will display “SYSTEM PROFILE”...
-
Page 11: Calibration Notes
When calibrating the sash positions allow a margin for the sash to over travel past the calibration height e.g. bottom position calibration, close sash fully and open 5mm before calibrating, normal height calibration, open sash to the normal height and lower by 5mm before calibrating. AFA4000/1/AS Airflow Monitor / p.11... - Page 12 Calibration - Sash Lock Function Press and Hold the MUTE button for approx 5 seconds or Until the MAIN MENU appears. Using the ↑ / ↓ buttons select SETUP AUTO SASH, the display will show “TEL SASH CLOSER” P ress the Mute button show the current Hardware and Software versions e.g. “1. HW2.0 FW1.1” Press the ↓ button to scroll down and select “SETUP MENU” and press Mute. Enter the PASSWORD (Factory default is 1-0-0-1) using the ↑ and Mute buttons. In the Setup menu the controller will display “SYSTEM PROFILE” Use the ↓ button to scroll through the menu and select “Sash 1 Settings” and press Mute. In the S1 Settings menu the display will show “1. S1 Enabled” Use the ↓ button to scroll through the menu and select “11. S1 Auto Lock” and press Mute. 10. Set to Enabled and press Mute. Use the ↓ button to scroll through the menu and select “11b. S1 Lock Alarm” and press Mute. Use the ↑ / ↓ buttons to set the required alarm delay time and press Mute. Use the ↓ button to scroll through the menu and select “11c. S1 Lock Pos Calibration” and press Mute. The display will show on screen instructions.
- Page 13 “Sash Locked” will be displayed if the sash is at or above the calibrated lock position. If the Auto open feature is enabled in the menu and is switched on from the keypad: “*” (asterix) will be displayed in the left-hand corner of the Status Window, e.g. “* User present”. To enable Auto open press and hold the Mute and ↑ buttons for 1 second or until the “*” symbol is displayed. To disable Auto open press and hold the Mute and ↑ buttons for 1 second or until the “*” symbol disappears. The Auto sash can be set to be disabled, enabled or USR enabled, USR enable is User enable / disable. To User enable the Auto Sash Press the Mute and ↓ buttons for 1 second. To User disable the Auto Sash Press the Mute and ↓ buttons for 1 second. “USR disabled” will be displayed in the Status window. AFA4000/1/AS Airflow Monitor / p.13...
- Page 14 (auto open, tiptronic & pushbuttons are disabled). “Sash Opening” will be displayed if the Sash Open Footswitch has been operated whilst the operator is present. “Sash Closing” will be displayed if the Sash Close Footswitch has been operated whilst the operator is present. AFA4000/1/AS Airflow Monitor / p.14...
- Page 15 S1 Auto Lock - Enables or Disables Auto Lock function. a. S1 Auto Lock alarm - Sets alarm delay time - Time before Alarm activates if sash remains locked. b. S1 Auto Lock Position Calibration - Calibrates the Lock position. S 1 Sensitivity, 0-6, 6 = least sensitive, allows sash travel to stutter for 1 second before Sash Fault alarm is triggered. AFA4000/1/AS Airflow Monitor / p.15...
- Page 16 BMS Input Settings Menu Fire Alarm BMS Input - (Disabled/IP1-4 Open/IP1-4 Closed). Open Sash BMS Input - (Disabled/IP1-4 Open/IP1-4 Closed). Close Sash BMS Input - (Disabled/IP1-4 Open/IP1-4 Closed). 4. EV Open Sash BMS Input - (Disabled/IP1-4 Open/IP1-4 Closed). EV Close Sash BMS Input - (Disabled/IP1-4 Open/IP1-4 Closed). BMS Output Settings Menu Remote Alarm Sounder - Enabled/Disabled Analogue V Output - 0-10V/1-10V/0-5V/1-5V (Analogue output voltage for sash position indication) Analogue C Output - 0-20mA/4-20mA (Analogue output current for sash position indication) 4. R elays 1 to 4 - Always open/closed, Open/Close on sash alarm, Open/Close on obstruction detected, Open/Close on user detected, Open/Close on sash open, Open/Close on sash closed. AFA4000/1/AS Airflow Monitor / p.16...
- Page 17 Sash Fault Alarm always The controller does not detect that the sash position sensor or limit switch is fitted, check the connections. shown Sash does not drive to the Check the calibration is correct, re-calibrate the sash stop positions. correct positions AFA4000/1/AS Airflow Monitor / p.17...
- Page 18 Press the ↑ / ↓ buttons together from the Run screen to access the Diagnostics menu, the menu contains the following Autosash data: - Menu Parameter Action Auto Sash Data Position Status – Sash position as % open if sash position sensor is used Alarm On/Off status Moving On/Off status Sash Closed On/Off status Obstruction On/Off status User On/Off status (User detected) Sash open On/Off status Sash Locked On/Off status AFA4000/1/AS Airflow Monitor / p.18...
- Page 19 AFA4000/1/AS Monitor Connection Details AFA4000/1/AS ONITOR ONNECTION ETAILS REFER TO INSTALLATION www.tel-uk.com INSTRUCTIONS Made in England BEFORE CONNECTING RJ45 0-1 0V RJ12 Relay Interface Unit RS485 Port A – 0-10V Velocity Retransmission Output,0-10Vdc Over 0-1.00M/Sec / 0-200Fpm – 0-10V ,0-10VDC 0-1.00...
- Page 20 AFA4000/1/AS AFA4000/1/AS Typical Connection Diagram YPICAL ONNECTION IAGRAM AFA4000/1/AS Airflow Monitor / p.20...
- Page 21 AFA4000/1/AS Dimensions AFA4000/1/AS Airflow Monitor / p.21...
- Page 22 AFA4000 Cut Out Template Note – Print to A4, do not scale or print to fit page. AFA4000/1/AS Airflow Monitor / p.22...
- Page 23 AFA4000 Installation AFA4000/1/AS Airflow Monitor / p.23...
- Page 24 IRFLOW ENSOR IMENSIONS SM7 Airflow Sensor Dimensions 17.5mm 25mm 76.2mm 3” 0.689” 0.985” Fixing Screws Press to Release Cover Cable Entry AFA4000/1/AS Airflow Monitor / p.24...
- Page 25 TEMPLATE SM7 CUT OUT TEMPLATE 50mm 1.97” 25mm 0.985” 30mm / 1.18”Ø M3.5 / M4 M3.5 / M4 Fixing Hole Fixing Hole 20mm 0.79” 12mm / 0.473” Ø 27mm 1.063” Note – Print to A4, do not scale or print to fit page. Note – Print to A4, do not scale or print to fit page. AFA4000/1/AS Airflow Monitor / p.25...
- Page 26 Airflow Sensor Installation Diagram 25mm (1”) Female adapter SM6 Sensor Open to the laboratory SM6 airflow sensor 100mm 25mm (1”) 100mm Male 25mm (1”) bush Tube Normal Sash working height. Fume cupboard Fume cupboard inner skin outer skin For complete manual and product information, log on to www.tel-uk.com For complete manual and product information, log on to http://www.tel-uk.com AFA4000/1/AS Airflow Monitor / p.26...
Need help?
Do you have a question about the AFA4000/1/AS and is the answer not in the manual?
Questions and answers