Table of Contents
Advertisement
Available languages
Available languages
Quick Links
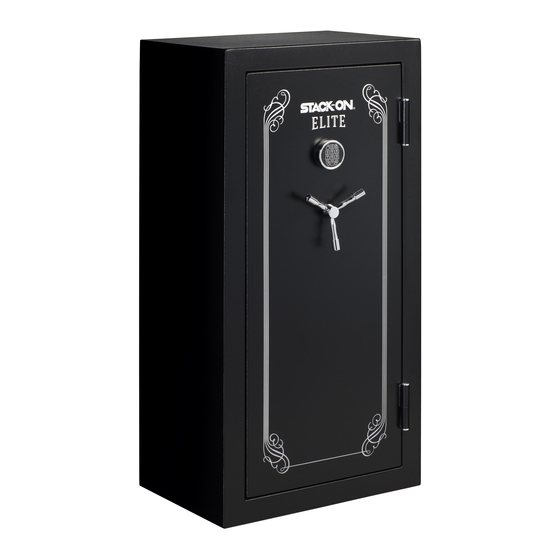
E18-30-MB-E
WARNING
A child or adult can tip the safe and
be killed or seriously injured.
Failure to secure the safe as shown in
these instructions can result in death
or serious injury to children and adults.
Children should not play with or
around the safe at any time.
Serial # :
Combination #:
WARNING:
to cause cancer and birth defects or other
to www
W
REGISTER THIS PRODUCT
®
Instructions
Tip Over Hazard
IMPORTANT
•
Record the serial number from the tag on the
back of the safe or from the tag on the front
bottom corner of the safe.
•
Keep keys and combination in a secure place
away from children.
•
Do not store the back up key, your combination
or this document in the safe.
•
Warning: Keep your safe closed and locked at
all times when not in use. Children could
accidentally be locked inside the safe.
•
Do not move this safe using its handle. The
handle should only be used for opening and
closing the door of the safe.
•
Do not store electronic media, computer disks,
audio-visual media or photographic negatives in
this safe. This material will not survive the rated
internal temperature of the safe. This material
may be damaged or destroyed.
HANDLE ASSEMBLY
Screw the 3 handle spokes into the hub and hand
tighten.
ese spokes are located in the front foam
packaging.
NOTE: Do not use this handle to move the safe.
1
40-0000100_2004
14
Advertisement
Table of Contents

Related Manuals for Stack-On E18-30-MB-E


Summary of Contents for Stack-On E18-30-MB-E
- Page 1 Record the serial number from the tag on the back of the safe or from the tag on the front bottom corner of the safe. Instructions E18-30-MB-E • Keep keys and combination in a secure place away from children. •...
-
Page 2: Battery Installation
BATTERY INSTALLATION IMPORTANT: You must rst install the ba ery which is located in the ont protective styrofoam. NOTE: When changing the ba ery, always hold Your safe is delivered with a Safety the ba ery connecting cap while disconnecting or Interlock Screw which must be removed in order for you to lock your a aching the ba ery. -
Page 3: Electronic Lock
Customer Service. If you write down your combination you must keep this information in a secure place, away from children, not inside the safe. -
Page 4: Locking The Safe
LOCKING THE SAFE SECURING THE SAFE NOTE: e safe must be secured to the oor. To lock the safe, close the door and rotate the Use the hardware provided or consult your handle counter clockwise until it stops. If the hardware retailer for fastening hardware for your handle is not turned until it stops, the locking particular mounting surface. -
Page 5: Back Up Key
BACK UP KEY GUN REST INSTALLATION A "Back Up Key" has been provided in case you have Adjustable gun rests are pre-installed with 4 "L" forgo en or lost your security code. To open the brackets using 2 screws for each bracket. To adjust safe using the back up key follow the steps below: the barrel rest height, remove the screws, reposition the barrel rest to your desired height and tighten the... - Page 6 Note: Make sure the door accessories do not interfere with items in the safe or when closing the safe door. ORDERING A REPLACEMENT KEY Visit “www.Stack-On.com/key-replacement-form” and follow the online instructions for form submission and payment. 40-0000100_2004...
- Page 7 Stack-On may require the safe be returned to the factory for repair. If the safe is so returned, Stack-On will pay the freight to the factory as well as the return freight. If the safe is replaced, Stack-On will pay the freight. This guarantee does not cover labor costs for removal or installation of the safe and its contents.
- Page 8 Anote el número de serie en la parte posterior ® de la caja fuerte o de la etiqueta en la parte inferior delantera esquina de la caja fuerte . Instrucciones E18-30-MB-E • Mantenga las llaves y la combinación en un lugar seguro lejos de los niños. •...
- Page 9 INSTALACIÒN DE LA BATERÍA IMPORTANTE: Primero debe instalar la batería que se encuentra en la espuma de poliestireno de protección delantera. Su caja fuerte se entrega con un tornillo de bloqueo de seguridad que NOTA : Al cambiar la batería , sujete siempre la debe ser eliminado para que te batería conectando el casquillo mientras se permite bloquear su caja fuerte.
- Page 10 De no hacerlo, en stack-on.com bajo Servicio al Cliente . Si usted pondrá en peligro la seguridad y la seguridad escribe su combinación debe mantener esta información de la caja fuerte.
- Page 11 CIERRE DEL CAJA FUERTE ASEGURAR LA CAJA FUERTE NOTA : La caja fuerte debe jarse al suelo. Utilice el Para bloquear la caja de seguridad , cerrar la puerta hardware proporcionado o consulte a su distribuidor y girar el mango hacia la izquierda hasta que se de hardware para la jación de hardware para su detenga.
- Page 12 COPIA DE SEGURIDAD DE CLAVE INSTALAR EL RESTO ARMA Restos de armas ajustables están pre-instalado con 4 Un "copia de seguridad de clave " se ha "L" soportes con 2 tornillos para cada soporte. Para proporcionado en caso de que haya olvidado o ajustar la altura del respaldo barril, quitar los perdido su código de seguridad .
- Page 13 Nota : Asegúrese de que los accesorios de la puerta no inter eran con los elementos de la seguridad o al cerrar la puerta de la caja . ORDENAR UNA LLAVE DE REMPLAZO Visite "www.Stack-On.com/key-replacement-form" y siga las instrucciones en línea para llenar el formulario y el pago. 40-0000100_2004...
- Page 14 Stack-On. Dependiendo de la magnitud de los daños, Stack-On puede exigir la devolución de la seguridad a la fábrica para su reparación. Si es así que regresó la caja fuerte, Stack-On pagará el flete a la fábrica, así como la carga de vuelta.
Need help?
Do you have a question about the E18-30-MB-E and is the answer not in the manual?
Questions and answers