Table of Contents
Advertisement
Quick Links
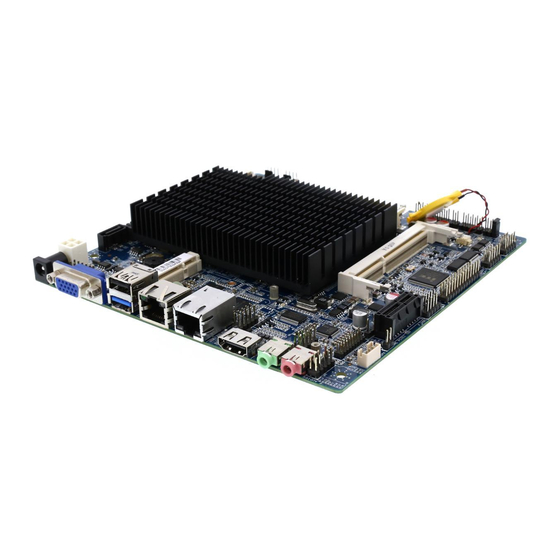
3.2 Installing Hard Drive or SSD
1. Install mSATA SSD to the mSATA slot indicated on Figure 3.
2. Install SATA hard drive or SSD by connecting the SATA power and data cable to
the connectors indicated on Figure 3.
3. Use the jumpers to select between using mSATA or standard SATA port for
SATA0 and SATA1, each port can connect to one SATA device at a time.
Figure 3: SATA and mSATA
Order Information
SKU
MITX-6770S-J1900
Dual NIC, TPM, 7.1 Audio
MITX-6770N-J1900
Single NIC, TPM, 7.1 Audio
HB-6770-HDMI
DDI 2nd HDMI Add-on Card
HB-6770-LVDS
DDI LVDS Add-on Card
HB-POE1230
POE+ 802.3at Add-on Module
For more information, please visit www.habeyusa.com
Description
MFG PN
2.06.0677000119
2.06.0677000109 OEM
2.04.0677011019
2.04.0677011029
2.04.0012300009
Packing List
Description
MITX-6770 mainboard
I/O Shield
DB9 Serial cable
SATA Power and SATA cable
Safety Warning
The use and installation of this system should only be performed by professionals. Improper
installation of any electronic device or electrical component can result in serious injury or
death. Please make sure that all safety precautions are taken into account.
Static-Sensitive Devices
Electrostatic-Discharge (ESD) can damage electronic components. To avoid damaging your
system board, it is important to handle it very carefully. The following measures are generally
sufficient to protect your equipment from ESD.
Precautions
●
Use a grounded wrist strap designed to prevent static discharge.
●
Touch a grounded metal object before removing the board from the antistatic bag.
●
Handle the board by its edges only; do not touch its components, peripheral chips,
memory modules or gold contacts.
●
When handling chips or modules, avoid touching their pins.
●
Put the motherboard and peripherals back into their antistatic bags when not in use.
4
MITX-6770
Quick Setup Guide
QTY
1
1
1
1
1
Advertisement
Table of Contents

Related Manuals for Habey MITX-6770S-J1900


Summary of Contents for Habey MITX-6770S-J1900
- Page 1 Order Information Precautions Description MFG PN ● Use a grounded wrist strap designed to prevent static discharge. MITX-6770S-J1900 Dual NIC, TPM, 7.1 Audio 2.06.0677000119 ● Touch a grounded metal object before removing the board from the antistatic bag. ● Handle the board by its edges only; do not touch its components, peripheral chips, MITX-6770N-J1900 Single NIC, TPM, 7.1 Audio...
- Page 2 1. Unpacking 2.3 Installing a SO-DIMM Memory Card. The motherboard is shipped in antistatic packaging to avoid static damage. When unpacking Locate the memory slot. Ensure memory is a 204-Pin SO DIMM. Align notch in memory circuit with corresponding guide on the memory slot. Insert the memory circuit at a 45° angle and the board, make sure that the person handling it is static protected.
Need help?
Do you have a question about the MITX-6770S-J1900 and is the answer not in the manual?
Questions and answers