
Related Manuals for EVEREST REFRIGERATION EPR1


Summary of Contents for EVEREST REFRIGERATION EPR1
- Page 1 Food Prep Table Refrigerators Side Mounted Condensing Unit Owner’s Manual EPR1, EPR2, EPWR2, EPR3 EPPR1, EPPSR2, EPPR2, EPPR3 EPPR1-D2, EPPR2-D2, EPPR2-D4, EPPR3-D2, EPPR3-D4 www.everestref.com...
-
Page 3: Table Of Contents
Food Prep Table Refrigerators Side Mounted Condensing Unit EPR1, EPR2, EPWR2, EPR3, EPPR1, EPPSR2, EPPR2, EPPR3, EPPR1-D2, EPPR2-D2, EPPR2-D4, EPPR3-D2, EPPR3-D4 Contents 1. Hydrocarbon Guidelines 2. Installation Instructions 3. General Safety 4. Electrical Safety 5. Operation 6. Care and Maintenance 7. -
Page 4: Hydrocarbon Guidelines
1. Hydrocarbon Guidelines This section applies to R290 Hydrocarbon units only. To identify the refrigerant type, see the data plate in the cabinet interior. WARNING - THIS UNIT USES R290, A HYDROCARBON, PROPANE REFRIGERANT THAT IS ENVIRON- MENTALLY FRIENDLY BUT IS ALSO HIGHLY FLAMMABLE AND EXPLOSIVE. PLEASE READ THIS MANUAL CAREFULLY AND FOLLOW ALL SAFETY PRECAUTIONS CONTAINED HEREIN TO AVOID THE RISK OF FIRE OR EXPLOSION. - Page 5 • General service and repairs must be performed in well-ventilated areas. General service and repairs must be performed only by professionals authorized by Everest Refrigeration. • Component shall be replaced with Everest-issued, like components to minimize the risk of possible ignition resulting from incompatible parts or improper repairs.
-
Page 6: Installation Instructions
2. Installation Instructions This section applies to all Everest products. Correct installation ensures proper performance and longevity of your appliance. Professional installation by a trained refrigeration technician and electrician is recommended. Warranty is void if the following guidelines are not met. 1. - Page 7 Shelf Installation Some models come standard with shelves, shelf clips and notched pilasters. Each shelf requires four clips. 1. Attach the shelf clips onto the pilasters by inserting its top hook into a pilaster notch followed by the bottom hook. Do not use pliers or other crimping tools to modify the shape of the shelf clips.
- Page 8 Product Load Levels EP Series Shelf Load Level 9” Load Level 9” 2” Front View Door Airflow Guard Load Level 9” Load Level 9” Air V ent 2” Airflow Side View Rear Front Installation Instructions...
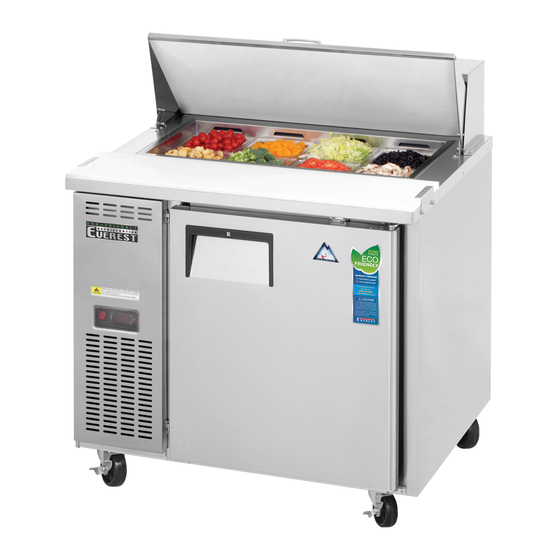
- Page 9 Pan Size Variations Pan Size Variation 1/6 1/6 1/6 1(full) 1/3 1/3 1/3 1/6 1/6 1/6 Side Mount Sandwich Prep. Tables EPR1 1/4 1/6 Standard: (8) 1/6 size pans (6" deep) w/ (3) pan dividers EPR2 Standard: (12) 1/6 size pans (6" deep)
- Page 10 Side Mount Sandwich Prep. Tables (Continued) EPR3 † 1/ 6 Standard: (18) 1/6 size pans (6" deep) w/ (8) pan dividers Side Mount Pizza Prep. Tables Side Mount Pizza Prep. Tables Side Mount Pizza Prep. Tables Side Mount Pizza Prep. Tables EPPR1 EPPR1 EPPR1...
- Page 11 EPPR3 Drawered Pan Configurations Standard: Some food prep. models are equipped with drawers. Drawer pans are not included with the product as (12) 1/3 size pans (6" deep) w/ (9) pan dividers standard and must be purchased separately. Purchase standard pans according to the size specified in the drawer pan configuration.
-
Page 12: General Safety
• If you suspect a refrigerant leak or a compromised refrigeration system, disconnect the unit and contact Everest Refrigeration immediately. • When disposing the unit, remove all doors and shelves to avoid any risk of injury or entrapment. Ensure that the refrigerant in the condensing unit is properly disposed of by a qualified refrigeration technician according to governmental codes, requirements and regulations. -
Page 13: Electrical Safety
4. Electrical Safety This section applies to all Everest products. Basic safety precautions must be observed when using electrical appliances in addition to the following. Warranty is void if these guidelines are not met. Everest does not recommend the use of generators in Everest units come as 115 volts, 60 hertz, single conjunction with the unit due to voltage fluctuations phase. -
Page 14: Operation
5. Operation Use your Everest product according to its intended functions. Warranty is void if the following guidelines are not met. Starting your Everest Product The compressor, condenser and evaporator fan motors run while the unit is on refrigeration cycle. After plugging in the unit, the current temperature The compressor, condenser and evaporator fan and compressor symbol... - Page 15 Carel ‘Easy’ Digital Temperature Control Everest units are equipped with a Carel Digital Temperature Control. The type of controller is dependent on the model and production date. Evaporator Fan Running Compressor Running Alarm in Progress Power / Up Button Temperature Set Button Cabinet Temperature Manual Defrost / Down Button...
- Page 16 Setting the Temperature ( continued ) 2. Toggle through the desired temperature by pressing UP or DOWN The number increases or decreases by a decimal point. 3. The recommended setting is 35.0°F (2.0°C) for refrigerators and -4.0°F (-20.0°C) for freezers. The available temperature setting range is 33.0°F to 54.0°F (1.0°C to 12.0°C) for Refrigerators and -10.0°F to 54.0°F (-23.0°C to 12.0°C) for Freezers.
- Page 17 Carel ‘ir33’ Digital Temperature Control Everest units are equipped with a Carel Digital Temperature Control. The type of controller is dependent on the model and production date Evaporator Fan Running Program Button Compressor Running Up Button / Alarm in Progress Auxillary Cabinet in Defrost Down Button /...
- Page 18 Initiating Manual Defrost The controller has an automatic defrost cycle in place so initiating manual defrost is not necessary unless there is an abnormal accumulation of ice around the evaporator coil. 1. Press and hold down the Manual Defrost Button until the Defrost Symbol appears on the LED display.
-
Page 19: Care And Maintenance
6. Care and Maintenance This section applies to all Everest products. Regular care and maintenance of your appliance will significantly extend service life and dependability. In severe cases, lack of upkeep will contribute to the rapid decline in performance and component health. Care and maintenance is the product owner’s personal responsibility. - Page 20 Condenser Coil Cleaning Instructions It is necessary to clean the condenser coil monthly to ensure that it is free of lint, dust and grease build-up. Warranty is void if the following guidelines are not met. 1. Ensure that the unit is disconnect from the outlet before performing maintenance.
-
Page 21: Troubleshooting Guide
7. Troubleshooting Guide In most cases, your Everest product may be exhibiting behavior that is typical of standard operation. Observe the following when troubleshooting symptoms. The outlet may not be sending power or the power ‘Cht’ or ‘cHt’ appears on the LED alternating supply breaker may be switched off. - Page 22 constantly in order to maintain cabinet temperature. A top pan may not be installed. This creates an open Provide additional exhaust vents and observe the gap for warm air to enter and cold air to escape. Keep clearance allowance specified in Chapter 3. all pans in their slots even when empty.
- Page 23 Condensation on the unit’s exterior surfaces. Highly humid environments will contribute to the condensation build up on exterior panels. Providing ample ventilation and air movement to a space will reduce the humidity level. The door, drawer or gaskets may not be sealing properly.
-
Page 24: Warranty Information
LOW PRESSURE TEST : Serial No: EPBR1XXXXXXXX * Do not clean label with solvent Warranty Registration You may register online at www.EVERESTref.com or send a completed warranty registration to: Everest Refrigeration Warranty Department, 201 W. Artesia Blvd., Compton, CA 90220 Warranty... - Page 25 WARRANTY REGISTRATION CARD 3 Year Parts and Labor Warranty* 5 Year Compressor Warranty Name of Business Owner : Date : Signature of Business Owner : Business Name : Telephone : Email : Street Address : City : State : Zip : Place of Purchase : Date Purchased : Date Installed :...
- Page 26 Warranty Certificate Three (3) Year Labor & Parts Warranty EVEREST warrants to the first purchaser of every new EVEREST unit, the cabinet and all parts thereof, to be free from defects in material or workmanship, under normal and proper use and maintenance service as specified by EVEREST and upon proper installation and start-up in accordance with the instruction packet supplied with each unit.
- Page 28 A Step Above The Standard 201 W. Artesia Blvd., Compton, CA 90220 Tel: 310-323-6586 Fax: 310-323-7524 / 310-761-1127 www.everestref.com ver. 112818...
Need help?
Do you have a question about the EPR1 and is the answer not in the manual?
Questions and answers