Table of Contents

Related Manuals for FRIEDHELM LOH RITTAL TX CableNet

Summary of Contents for FRIEDHELM LOH RITTAL TX CableNet
- Page 1 TX CableNet 7888.100 7888.200 7888.228 7888.102 7888.202 7888.266 7888.120 7888.208 7888.268 7888.218 7888.276 7888.220 7888.278 Montage- und Bedienungsanleitung Assembly and operating instructions Notice de montage et d’emploi...
- Page 2 Inhaltsverzeichnis Seite Seite Seite Hinweise zur Dokumentation 4.3.5 Rack von der Palette heben Inbetriebnahme Konformitätserklärungen und 4.3.6 Optionale Montage des Sockels Bedienung Approbationen 4.3.7 Montage von Rollen oder Störung und Abhilfe Aufbewahrung der Unterlagen Nivellierfüßen Inspektion und Wartung Verwendete Symbole 4.3.8 Rack an den Aufstellort Lagerung und Entsorgung...
-
Page 3: Table Of Contents
Contents Page Page Page Notes on documentation 4.3.5 Lifting the rack off of the pallet Commissioning Declarations of conformity 4.3.6 Optional installation of Operation and approvals the base/plinth Troubleshooting Storing the documents 4.3.7 Installing castors or Inspection and maintenance levelling feet Symbols used Storage and disposal 4.3.8... - Page 4 Sommaire Page Page Page Remarques relatives 4.3.5 Lever la baie de la palette Mise en service à la documentation 4.3.6 Montage du socle (en option) Utilisation Déclarations de conformité et 4.3.7 Montage des roulettes ou Incident et suppression homologations des pieds de nivellement Inspection et entretien Conservation des documents 4.3.8...
- Page 5 Inhaltsverzeichnis Contents Sommaire 6 – 40, 56 – 64, 79 – 83 90° 65 – 68 70 – 71 73 – 74 76 – 77 68 – 69, 78 TX CableNet...
-
Page 6: Notes On Documentation
1. Hinweise zur Dokumentation 1. Notes on documentation 1. Remarques relatives à la documentation Die Montage- und Bedienungsanleitung These assembly and operating instruc- La notice de montage et d’emploi richtet sich an Personen, die Einrichtungen tions have been written for personnel tasked s’adresse aux personnes qui installent, der Informations- und Telekommunikations- with assembling, connecting and operating... - Page 7 2. Sicherheitshinweise 2.1 Bestimmungsgemäße Verwendung ◾ Achtung: Bei asymmetrischer Gewichtsverteilung ist die Standsicher- Der TX CableNet ist ein Gehäuse für die Unterbringung von 19˝-Hard- heit des TX CableNet gefährdet. Öffnen Sie z. B. die Türen nie zur ware nach der Industrienorm EIA-310, hierzu gehören hauptsächlich gleichen Seite, ohne den TX CableNet vorher am Boden zu befestigen.
-
Page 8: Safety Instructions
2. Safety instructions 2.1 Intended use ◾ Note: Where there is an asymmetrical distribution of weight, the The TX CableNet is an enclosure designed to accommodate 19˝ stability of the TX CableNet is at risk. Never simultaneously open the hardware in accordance with the industry standard EIA-310; this doors to the same side without first securing the TX CableNet to the includes primarily network and Internet components and the infrastruc- floor. - Page 9 2. Consignes de sécurité 2.1 Utilisation correcte ◾ Attention : la stabilité de la baie TX CableNet est menacée en cas de La baie TX CableNet est une baie pour l’intégration de matériel 19˝ selon répartition asymétrique des charges. Ne jamais ouvrir simultanément la norme industrielle EIA-310, les composants réseau et Internet ainsi des portes vers le même côté...
- Page 10 2. Veiligheidsvoorschriften 2.1 Voorgeschreven gebruik ◾ Let op: bij een asymmetrische gewichtsverdeling komt de stabiliteit De TX CableNet is een behuizing voor het onderbrengen van 19˝-hard- van het TX CableNet-rack in gevaar. Open nooit gelijktijdig beide ware volgens de industrienorm EIA-310, hiertoe behoren hoofdzakelijk deuren zonder eerst de TX CableNet aan de vloer te bevestigen.
- Page 11 2. Säkerhetsinstruktioner 2.1 Ändamålsenlig användning ◾ OBS: Om viktfördelningen är asymmetrisk finns risk för att TX CableNet är en Kapsling som är utformat för att rymma 19 tums TX CableNet inte står stadigt. Öppna aldrig dörrarna samtidigt på hårdvara i enlighet med industristandarden EIA-310. Detta inkluderar samma sida utan att först förankra TX CableNet i golvet.
- Page 12 2. Istruzioni di sicurezza ◾ Attenzione: in caso di distribuzione asimmetrica del peso, la stabilità 2.1 Impiego conforme alle norme del TX CableNet è a rischio. Non aprire contemporaneamente le porte Il TX CableNet è un armadio progettato per ospitare sistemi e apparati sullo stesso lato senza aver prima fissato il TX CableNet al pavimento.
- Page 13 2. Instrucciones de seguridad ◾ Atención: si la distribución del peso es asimétrica, la estabilidad del 2.1 Uso correcto TX CableNet está en riesgo. No abra nunca al mismo tiempo las El TX CableNet es un rack destinado al alojamiento de hardware de 19˝ puertas sin haber fijado previamente el TX CableNet al suelo.
- Page 14 2. Turvallisuusohjeet ◾ Huom! Painon epätasainen jakautuminen vaarantaa TX CableNet 2.1 Määräystenmukainen käyttö -kaapin tukevuuden. Älä koskaan avaa ovia samanaikaisesti samalla TX CableNet -kotelo on suunniteltu sopimaan 19˝-järjestelmään puolella ilman, että TX CableNet on kiinnitetty lattiaan. teollisuusstandardin EIA-310 mukaisesti; tämä sisältää pääasiassa verkko- ja Internet-komponentit, esimerkiksi virtalähteet ja pistorasialistat ◾...
- Page 15 2. Sikkerhedsanvisninger ◾ OBS: Ved en asymmetrisk vægtfordeling er der risiko for, at 2.1 Forskriftsmæssig anvendelse TX CableNet ikke står sikkert. Åbn aldrig dørene til samme side uden TX CableNet er et kabinet designet til at rumme 19˝ hardware i overens- forinden at fastgøre TX CableNet i gulvet.
- Page 16 2. Wskazówki dotyczące bezpieczeństwa ◾ Uwaga: Asymetryczne rozmieszczenie ciężaru grozi utratą stabilności 2.1 Używaj zgodnie z przeznaczeniem TX CableNet. Nigdy nie należy otwierać jednocześnie drzwi przednich i TX CableNet jest obudową przeznaczoną do umieszczenia w niej tylnych zainstalowanych po tej samej stronie zawiasów dopóki zgodnie ze standardem EIA-310 sprzętu 19˝, do którego zaliczają...
- Page 17 2. Bezpečnostní pokyny ◾ Pozor: Při asymetrickém rozložení hmotnosti je ohrožena stabilita 2.1 Použití v souladu s určením skříně TX CableNet. Před otevřeím dveří se ujistětem, že je TX CableNet je skříň určena k vybavení 19˝ hardwarem v souladu s TX CableNet připevněn k podlaze. průmyslovým standardem EIA-310;...
- Page 18 2. Инструкции за безопасност ◾ Внимание: При асиметрично разпределение на теглото 2.1 За правилна употреба стабилността на TX CableNet е застрашена. Никога не отваряйте Шкафът TX CableNet е проектиран за хардуер с 19˝ монтаж, в едновременно вратите, без преди това да сте фиксирали съответствие...
- Page 19 2. Меры безопасности ◾ Внимание: при асимметричном распределении веса имеется 2.1 Использование согласно назначению опасность нарушения устойчивости TX CableNet. Никогда не TX CableNet - это корпус, предназначенный для размещения открывайте одновременно двери в одну сторону, без 19-дюймового оборудования в соответствии с отраслевым предварительного...
- Page 20 2. Υποδείξεις ασφαλείας ◾ Προσοχή: Σε ασύμμετρη κατανομή του βάρους κινδυνεύει η 2.1 Προβλεπόμενη χρήση σταθερότητα του TX CableNet. Μην ανοίγετε ποτέ ταυτόχρονα τις Το TX CableNet είναι ένα περίβλημα που έχει σχεδιαστεί για να πόρτες, εάν δεν έχετε προηγουμένως στερεώσει το TX CableNet στο φιλοξενεί...
- Page 21 2. Instrucțiuni de siguranță ◾ Atenție: Distribuirea neuniformă a greutății periclitează stabilitatea 2.1 Domeniul de utilizare produsului TX CableNet. Nu deschideți niciodată simultan ușile fără a Rack-ul TX CableNet este un dulap conceput pentru a găzdui echipa- fixa în prealabil produsul TX CableNet la nivelul podelei. mente pe 19˝...
- Page 22 2. Sigurnosne upute ◾ Upozorenje: stabilnost ormara TX CableNet ugrožena je ako dođe do 2.1 Predviđena uporaba nepravilne raspodjele težine. Nikada nemojte istovremeno otvarati vrata TX CableNet je ormar dizajniran za smještaj 19˝ hardvera u skladu na istu stranu prije nego što sigurno pričvrstite TX kabelska mreža za s industrijskim standardom EIA-310;...
- Page 23 2. Biztonsági utasítások ◾ Figyelem: Aszimmetrikus súlyelosztás esetén a TX CableNet 2.1 Rendeltetésszerű használat stabilitása veszélyben van. Soha ne nyisson ki egyidejűleg ugyanazon A TX CableNet egy ház, amelyet 19˝ hardver befogadására terveztek, az oldalon lévő ajtókat, csak akkor, ha előzőleg a TX CabelNet-et a EIA-310 ipari szabványnak megfelelően;...
- Page 24 2. Saugos nurodymai ◾ Dėmesio: Dėl asimetrinio svorio paskirstymo TX CableNet gali būti 2.1 Naudojimas pagal paskirtį nestabilus. Niekada neatidarykite durų į tą pačią pusę nepritvirtinę TX CableNet yra korpusas, skirtas pritaikyti 19 colių įrangą pagal TX CableNet spintos prie grindų. pramonės standartą EIA-310; tai apima tinklo ir interneto komponentus bei jų...
- Page 25 2. Ohutusjuhised ◾ Tähelepanu! Asümmeetriline kaalujaotus ohustab kapi TX CableNet 2.1 Sihtotstarbeline kasutus stabiilsust. Mitte avada uksi enne kui TX CableNet on eelnevalt TX CableNet on korpus, mis on kavandatud 19˝ riistvara mahutamiseks põranda külge kinnitatud. vastavalt tööstusstandardile EIA-310; see hõlmab peamiselt võrgu - ja Internetikomponente ning tööks vajalikku infrastruktuuri, näiteks ◾...
- Page 26 2. Drošības norādījumi ◾ Svarīgi: asimetriska svara sadalījuma gadījumā ir apdraudēta 2.1. Paredzētais lietošanas veids TX CableNet stabilitāte. Nekādā gadījumā neatveriet durvis, kas TX CableNet ir korpuss ir paredzēts 19 collu aparatūras izvietošanai uzstādīta uz durvju apturēšanas puses, vienlaikus vispirms nepiestipri- saskaņā ar nozares standartu EIA-310; tas galvenokārt ietver tīkla un not TX CableNet pie grīdas.
- Page 27 2. Varnostni napotki ◾ Pozor: Če je teža porazdeljena nesimetrično, obstaja nevarnost 2.1 Predvidena uporaba prevrnitve ohišja TX CableNet. Vrat, nikoli ne odpirajte hkrati, ne da bi TX CableNet je ohišje, zasnovano za namestitev 19˝ strojne opreme ohišje TX CableNet najprej pritrdili na tla. v skladu z industrijskim standardom EIA-310;...
- Page 28 2. Bezpečnostné pokyny ◾ Pozor: Pri asymetrickom rozložení hmotnosti je stabilita TX CableNet 2.1 Používanie v súlade s účelom ohrozená. Nikdy neotvárajte dvere bez toho, aby ste najprv pripevnili TX CableNet je rozvádzačová skriňa určená na inštaláciu 19˝ zariadení TX CableNet k podlahe. v súlade s priemyselným štandardom EIA-310;...
- Page 29 2. Instruções de segurança ◾ Atenção: a distribuição assimétrica do peso compromete a estabili- 2.1 Utilização dade do TX CableNet. Nunca abra, ao mesmo tempo as portas para o O TX CableNet é um armário projetado para acomodar hardware de 19˝ mesmo lado sem ter fixado o cabo de rede ao piso.
-
Page 30: Safety Instructions
2. Sicherheitshinweise 2. Veiligheidsvoorschriften 2. Safety instructions 2. Säkerhetsinstruktioner 2. Consignes de sécurité 2. Istruzioni di sicurezza Gefahr! Achtung! Danger! Caution! Danger ! Attention ! Gevaar! Waarschuwing! Fara! Varning! Pericolo! Attenzione! Warnung vor der Waarschuwing voor Prestare attenzione Warning against Danger dû... - Page 31 2. Sicherheitshinweise 2. Veiligheidsvoorschriften 2. Safety instructions 2. Säkerhetsinstruktioner 2. Consignes de sécurité 2. Istruzioni di sicurezza Aufsteigen auf eine Climbing on surfaces is Il est interdit de marcher Het is verboden het Förbjudet att stå på Divieto di salire sulla Fläche ist verboten prohibited sur toute surface...
- Page 32 2. Instrucciones de 2. Sikkerhedsanvisninger 2. Bezpečnostní pokyny seguridad 2. Wskazówki dotyczące 2. Инструкции за безопасност 2. Turvallisuusohjeet bezpieczeństwa Niebezpieczeństwo! ¡Peligro! ¡Atención! Vaara! Varoitus! Fare! Pas på! Pozor! Nebezpečí! Опасност! Внимание! Uwaga! Atención, movimiento Предупреждение Advarsel mod lukke- de cierre de compo- Varoitus koneen/laitteen Uwaga na zamykające за...
- Page 33 2. Instrucciones de 2. Sikkerhedsanvisninger 2. Bezpečnostní pokyny seguridad 2. Wskazówki dotyczące 2. Инструкции за безопасност 2. Turvallisuusohjeet bezpieczeństwa Det er forbudt at Качването върху Prohibido subirse a una Päälle astuminen Zakaz wchodzenia na klatre på maskinens Nešlapat na povrh повърхностите...
- Page 34 2. Меры безопасности 2. Sigurnosne upute 2. Υποδείξεις ασφαλείας 2. Biztonsági utasítások 2. Instrucțiuni de siguranță 2. Saugos nurodymai Опасно! Внимание! Κίνδυνος! Προσοχή! Pericol! Atentie! Opasnost! Oprez! Vigyázat! Veszély! Pavojus! Atsargiai! Προειδοποίηση Предупреждение Avertizare cu privire la πριν από την κίνηση Upozorenje na opas- Gép/berendezés Įspėjimas dėl mašinos /...
- Page 35 2. Меры безопасности 2. Sigurnosne upute 2. Υποδείξεις ασφαλείας 2. Biztonsági utasítások 2. Instrucțiuni de siguranță 2. Saugos nurodymai Становиться Απαγορεύεται η Urcarea pe o suprafață Zabranjeno je penjanje Draudžiama lipti ant на поверхность ανάβαση σε μία A felületre lépni tilos este interzisă...
- Page 36 2. Ohutusjuhised 2. Bezpečnostné pokyny 2. Drošības norādījumi 2. Instruções de segurança 2. Varnostni napotki Nebezpečenstvo! Ettevaatust! Oht! Briesmas! Uzmanību! Nevarnost! Pozor! Perigo! Cuidado! Výstraha! Hoiatus masina/ Dávajte pozor na Cuidado quando as Uzmanieties iekārtas/ Opozorilo pred seadme mehhaaniliste zatvárací pohyb partes mecânicas mašīnas mehānisko zapiranjem mehanskih...
- Page 37 2. Ohutusjuhised 2. Bezpečnostné pokyny 2. Drošības norādījumi 2. Instruções de segurança 2. Varnostni napotki Pinna peale astumine Aizliegts kāpt uz Vzpenjanje na površino Je zakázané vystupovať É proibido subir para a on keelatud virsmas je prepovedano na plošinu superfície Ärge paigaldage kui Neuzstādiet bērnu Ne postavljajte v bližini...
-
Page 38: Device Description
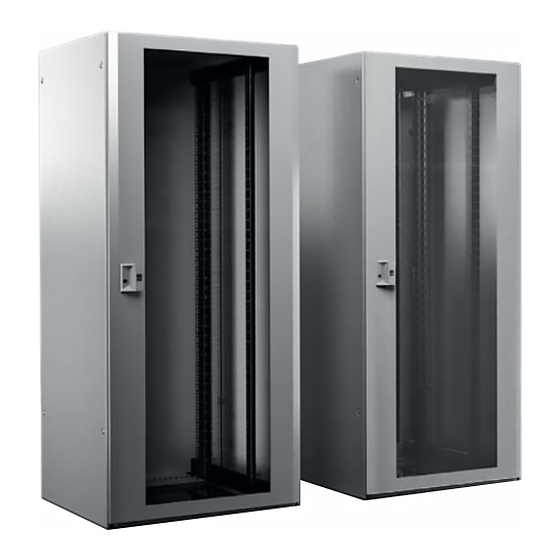
3. Gerätebeschreibung 3. Device description 3. Description de la baie 3.1 Funktionsbeschreibung 3.1 Functional description and 3.1 Description fonctionnelle et éléments und Bestandteile components La baie TX CableNet standard est constituée Der TX CableNet besteht im Serienlieferum- The standard supply scope of the des sous-ensembles suivants : fang aus den folgenden Baugruppen: TX CableNet comprises the following... -
Page 39: Labelling
3. Gerätebeschreibung 3. Device description 3. Description de la baie 3.2 Kennzeichnung 3.2 Labelling 3.2 Traçabilité Das Typenschild der Serien-Schränke The rating plate for the standard enclosures La plaquette signalétique des baies TX CableNet besitzt einen QR-Code mit TX CableNet displays a QR code containing TX CableNet de série possède un code QR folgenden Daten: the following data:... -
Page 40: Assembly And Siting
4. Montage und Aufstellung 4. Assembly and siting 4. Montage et implantation 4.1 Anforderungen an den Aufstellort 4.1 Site requirements 4.1 Exigences concernant le lieu Achtung: Der TX CableNet ist nur für die Caution: The TX CableNet is only intended for d’implantation Anwendung im Innenbereich bestimmt. -
Page 41: Assembly Procedure
4. Montage und Aufstellung 4. Assembly and siting 4. Montage et implantation 4.3.1 Verpackungsbänder lösen, auspacken 4.3.1 Releasing the packing bands and unpacking 4.3.1 Ôter les liens d’emballage, déballer 4. Montage und Aufstellung 4. Assembly and siting 4. Montage et implantation 4.3.2 Anleitung lesen 4.3.2 Reading the instructions 4.3.2 Lire la notice... -
Page 42: Removing The Enclosure Panels
4. Montage und Aufstellung 4. Assembly and siting 4. Montage et implantation 4.3.3 Flachteile entfernen 4.3.3 Removing the enclosure panels 4.3.3 Démonter les pièces plates Fronttüren demontieren Dismantling the front doors Démonter les portes avant Mögliche verbaute Fronttüren / Supported front doors / Portes avant possibles Stahlblech-Sichttür / Stahlblechtür, einteilig, belüftet /... -
Page 43: Dismantling The Rear Doors
4. Montage und Aufstellung 4. Assembly and siting 4. Montage et implantation 4.3.3 Flachteile entfernen 4.3.3 Removing the enclosure panels 4.3.3 Démonter les pièces plates Rücktüren demontieren Dismantling the rear doors Démonter les portes arrière Mögliche verbaute Rücktüren / Supported rear doors / Portes arrière possibles Stahlblechtür, einteilig / Sheet steel door, one-piece /... -
Page 44: Dismantling The Side Panels (Optional)
SW10 4. Montage und Aufstellung 4. Assembly and siting 4. Montage et implantation 4.3.3 Flachteile entfernen 4.3.3 Removing the enclosure panels 4.3.3 Démonter les pièces plates Seitenwände demontieren (optional) Dismantling the side panels (optional) Démonter les panneaux latéraux (en option) nur für/ only for/ unique-... -
Page 45: Removing Any Accessories Supplied Loose
4. Montage und Aufstellung 4. Assembly and siting 4. Montage et implantation 4.3.4 Ggf. lose beiliegendes Zubehör entfernen 4.3.4 Removing any accessories supplied loose 4.3.4 Ôter les accessoires éventuellement joints 4. Montage und Aufstellung 4. Assembly and siting 4. Montage et implantation 4.3.5 Rack von der Palette heben 4.3.5 Lifting the rack off of the pallet 4.3.5 Lever la baie de la palette... -
Page 46: Optional Installation Of
4. Montage und Aufstellung 4. Assembly and siting 4. Montage et implantation 4.3.6 Optionale Montage des Sockels 4.3.6 Optional installation of the base/plinth 4.3.6 Montage du socle en option Separate Anleitung zur Sockel-Montage beachten Observe the separate instructions on installation of the base/plinth Respecter la notice spécifique pour le... -
Page 47: Installing Castors Or
4. Montage und Aufstellung 4. Assembly and siting 4. Montage et implantation 4.3.7 Montage von Rollen oder Nivellierfüßen 4.3.7 Installing castors or levelling feet 4.3.7 Montage des roulettes ou des pieds de nivellement Option Nur Original-Zubehör Option von Rittal verwenden Use only original Rittal accessories Utiliser uniquement... -
Page 48: Moving The Rack To The Installation Site
4. Montage und Aufstellung 4. Assembly and siting 4. Montage et implantation 4.3.8 Rack an den Aufstellort bewegen 4.3.8 Moving the rack to the installation site 4.3.8 Déplacer la baie sur le lieu d’implantation ◾ Um den TX CableNet sicher bewegen zu können, werden mindestens 2 unterwiesene Personen oder Fachkräfte benötigt. -
Page 49: Preparing For Installation
4. Montage und Aufstellung 4. Assembly and siting 90° 4. Montage et implantation 4.3.9 Aufstellung vorbereiten 4.3.9 Preparing for installation 4.3.9 Préparer la mise en place Die Nivellierfüße müssen gleichmäßig in der Höhe verstellt werden. Während des Positionierens sind max. 5 mm Höhen- unterschied zulässig. - Page 50 TX30 4. Montage und Aufstellung 4. Assembly and siting 4. Montage et implantation 4.3.9 Aufstellung vorbereiten 4.3.9 Preparing for installation 4.3.9 Préparer la mise en place Tiefenverstellung der 19˝-Ebene Depth adjustment of the 482.6 mm (19˝) level Réglage en profondeur du plan 19˝ 5 x 12 = 5 Nm 5 x 12...
-
Page 51: Mm (19˝) Level
TX30 4. Montage und Aufstellung 4. Assembly and siting 4. Montage et implantation 4.3.9 Aufstellung vorbereiten (nur bei B (W) = 800 mm) 4.3.9 Preparing for installation (only for W = 800 mm) 4.3.9 Préparer la mise en place (uniquement avec L (W) = 800 mm) Seitliche Verschiebung der 19˝-Montageebene, Breitenverstellung der Montageebene (alternative Montagestandards (19˝... -
Page 52: Baying The Rack (Optional)
TX25 4. Montage und Aufstellung 4. Assembly and siting 4. Montage et implantation 4.3.10 Rack anreihen (optional) 4.3.10 Baying the rack (optional) 4.3.10 Juxtaposer les baies (en option) TX CableNet an TX CableNet TX CableNet to TX CableNet TX CableNet à TX CableNet Best.-Nr. Model No. Référence 8800.490 Bestimmungsgemäße Verwendung... -
Page 53: Securing The Rack To The Floor
TX25 4. Montage und Aufstellung 4. Assembly and siting 4. Montage et implantation 4.3.11 Rack am Boden befestigen 4.3.11 Securing the rack to the floor 4.3.11 Fixer la baie au sol 5.5 x 13 Ø 14 = 5 Nm Alternative ◾... -
Page 54: Installing/Modifying Gland Plates (Optional)
TX25 4. Montage und Aufstellung 4. Assembly and siting 4. Montage et implantation 4.3.12 Bodenbleche installieren/anpassen (optional) 4.3.12 Installing/modifying gland plates (optional) 4.3.12 Installer / adapter les plaques passe-câbles (en option) (min.) = 1,5 Nm (max.) = 2,5 Nm Alternativer Bodenausbau: Alternative base installation: Équipement alternatif de la base : Bodenmodul, einteilig mit Bürste... -
Page 55: Transport
5. Transport 5. Transport 5. Transport Der TX CableNet muss beim Transport gegen The TX CableNet must be secured to prevent La baie TX CableNet doit être bloquée pour Umkippen gesichert und darf nur im Leerzu- it tipping over during transportation and must éviter tout basculement lors du transport et ne stand versendet werden. -
Page 56: Installation
6. Installation 6. Installation 6. Installation Installationsbeispiele: Installation examples: Exemples d’installation : Gleitschiene für Festeinbau 19˝-Geräteboden, teleskopiert Slide rail for static installation 482.6 mm (19˝) component shelf, telescopic Glissière pour montage fixe Tablette d'appareillage 19˝ télescopique 6. Installation 6.1 Installation der Kundenhardware ◾... -
Page 57: Installing The Customer Hardware
6. Installation 6. Installation 6. Installatie 6.1 Installing the customer hardware 6.1 Installation du matériel du client 6.1 Installatie van hardware van de klant Before populating the TX CableNet with La baie TX CableNet doit être fixée au sol Voordat er apparaten in het TX CableNet- equipment, it must first be secured to the avant d’installer les équipements. - Page 58 6. Installation 6. Installazione 6. Instalación 6.1 Installation av kundens utrustning 6.1. Installazione dell’hardware del cliente 6.1 Instalación del hardware del cliente Innan TX CableNet förses med utrustning Il TX CableNet deve essere fissato al pavi- Antes de instalar los componentes en el måste den förankras i golvet.
- Page 59 6. Asennus 6. Installation 6. Instalacja 6.1 Asiakaslaitteiston asennus 6.1 Installation af kundens hardware 6.1 Instalacja sprzętu klienta Ennen kuin TX CableNet varustetaan laitteilla, Før TX CableNet bestykkes med udstyr, Przed zainstalowaniem sprzętu, TX CableNet se on kiinnitettävä lattiaan. Käytä siihen kiinni- skal det fastgøres til gulvet. Hertil anvendes musi zostać...
- Page 60 6. Instalace 6. Инсталация 6. Установка 6.1 Instalace hardwaru od zákazníka 6.1 Инсталация на клиентския хардуер 6.1 Установка оборудования клиента Než osadíte skříň TX CableNet vybavením, Преди TX CableNet да бъде оборудван, Перед комплектацией VX IT оборудованием musíte ji připevnit k podlaze. Použijte трябва...
- Page 61 6. Εγκατάσταση 6. Instalare 6. Ugradnja 6.1 Εγκατάσταση υλικού του πελάτη 6.1 Instalarea echipamentului hardware 6.1 Ugradnja korisničke opreme Πριν από την τοποθέτηση εξοπλισμού στο al clientului Prije nego što postavite opremu na TX CableNet, αυτό θα πρέπει να στερεωθεί στο Înainte de montarea echipamentului, produsul TX CableNet, pričvrstite ga za pod.
- Page 62 6. Telepítés 6. Montavimas 6. Paigaldus 6.1 Az ügyfél hardverének telepítése 6.1 Kliento įrangos montavimas 6.1 Kliendi riistvara paigaldus Mielőtt a TX CableNet-t a berendezésekkel Prieš montuojant įrangą į TX CableNet, korpu- Enne kui TX CableNet varustatakse sead- felszereli, rögzíteni kell a szekrényt a padlóra. sas turi būti pritvirtintas prie grindų.
- Page 63 6. Uzstādīšana 6. Namestitev 6. Inštalácia 6.1. Klienta aparatūras uzstādīšana 6.1 Namestitev strojne opreme stranke 6.1 Inštalácia hardvéru zákazníka Pirms TX CableNet tiek aprīkots ar aprīkojumu, Preden opremite ohišje TX CableNet z Predtým, ako je TX CableNet osadená tech- tam jābūt piestiprinātam pie grīdas. Lūdzu, opremo, ga morate pritrditi na tla.
- Page 64 6. Instalação 6.1 Instalação do hardware do cliente Antes de instalar equipamentos no TX CableNet, fixar o rack no piso utilizando o suporte de base TS 8800.210. Considere o peso dos componentes ins- talados e mantenha a capacidade de carga máxima permitida do TX CableNet. Além disso, ao utilizar acessórios para a montagem, observe a respectiva capacidade de carga indicada.
-
Page 65: Installing The Power And Network Cables
6. Installation 6. Installation 6. Installation 6.2 Installation der Power- und Netzwerkverkabelung 6.2 Installing the power and network cables 6.2 Installation du câblage de puissance et de réseau Kabeleinführung im Dach für B (W) = 800 mm und H ≥ 2000 mm Cable entry in the roof for W = 800 mm and H ≥... - Page 66 6. Installation 6. Installation 6. Installation 6.2 Installation der Power- und Netzwerkverkabelung 6.2 Installing the power and network cables 6.2 Installation du câblage de puissance et de réseau Kabeleinführung im Dach für B (W) = 600 mm und H = 2000 mm Cable entry in the roof for W = 600 mm and H = 2000 mm Introduction des câbles dans le toit pour L (W) = 600 mm et H = 2000 mm...
-
Page 67: Cable Entry In The Base
6. Installation 6. Installation 6. Installation 6.2 Installation der Power- und Netzwerkverkabelung 6.2 Installing the power and network cables 6.2 Installation du câblage de puissance et de réseau Kabeleinführung im Boden Cable entry in the base Introduction des câbles par la base Alternative Bodenmodul, einteilig, mit Bürste Base module,... -
Page 68: Cable Management Accessories
6. Installation 6. Installation 6. Installation 6.2 Installation der Power- und Netzwerkverkabelung 6.2 Installing the power and network cables 6.2 Installation du câblage de puissance et de réseau Zubehör Kabelführung Cable management accessories Accessoires pour guidage des câbles Bürsten-Kit für Kabelkanal VX IT Kabelwanne, tiefenvariabel Kabelkanal für VX IT 19˝-Kabeldurchführungs-Panel... - Page 69 6. Installation 6. Installation 6. Installation 6.2 Installation der Power- und Netzwerkverkabelung 6.2 Installing the power and network cables 6.2 Installation du câblage de puissance et de réseau Zubehör Kabelführung Cable management accessories Accessoires pour guidage des câbles Rangierbügel zur individuellen Kabelführung Strukturierung mit Kabelsprossen Kabelführungsschiene, variabel Shunting ring for individual cable...
-
Page 70: Protective Earthing
6. Installation 6. Installation 6. Installation 6.3 Schutzerdung 6.3 Protective earthing 6.3 Protection par mise à la masse Im Anwendungsbereich der Applications within the scope of the Dans le domaine d’application de la Niederspannungsrichtlinie 2014/35/EU Low-Voltage Directive 2014/35/EU directive basse tension 2014/35/CE Die DIN EN IEC 62368-1 fordert bei bestim- DIN EN IEC 62368-1 does not require protec- La norme DIN EN IEC 62368-1 n’exige... -
Page 71: Overview Of Connection Points For Protective Earthing
TX30 SW13 6. Installation 6. Installation 6. Installation 6.3.2 Übersicht der Anbindungspunkte für eine Schutzerdung 6.3.2 Overview of connection points for protective earthing 6.3.2 Vue d’ensemble des points de raccordement pour la protection par mise à la masse 5 x 12 5 x 12 = 5 + 1 Nm 5 + 1 Nm /... -
Page 72: Accessories For Provision Of Protective Earthing
6. Installation 6. Installation 6. Installation 6.3.3 Zubehör zur Durchführung einer Schutzerdung 6.3.3 Accessories for provision of protective earthing 6.3.3 Accessoires pour la réalisation d’une protection par mise à la masse Potenzialausgleich-Set für VX IT (DK 5302.027) Potential equalisation kit for VX IT (DK 5302.027) Kit d’équipotentialité... -
Page 73: Re-Installing The Removed Enclosure Panels
6. Installation 6. Installation 6. Installation 6.4 Entfernte Flachteile wieder montieren 6.4 Re-installing the removed enclosure panels 6.4 Remonter à nouveau les pièces plates démontées Rücktür montieren Fitting the rear door Monter la porte arrière SW10 6. Installation 6. Installation 6. -
Page 74: Fitting The Side Panels
SW10 6. Installation 6. Installation 6. Installation 6.4 Entfernte Flachteile wieder montieren 6.4 Re-installing the removed enclosure panels 6.4 Remonter à nouveau les pièces plates démontées Seitenwände montieren (nur bei B (W) = 600 mm, H = 2000 mm und B (W) = 800/600 mm, H = 1200 mm) Fitting the side panels (only for W = 600 mm, H = 2000 mm and W = 800/600 mm, H = 1200 mm) -
Page 75: Fitting The Front Doors - R/H Door Hinge
6. Installation 6. Installation 6. Installation 6.4 Entfernte Flachteile wieder montieren 6.4 Re-installing the removed enclosure panels 6.4 Remonter à nouveau les pièces plates démontées Fronttür montieren – Türanschlag rechts Fitting the front door – r/h door hinge Monter la porte avant – porte avec charnières à droite TX CableNet... -
Page 76: Fitting The Front Doors - L/H Door Hinge (Swapping Hinge To Opposite Side)
TX25/30 6. Installation 6. Installation 6. Installation 6.4 Entfernte Flachteile wieder montieren 6.4 Re-installing the removed enclosure panels 6.4 Remonter à nouveau les pièces plates démontées Fronttür montieren – Türanschlag links (Türanschlagwechsel) Fitting the front door – l/h door hinge (swapping hinge to opposite side) Monter la porte avant –... - Page 77 TX30 6. Installation 6. Installation 6. Installation 6.4 Entfernte Flachteile wieder montieren 6.4 Re-installing the removed enclosure panels 6.4 Remonter à nouveau les pièces plates démontées Optional: Fronttür montieren – Türanschlag links (Türanschlagwechsel) mit montiertem AX Komfortgriff Optional: Fitting the front door – l/h door hinge (swapping hinge to opposite side) with fitted AX Comfort handle En option : Monter la porte avant –...
-
Page 78: Other Accessories
6. Installation 6. Installation 6. Installation 6.5 Weiteres Zubehör 6.5 Other accessories 6.5 Accessoires complémentaires CMC III – Überwachungssystem CMC III – Monitoring system CMC III – Système de supervision AX Komfortgriff Varianten AX comfort handle variants Variantes de poignées Confort AX Lüfterblech/Fan mounting plate/ Plaque de ventilation 5502.010 TX CableNet... -
Page 79: Commissioning
7. Inbetriebnahme 7. Commissioning 7. Mise en service Vor der Inbetriebnahme muss der TX CableNet Before commissioning, the TX CableNet or La baie TX CableNet ou la rangée de baies oder die TX CableNet Anreihung ordnungsge- bayed TX CableNet must be correctly equip- TX CableNet doivent être équipées des pièces mäß... -
Page 80: Troubleshooting
9. Störung und Abhilfe 9. Troubleshooting 9. Incident et suppression Bei technischen Störungen wenden Sie sich For technical queries, please contact: Pour tout incident technique, bitte an veuillez vous adresser à Rittal International Service Rittal International Service Auf dem Stützelberg Rittal International Service Auf dem Stützelberg 35745 Herborn... -
Page 81: Technical Specifications
12. Technische Daten 12. Technical specifications 12. Caractéristiques techniques Nennmaße Schrank Nominal dimensions of enclosure Best.-Nr. Dimensions nominales de la baie Model No. Référence W mm H mm HE ⁄ U D mm 7888.100 2000 1000 7888.102 2000 1000 7888.120 2200 1000 7888.200... - Page 82 12. Technische Daten 12. Technical specifications 12. Caractéristiques techniques Best.-Nr. Fronttüren Rücktüren Seitenwände Model No. Front doors Rear doors Side panels Portes avant Portes arrière Panneaux latéraux Référence 7888.100 ◾ – ◾ – ◾ 7888.102 ◾ – ◾ – – 7888.120 ◾...
-
Page 83: Spare Parts
13. Ersatzteile 13. Spare parts 13. Pièces de rechange Eine aktuelle Übersicht finden Sie auf A current overview is available at Une version actualisee de cette notice est www.rittal.de. www.rittal.com. disponible sur le site internet www.rittal.fr. Es dürfen nur Original-Ersatzteile von Rittal Only original Rittal spare parts may be used. - Page 84 ◾ Enclosures ◾ Power Distribution ◾ Climate Control ◾ IT Infrastructure ◾ Software & Services You can find the contact details of all Rittal companies throughout the world here. www.rittal.com/contact RITTAL GmbH & Co. KG Auf dem Stuetzelberg · 35745 Herborn · Germany Phone +49 2772 505-0 E-mail: info@rittal.de ·...
Need help?
Do you have a question about the RITTAL TX CableNet and is the answer not in the manual?
Questions and answers