Table of Contents
Advertisement
Quick Links
Advertisement
Table of Contents

Related Manuals for ZALMAN X7


Summary of Contents for ZALMAN X7
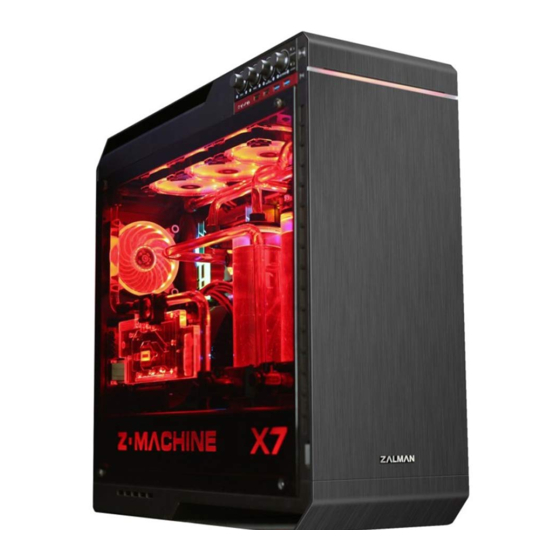
- Page 1 A TX FULL TOWER COMPUTER CASE USER MANUAL Ver. 170828 WWW.ZALMAN.COM...
- Page 2 Precautions ■ Read this manual carefully before installing. ■ Check the product and components before installing. If you find any abnormality, contact the location where you purchased the product for a replacement or refund. ■ Wear gloves to prevent accidents when installing the product. ■...
-
Page 3: Меры Предосторожности
Меры предосторожности ■ Внимательно прочтите настоящее руководство перед установкой. ■ Проверьте продукт и компоненты перед установкой. При обнаружении какого-либо дефекта обратитесь в магазин, чтобы оформит ь возврат или замену. ■ Выполняйте установку в защитных перчатках. ■ Не прилагайте значительных усилий при монтаже системы во избежание повреждений. ■... -
Page 4: Środki Ostrożności
주의사항 ■ 설치 전에 설명서를 자세히 읽으십시오. ■ 설치 전 제품과 구성품을 반드시 확인 후 이상이 있을 경우 구입처에 교환/환불 조치 받으십시오. ■ 제품 설치 시 사고 예방을 위해 장갑을 착용하고 취급하십시오. ■ 시스템 장착 시 치명적 손상이 발생할 수 있으므로 무리한 힘을 가하지 마십시오. ■... -
Page 5: Specification
Specification Model Case Form Factor ATX FULL TOWER Dimensions 617 x 230 x 587(H)mm Weight 17.5kg Case Materials Aluminum, Steel, Plastic Motherboard Support E-ATX / ATX / M-ATX / M-ITX Maximum GPU Length 420mm Maximum CPU Cooler Height 175mm Maximum PSU Length 180mm PCI Expansion Slots 8 + 2... - Page 6 Case construction ··························Tempered glass ····Tool-free 2.5", 3.5" combo HDD cage ·····························Side I/O port ····················Aluminum front panel ······················2.5" SSD, HDD cage ··················Radiator & Fan bracket ······························Front bezel ·····················Aluminum top panel ·······························VGA guide ································Dust filter ···············ZM-MFC5 ····························Rubber cover (RGB fan controller) ································Vent filter ························Front RGB display ····················VGA mounting guide ···············ZM-F3 STR...
-
Page 7: Mounting The Main Board
1. Separating the side panel Loosen the side hand screw and separate the tempered glass panel. English Desserrer la vis main latérale et réparer le panneau de verre trempé. Français Lösen Sie die Flügelschraube an der Seite und nehmen Sie die Hartglasscheibe ab. Deutsch Afloje el tornillo de mano lateral y separe el panel de vidrio templado. - Page 8 3. Mounting PSU Fix the PSU on the PSU mounting hole located at the bottom of the case using the screw. English Fixez l’unité d’alimentation sur l’orifice de montage de l’unité d’alimentation située en bas du boîtier à l’aide de la vis. Français Befestigen Sie das Netzteil an der Netzteil-Montagebohrung an der Unterseite mit der Schraube am Gehäuse.
- Page 9 5. Mounting the riser card Fix the riser card on the riser card-mounting hole using the screw, and mount the graphic card on the relevant position. English Fixez la carte d’adaptation de connexion sur l’orifice de montage de la carte d’adaptation de connexion à l’aide de la vis puis montez la carte graphique sur Français la position correspondante.
- Page 10 7. Mounting 2.5” SSD and HDD Separate the 2.5” SSD and HDD cage on the side of the case by pushing it to the right and assemble the 2.5” SSD or HDD. Mount the as- English sembled SSD on the cage-mounting hole by pushing it to the left. Séparez la cage du disque SSD et disque dur 2,5»...
-
Page 11: Cable Connection
9. Cable Connection I/O Port Power Button HD Audio USB 3.0 USB 3.0 HDD LED Reset Power LED Power 10. Separating the top panel Loosen the screw at the back and separate the top panel. English Desserrez la vis à l’arrière et séparez le panneau supérieur. Français Lösen Sie die Schraube an der Rückseite und nehmen Sie die obere Verkleidung ab. - Page 12 11. Mounting the top fan and radiator Separate the radiator and fan bracket by loosening the fixed hand screw and assemble the radiator or the fan. Fix the assembled radiator and fan bracket English on the top bracket-mounting hole using the hand screw. Séparez le radiateur et le support du ventilateur en desserrant la vis à...
- Page 13 13. Separating the front bezel Separate the bezel by pulling it in the direction of the arrow as shown in the figure. English Séparez la couronne en la poussant dans le sens de la flèche comme indiqué sur la figure. Français Bauen Sie die Blende durch Ziehen in Pfeilrichtung wie in der Abbildung dargestellt ab.
-
Page 14: Warranty
GVM Series Power Supply Units ■ 7 Year Warranty ARX,EBT series Power Supply Units Zalman USA has the right to change availability of limited warranty at its own discretion and any changes will not be retroactive. ■ The limited warranty does not cover…... - Page 15 1. Separating the side panel 拧松侧面手动螺丝,然后拆下玻璃钢面板。 中文 Desaperte o parafuso manual lateral e separe o painel de vidro temperado. Português 측면 핸드 스크류 분리 후 강화유리 패널을 분리합니다 한글 Wykręć boczne śruby radełkowane i zdejmij panel ze szkła hartowanego. Polski Lazítsa meg az oldalsó...
- Page 16 3. Mounting PSU 使用螺丝刀在箱体底部的 PSU 安装孔中固定 PSU。 中文 Fixe a PSU no orifício de montagem da PSU, localizado na parte inferior da torre, utilizando o parafuso. Português 케이스 하단부에 위치한 PSU 장착 홀과 PSU를 맞추어 나사로 장착합니다. 한글 Zamocuj zasilacz w otworze montażowym zasilacza na dole obudowy, używając odpowiednich śrub. Polski Rögzítse a tápegységet a csavarral a ház alján található...
- Page 17 5. Mounting the riser card 用螺丝刀在扩展卡插孔中固定扩展卡,然后在相应的位置上安装显卡。 中文 Fixe a placa de expansão no respetivo orifício de montagem utilizando o parafuso e monte a placa gráfica na devida posição. Português 라이저 카드 장착 홀에 맞추어 라이저 카드를 나사로 고정 후 해당 위치에 그래픽 카드를 장착합니다. 한글...
- Page 18 7. Mounting 2.5” SSD and HDD 通过向右侧推动箱体,拆下 2.5 英寸 SSD 和 HDD 箱,然后装上 2.5 英寸 SSD 中文 或 HDD。向左侧推动,将已组装好的 SSD 安装到箱体安装孔上。 Separe o compartimento de HDD e SSD de 2,5” na parte lateral da torre, empur- Português rando-o para a direita, e monte a HDD ou SSD de 2,5”. Monte a SSD no orifício de montagem do compartimento, empurrando-a para a esquerda.
- Page 19 9. Cable Connection I/O Port Power Button HD Audio USB 3.0 USB 3.0 HDD LED Reset Power LED Power 10. Separating the top panel 拧松后面的螺丝,然后拆下顶部面板。 中文 Desaperte o parafuso na parte traseira e separe o painel superior. Português 후면 나사를 풀어 상단 패널을 분리 합니다. 한글...
- Page 20 11. Mounting the top fan and radiator 拧松固定的手动螺丝,拆下散热器和风扇托架,然后安装上散热器或风扇。使用手动螺丝在顶部托架安装孔上固定已组装好的散热器和风扇托架。 中文 Separe o suporte de radiador e ventoinha, desapertando o parafuso manual fixo, e monte o radiador ou a ventoinha. Fixe o suporte de radiador e Português ventoinha montado no orifício de montagem do suporte superior, utilizando o parafuso manual. 고정된...
- Page 21 13. Separating the front bezel 朝着如图所示的箭头方向拉出边框。 中文 Separe o engaste puxando-o na direção da seta, conforme ilustrado na figura. Português 그림과 같이 화살표 방향으로 베젤을 당겨 분리합니다. 한글 Zdejmij oprawę, pociągając ją w kierunku strzałki pokazanej na rysunku. Polski Az elülső keretet az ábrán látható módon távolíthatja el, a nyíl irányába húzva. Magyar Oddělte rámeček tak, že za něj zatáhnete ve směru šipky, jak je ukázáno na obrázku.
- Page 22 15. Mounting the custom water cooler 如图所示,您可以将水瓶夹在定制水冷器安装孔上。 中文 Pode prender a garrafa de água ao orifício de montagem do refrigerador de água personalizado, conforme ilustrado na figura. Português 그림과 같이 커스텀 수랭 장착 홀에 맞추어 수통을 채결 할 수 있습니다. 한글...