
Related Manuals for HYPERVSN Masterbox

Summary of Contents for HYPERVSN Masterbox
- Page 1 See Extraordinary Masterbox OPERATING MANUAL Integrated 3D Holographic Display System © Copyright 2018 HYPERVSN. All rights reserved...
-
Page 2: Table Of Contents
ORDER OF PRE-OPERATION PROCEDURES ......10 MASTERBOX INSTALLATION ............11 MASTERBOX ASSEMBLY ..............12 CONTENT UPLOADING AND OPERATION ........14 AUDIO CONTENT UPLOADING ON THE MASTERBOX ... 14 MEDIA CONTENT DISPLAYING ..........20 TECHNICAL MAINTENANCE ............22 SAFETY PROVISIONS ............... 23 10. - Page 3 HYPERVSN Masterbox, HYPERVSN Devices or HYPERVSN Wall. This manual is designed as a general guide for HYPERVSN Masterbox (hereinafter referred to as the Masterbox). This operating manual covers an overview, safety rules and requirements, technical specifications and other information required to install, to assemble and to operate the Masterbox.
-
Page 4: Overview
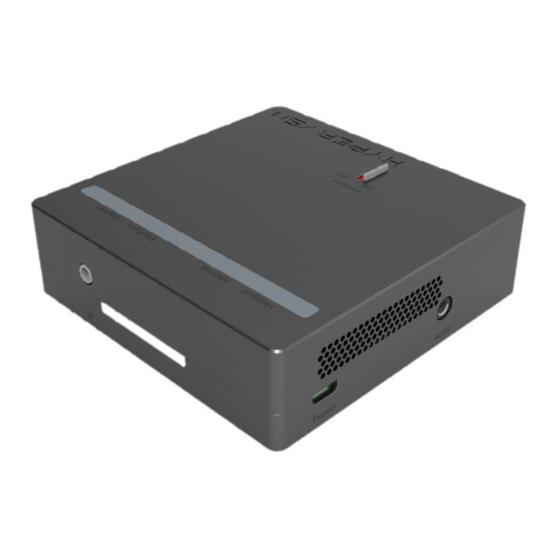
HYPERVSN Wall which allows to create a single large image (hereinafter referred to as the Wall). Picture 1. Device and an example of Wall The Masterbox is an additional component connected to the Device or to the Wall that provides their additional functionality. Picture 2. Masterbox general view... - Page 5 Managing number of the Devices of the Wall as a one metadevice. Managing media content. Calibration of the Wall. • The connection between the Masterbox and the Wall is performed through the wire interface RS-485. The Masterbox is equipped with the remote control. Picture 3. Remote control Note.
-
Page 6: Technical Specifications
TECHNICAL SPECIFICATIONS Table 2. Operational environmental conditions (indoors) of the Device with the connected Masterbox VALUE CONDITIONS Air temperature range from 0 °C to + 35 °C Relative humidity up to 75% Table 3. Basic technical specifications VALUE PARAMETERS DESCRIPTION... - Page 7 Operation of this equipment in a residential environment could cause radio interference. The Masterbox is supplied with 12 W line adapter with a micro USB cable connected and can be operated continuously while plugged in. © Copyright 2018 HYPERVSN. All rights reserved...
-
Page 8: Package Contents
Operating manual Tools and fittings required (not supplied) To install the Masterbox on a wall, you will need the following tools and fittings that are not supplied with the Masterbox: Drill – to make holes in a wall where the Masterbox will be mounted. - Page 9 Masterbox: • Computer (Windows operated only with disabled firewall programs and anti- viruses software) • Router Rj45 cable, its length must be sufficient to connect a router with the Masterbox. • © Copyright 2018 HYPERVSN. All rights reserved...
-
Page 10: Order Of Pre-Operation Procedures
4. ORDER OF PRE-OPERATION PROCEDURES Attention. Before installing or assembling the Masterbox, make a visual check of its components integrity. The Masterbox should not have any cracks, dents or other visual damage. Contact your supplier if you notice any irregularities during the visual check... -
Page 11: Masterbox Installation
Attention. The length of the cable intended to connect the Masterbox with the Device is 3 m. The MB wall mount must be mounted at the distance sufficient to the Masterbox to be connected to the nearest mounted Device. Installation procedure Mark the desired position of the center of the MB box mount on the wall. -
Page 12: Masterbox Assembly
Assembly procedure Picture 8. Connection scheme Connect the one end of RJ12 cable (3m) to the Masterbox RJ12 socket (Picture 7). Connect the second end of the RJ12 cable to the appropriate socket (Picture 4) of the nearest mounted (first) Device of the Wall. - Page 13 When required to manage the Masterbox using SDK application, connect the Masterbox to your router using RJ45 cable (use the RJ45 socket of the Masterbox, see Picture 7). If required, the audio facilities may be connected to the Masterbox. Use the appropriate sockets (3.5 jack or S/PDIF) (Picture 7).
-
Page 14: Content Uploading And Operation
(Picture 7). The audio content will start to download automatically. If any audio facilities are connected to the Masterbox, it will produce the “Start update” sound message. Once the downloading procedure is successfully finished, the “Update success” sound message will be produced. The “Update failure” sound message will be produced, if the downloading procedure is finished incorrectly. - Page 15 Make sure the “Core” indicator is green (is in the left lower corner). Note: If it is red, the SDK application has no connection with the Masterbox and the Wall. Check security rules of firewalls, anti-viruses programs, Windows brandmauer (open 123 port, enable a broadcast udp).
- Page 16 Picture 14. List of devices, selecting the device Click the Masterbox name (Picture 14) in the list of devices. The Masterbox name has the next format: H-WXXXXXXX. Go to the Device Settings tab. Make sure the Mode switcher is in the “Player”...
- Page 17 Devices of the Wall). REFRESH UPLOAD FILE CANCEL FILE TRANSFER DELETE FILE TO PLAYLIST Picture 17. Buttons for managing media files Picture 18. Selecting a media file Wait till the download is complete. © Copyright 2018 HYPERVSN. All rights reserved...
- Page 18 Picture 19. Checkboxes to select media files for a playlist The media will be displayed in the “Playlists” list. RIGHT ARROW Picture 20. Playlist Enter a playlist name to the Playlist name field. Picture 21. Field to enter a playlist name © Copyright 2018 HYPERVSN. All rights reserved...
- Page 19 Select the playlist(s) with a checkbox(s). Click on the Right arrow button (Picture to upload the checked playlist(s) to the Masterbox. Select the added playlist file(s) with a checkbox(s), click Set playlist. SET PLAYLIST BUTTON Picture 22. Set playlist Attention.
-
Page 20: Media Content Displaying
Attention. To display a media content the Devices of the Wall must be in the Operating mode. Switching on Connect the Device/ the Wall and the Masterbox to the power mains. Press the On button of the remote control, pointing the remote control towards the IR-sensor. The Device/the Wall will start displaying the media content. - Page 21 If any audio facilities are connected to the Masterbox and powered, the audio content output will be provided while the Devices are displaying videos. Switching off Press the Off button of the remote control, pointing the remote control towards the IR-sensor. The Device/the Wall will stop displaying the media content. If any audio facilities are connected to the Masterbox, the audio content output will be stopped.
-
Page 22: Technical Maintenance
Visual check of the line adapter and the plugs. The equipment should not have any cracks or cuts compromising its base insulation. If there are any faults of this nature, stop using the Masterbox immediately until the faults are fixed or the Masterbox is replaced. -
Page 23: Safety Provisions
The user shall bear full responsibility for ensuring that the Masterbox is utilized in a safe manner and compliant with all specified safety measures as well as local laws and requirements. -
Page 24: Disposal
The Masterbox packaging is environmentally friendly and reusable. All plastic parts contain special labels, e.g. >PE< for polyethylene, >PS< for polystyrene. sign on the package means that the Masterbox cannot be disposed of as domestic waste. Instead, please pass it to an electric equipment recycling center for proper disposal. -
Page 25: Warranty And Maintenance
If any of the guarantee labels are broken or removed, the Masterbox warranty is considered voided. 12.2 MAINTENANCE If the Masterbox needs to be repaired or if spare parts need to be purchased, please contact your vendor. 12.3 SPECIAL REQUIREMENTS The Masterbox complies with ISED’s license-exempt RSSs. - Page 26 2nd Floor Soho Wharf 1 Clink Street London SE1 9DG United Kingdom + 44 208 0685 328 info@hypervsn.com...
Need help?
Do you have a question about the Masterbox and is the answer not in the manual?
Questions and answers