
Related Manuals for HYPERVSN MasterBox

Summary of Contents for HYPERVSN MasterBox
- Page 1 See Extraordinary MasterBox OPERATING MANUAL Integrated 3D Holographic Display System © Copyright 2021 HYPERVSN. All rights reserved...
-
Page 2: Table Of Contents
3. PACKAGE CONTENTS ................ 9 4. ORDER OF PRE-OPERATIONAL PROCEDURES ......12 5. MASTERBOX INSTALLATION ............14 6. ASSEMBLING THE MASTERBOX AND TURNING IT ON/OFF ..15 7. MASTERBOX AND WALL DEVICES ACTIVATION .......18 7.1 MASTERBOX ACTIVATION........... 18 7.2 WALL DEVICES ACTIVATION ..........20 7.3 WALL APP INSTALLATION AND LAUNCH / WALL... - Page 3 HYPERVSN MasterBox, HYPERVSN Device or HYPERVSN Wall. This Operating Manual is designed as a general guide for the HYPERVSN MasterBox (hereinafter referred to as, the “MasterBox”). The Operating Manual provides an overview of the MasterBox, its safety rules and requirements, technical specifications and other important information required to install, assemble and operate the MasterBox.
-
Page 4: Masterbox Overview
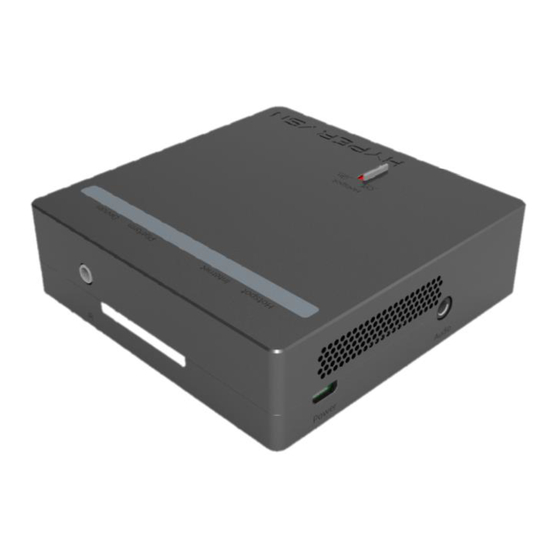
3D image. Picture 1. General view of the Device and an example of the Wall The MasterBox is an additional hardware component connected to the Device or to the Wall, providing additional functionality. Picture 2. General view of MasterBox... - Page 5 Increases stable synchronization of media content displayed by the Wall Devices. Connection schemes Connection scheme of the MasterBox to a router and a single Device Wall Devices (MS models) used with the MasterBox Wall Devices (M or MS models) used without the MasterBox...
- Page 6 Attention. All the procedures for the single Device with the MasterBox connected are the same as those for the Wall with the MasterBox connected, but the size of this Wall must be set as 1x1. The MasterBox is equipped with this remote control and the IR sensor below: Picture 4.
-
Page 7: Technical Specifications
Operation of this equipment in a residential environment could cause radio interference. The MasterBox is supplied with a 12 W line adapter with a micro USB cable connected and can be operated continuously while plugged into single-phase alternating current mains. - Page 8 • MasterBox, as well as providing core functionality of the HYPERVSN Wall Application. To upload media content onto the Wall via the HYPERVSN Wall Application, a • direct Wi-Fi connection between the Device(s) and a router is required (Internet connection is not required).
-
Page 9: Package Contents
Line adapter with set of plugs (AU. EU, US, UK) and micro USB – USB cable Sync cable 3 m “Last Device” cable 0.1 m (RJ14 with a terminator) IR sensor Operating Manual © Copyright 2021 HYPERVSN. All rights reserved... - Page 10 Tools and fittings required (not supplied) You will need the following tools and fittings that are not supplied with the MasterBox: Table 5. Tools, fittings and other components required COMPONENT NAME DESCRIPTION IMAGE To mount the MasterBox onto a wall...
- Page 11 - optional, if you prefer only using a micro SD card to upload media content to the MasterBox If you are going to utilize the Device/Wall with accompanying sound In accordance to the Sound facilities customer’s needs © Copyright 2021 HYPERVSN. All rights reserved...
-
Page 12: Order Of Pre-Operational Procedures
Attention. Before installing or assembling the MasterBox, double-check that the components seem to be in good working order. The MasterBox should not have any cracks, dents or other visual damage. Contact your supplier if you notice any irregularities during your component check Important. - Page 13 To connect the Devices one by one with sync cables (one sync cable is supplied with each Device), use the highlighted sockets at the bottom of the stator in the image below. SOCKETS Picture 5. Sockets at the bottom of the stator © Copyright 2021 HYPERVSN. All rights reserved...
-
Page 14: Masterbox Installation
The length of the Sync cable intended to connect the MasterBox to the Device is 3m long. The MB wall mount must be mounted at a distance of no more than 3 m from the MasterBox (in order to connect the MasterBox to the nearest mounted Device). -
Page 15: Assembling The Masterbox And Turning It On/Off
Picture 8. MasterBox elements (front view) Assembly procedure Picture 9. Connection scheme Connect the one end of the sync cable (3 m) to the MasterBox Sync socket (Picture Connect the second end of the Sync cable to the appropriate stator socket (Picture of the Device / of the nearest mounted (first) Device of the Wall. - Page 16 Picture 10. MasterBox (back view) Connecting audio facilities If required, audio facilities may be connected to the MasterBox using the 3.5 jack or S/PDIF sockets (Picture 8). Turning the MasterBox on To turn the MasterBox on, plug it into the power mains.
- Page 17 Disconnect the Device(s) and audio facilities (if any) from the power mains / switch the line filter(s) off. Connecting a router To activate the MasterBox, the Device / Wall Devices (see section 7) and to control them via the Wall App, make sure that the MasterBox, the Device(s) and your computer are...
-
Page 18: Masterbox And Wall Devices Activation
Define the details of the network(s) that you will use to connect the Device(s) to the Internet via Wi-Fi. • Connect the MasterBox to your router, using an Ethernet cable (use the Ethernet socket of the MasterBox, Picture 8). Turn the MasterBox and your computer on. - Page 19 Click Activate (Picture 15) and wait until the “Activation successful. Go to Info” message appears. Picture 16. Message after successful activation To ensure that the MasterBox activation is completed successfully: choose Info → click in front of Activation. The “Status” field should be green and say “Ok”. Picture 17. Activation status...
-
Page 20: Wall Devices Activation
Manual. Attention. Before activating the Device/Wall Devices, ensure that the following steps have been taken: the router that the MasterBox is connected to has an Internet connection. • the Hotspot switch of the MasterBox is switched on. • Turn the Device/Wall Devices on. The Devices will display the “HYPERVSN” logo. - Page 21 Picture 21. Message displayed once the Wi-Fi settings have been successfully updated Choose Devices → Controls. Click Activate All. Picture 22. “Activate All” button The next window to confirm your choice will appear. Picture 23. Confirmation window © Copyright 2021 HYPERVSN. All rights reserved...
-
Page 22: Wall App Installation And Launch / Wall Setup
Install the Wall App – from the Microsoft Store (you may use the link that the Web Manager provides, Picture 26). Run it and setup a Wall. See the Wall App User Guide for details. Picture 26. Link to follow the Windows Store © Copyright 2021 HYPERVSN. All rights reserved... -
Page 23: Running The Devices And Masterbox Configuration Program (Web Manager)
Picture 28. PIN request Enter PIN and click Log in. To retrieve the MasterBox PIN, go to your CMS account → Devices → button located in front of the MasterBox serial number in the list of devices. -
Page 24: Stator Firmware Updating
Picture 29. Stator firmware versions All the Wall Devices’ stator firmware versions must be the same. The MasterBox downloads firmware automatically, if there is a new version available on your CMS account and the MasterBox is connected to the Internet. - Page 25 The update procedure starts consistently for each Device, one by one. Attention. While updating, the Devices will be stopped. IMPORTANT. Once the update process has been completed, disconnect the Devices from the power mains and then reconnect them. © Copyright 2021 HYPERVSN. All rights reserved...
-
Page 26: Content Uploading
Wi-Fi (see Wall App User Guide the for details), or • via micro SD card to the Device(s) and via a USB flash drive to the MasterBox (see the • details below). Uploading playlists to Wall Devices via an SD card Note. - Page 27 Note. Files containing soundtracks have the same special format as those for playlists. If any audio facilities are connected to the MasterBox, it will produce the “Start update” sound message. Once the downloading procedure is successfully finished, the “Update success” sound message will be produced. The “Update failure” sound message will be produced if the downloading procedure is finished incorrectly.
-
Page 28: Managing The Masterbox And The Wall Devices Via Web Manager
10. MANAGING THE MASTERBOX AND THE WALL DEVICES VIA WEB MANAGER 10.1 TURNING WALL DEVICES ON/OFF VIA WEB MANAGER To turn Wall Devices on/off: Go to Player (Picture 35) or go to the Devices → Controls (Picture 36). Picture 35. On/Off commands on the “Player” page Picture 36. - Page 29 Upon completing the activation, setup and calibration procedures, turn off the Hotspot switch on the MasterBox. Attention. To ensure that networks are not overloaded, please do not leave the MasterBox Hotspot switch on. © Copyright 2021 HYPERVSN. All rights reserved...
-
Page 30: Volume Control
10.5 MASTERBOX AND DEVICES’ MODE SELECTION There are two operation modes: • CMS – to make it available to control the MasterBox and the Wall Devices via the software tools available in your CMS account (to turn the Wall Devices and the MasterBox on/off). -
Page 31: Erasing Content
Picture 42. Information about the Devices’ modes Attention. To control the Wall Devices with the MasterBox connected via the Wall App, the Player mode should be selected for them. To select the mode: Go to Setup →Settings (Picture 41c). -
Page 32: Content Playback Control
If media content is already uploaded onto the Device/the Wall Devices, after the Wall Devices are turned on, content will start to be displayed. If this content contains soundtracks and if audio facilities are connected to the MasterBox and powered, the audio content output will be provided while the Devices are displaying videos. - Page 33 The currently playing playlist has the icon in front of its name. Note. Media playback can be also controlled via the Wall application. For information on how to control it, see the Wall App User Guide. © Copyright 2021 HYPERVSN. All rights reserved...
-
Page 34: Masterbox And Devices' Statuses
Devices → Controls) or the Wall Devices are disconnected from the power mains. Off: everything is OK. The red light indicator of the MasterBox located above the Sync socket is blinking when the MasterBox is sending any command (via the Sync cable). © Copyright 2021 HYPERVSN. All rights reserved... - Page 35 The color of serial numbers depends on the Device status: Grey – no connection between the Device and the MasterBox. • Black – a wire connection between the Device and the MasterBox is established, • and the Device is turned off by the remote control.
- Page 36 Picture 47. Device status indicators The blue indicator of the Device should be blinking, if the Wall (including this Device) has already been setup via the Wall App and the MasterBox is connected to the Wall. If it is not blinking: The Wall with the connected MasterBox has not already been setup via the Wall •...
-
Page 37: Technical Maintenance / Waranty / Disposal
MasterBox have been replaced. Clean any dust off of the MasterBox. Important. Do not use a moist rage when cleaning the MasterBox. If the MasterBox needs to be repaired or if spare parts need to be purchased, please contact your vendor. 13.2 WARRANTY The MasterBox warranty is for 12 months, or as required by local law. -
Page 38: Safety Provisions
Since the MasterBox relates to TYPE A pluggable equipment it is necessary to have an easy-to-reach socket nearby. • Do not use the MasterBox if cables are damaged. Make sure the cables are not in contact with any sharp edges or hot surfaces. •... -
Page 39: Special Requirements
This equipment shall be installed and operated with a minimum distance of 2cm between user and/or bystanders and this device. The MasterBox complies with part 15 of the FCC Rules. Operation is subject to the following two conditions: This device may not cause harmful interference. - Page 40 Unit 12.3.1 the Leather Market Weston Street London SE1 3ER United Kingdom + 44 (0) 208 0685 328 www.hypervsn.com...
Need help?
Do you have a question about the MasterBox and is the answer not in the manual?
Questions and answers