Table of Contents
Advertisement
Advertisement
Table of Contents

Subscribe to Our Youtube Channel
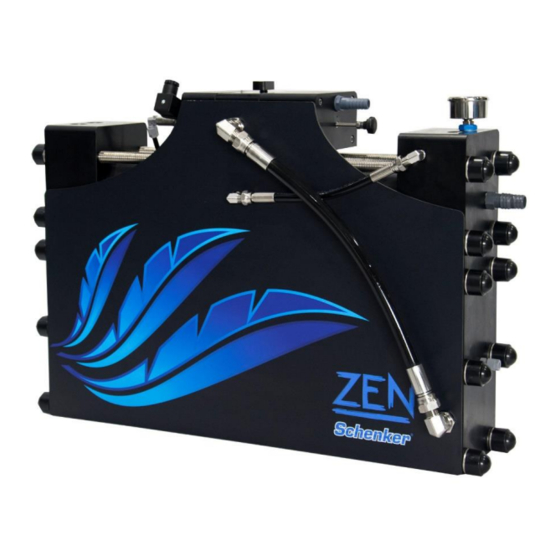
Related Manuals for Schenker ZEN 150


Summary of Contents for Schenker ZEN 150
- Page 1 COD: 150Z24.B.2021 Installation, use and maintenance manual ZEN 150 24 V dc...
-
Page 2: Table Of Contents
..........................23 4.5 E LECTRIC CONNECTIONS ..........................26 4.5.1 R EMOTE CONTROL PANEL INSTALLATION ....................26 4.5.2 E (ZEN 150 12/24V DC) ..............26 LECTRIC CONNECTIONS WIRES 5. FUNCTIONING AND USE ..........................28 5.1 C OMMAND DESCRIPTION ..........................28 5.1.1 A LARMS DESCRIPTION .......................... - Page 3 7. TROUBLESHOOTING ............................41 7.1 T ROUBLESHOOTING CHART ..........................41 8. SUGGESTED SPARE PARTS ......................... 42 8.1 S HORT TERM CRUISING ........................... 42 8.2 L ONG TERM CRUISING ............................. 42 Schenker Italia THE PRESENT MANUAL BELONGS TO - - ALL RIGHTS RESERVED...
-
Page 4: Layout Of Manual
This symbol indicates accident prevention regulations for the operator and / or for any exposed persons. CAUTION: This symbol indicates that there is the possibility of damaging the system and / or its components. NOTE: This symbol indicates useful information. Schenker Italia THE PRESENT MANUAL BELONGS TO - - ALL RIGHTS RESERVED... -
Page 5: General Warnings And Information To The Recipient
All rights of reproduction of this manual are reserved to SCHENKER ITALIA. This manual cannot be transferred to third parties without the written authorization of SCHENKER ITALIA. -
Page 6: Warranty
36-month warranty, as long as the watermaker is given a proper maintenance by a specialized Schenker technician. The warranty covers faults due to defected materials and parts. It is limited to the replacement or repair of faulty parts. The charge for the disconnecting and reinstalling on the vessel, as well as the transport from or to our Service Point (or our factory) shall be at the customers own expenses. -
Page 7: Identification Of The Unit
According to removal and disposal, it should be highlighted that the construction materials of the machine are not dangerous for the environment and consist essentially of: Stainless Steel; Plastic; Carbon fibre; Motors, cables and consumable electrical materials; Rubber and polyurethane seals. Schenker Italia THE PRESENT MANUAL BELONGS TO - - ALL RIGHTS RESERVED... - Page 8 ATTENTION Different legislations are in force in the different countries, therefore the prescriptions imposed by the laws and by the agencies designated by the Countries must be observed. Schenker Italia THE PRESENT MANUAL BELONGS TO - - ALL RIGHTS RESERVED...
-
Page 9: Presentation Of The Product
The watermaker unit is transported in a cardboard box. Dimensions and weight are indicated in the following table. MATERIALS HANDLING fig. 3-1 Model L cm. W cm. H cm. Weight Kg. Zen 150 Packaging dimensions and weight tab.3-1 Schenker Italia THE PRESENT MANUAL BELONGS TO - - ALL RIGHTS RESERVED... -
Page 10: Stockage
3.3 Packaging 3.3.1 Packaging contents PACKAGING (picture for purely information) FIG. 3-2 ZEN 150 Watermaker Pump group Active carbon filter with electrovalve 5 microns filter with accumulator Mesh filter... -
Page 11: Attached Documents
Do not store the unit under temperature below 5°C and above 45 °C DOCUMENTS INCLUDED IN THE PACKAGING (picture for purely information) FIG. 3-3 3.5 Technical data WATERMAKER WATERMAKER DIMENSIONS FIG. 3-4 Schenker Italia THE PRESENT MANUAL BELONGS TO - - ALL RIGHTS RESERVED... -
Page 12: Features Of The Product
(electric safety requirements) 3.6 Features of the product The fresh water produced by a Schenker watermaker, obtained by clean seawater, has a high purity. Despite this, the potability may not be guaranteed: bacterium caused by non-observance of shutdown and cleaning procedures may be present in the watermaker. -
Page 13: Advantages Of The Energy Recovery System
Functioning principles The Schenker watermakers, as an alternative to the high-pressure pumps of traditional systems, use the ENERGY RECOVERY SYSTEM patented device, which amplifies the pressure of common low-pressure pumps, and recover all the hydraulic energy back from the membranes, allowing a high energy efficiency. -
Page 14: Composition Of The Machine
The device has to be pre-charged with air through the Schrader valve. The pressure is about 6 Bar. The accumulator is preloaded in factory to the correct pressure. Schenker Italia THE PRESENT MANUAL BELONGS TO -... -
Page 15: Watermaker Group
WATERMAKER GROUP (SIDE VIEW W/O COVER) FIG. 3-7 Watermaker outlet/discharge Watermaker inlet Reverse osmosis membranes Fresh water production WATERMAKER GROUP (FRONT VIEW W/O COVER) FIG. 3-8 Reset valve Manometer Depressurization valve Positioner knob Schenker Italia THE PRESENT MANUAL BELONGS TO - - ALL RIGHTS RESERVED... - Page 16 (lever perpendicular to the valve). This valve has the function of allowing the resetting of the ERS in case of a system block. It must be opened before screwing in the valve positioner. Schenker Italia THE PRESENT MANUAL BELONGS TO -...
-
Page 17: Accessories
It stops leaking of fresh water from the seacock while the washing procedure starts. Mesh filter. The machine is equipped with a strainer to protect the pump from macro sediments. This is placed between the seacock and the pump. Schenker Italia THE PRESENT MANUAL BELONGS TO - - ALL RIGHTS RESERVED... -
Page 18: Installation
Once an installation plan has been made, it is recommended to make a schematic drawing of the hydraulic and electric connections and attach them to the manual for future reference. Schenker Italia THE PRESENT MANUAL BELONGS TO - - ALL RIGHTS RESERVED... -
Page 19: Components Installation
L-brackets but it must rest on a flat surface at all times. Otherwise a shelf is necessary as base to support the weight of the watermaker. VERTICAL AND HORIZONTAL FIXING FIG. 4-1 Schenker Italia THE PRESENT MANUAL BELONGS TO - - ALL RIGHTS RESERVED... - Page 20 4 – INSTALLATION COD: 150Z24.B.2021 MOUNTING PROCEDURE FIG. 4-2 POSSIBLE CONFIGURATIONS FIG. 4-3 For a complete installation, antivibration rubber stickers are provided. Schenker Italia THE PRESENT MANUAL BELONGS TO - - ALL RIGHTS RESERVED...
- Page 21 This can be done by making use of the fittings provided. HORIZONTAL FIXING FIG. 4-5 3/8” Nipple 3/8” male to 1/8” female reducer 3/8” 90°-Degree Elbow Manometer Schenker Italia THE PRESENT MANUAL BELONGS TO - - ALL RIGHTS RESERVED...
-
Page 22: Accessories
In case of powerboats with a cruising speed above 15 knot it is advised to make a small hole (8 mm. diameter) on the back of the shape, in order to reduce dynamic prevalence during navigation. Schenker Italia THE PRESENT MANUAL BELONGS TO - - ALL RIGHTS RESERVED... -
Page 23: Fresh Water Connection For Flushing
It is possible to use a tee fitting on existing discharge hoses (ie: tap discharges) provided that there are no returns of dirty water back to the watermaker. Schenker Italia THE PRESENT MANUAL BELONGS TO - - ALL RIGHTS RESERVED... -
Page 24: Hydraulic Connections
“Armorvin” type hose Brine discharge Plumb to pressure side of boat fresh water system Reinforced hose PN16 min int. dia. 20 mm. HYDRAULIC CONNECTION AND PIPES FIG. 4-7 Schenker Italia THE PRESENT MANUAL BELONGS TO - - ALL RIGHTS RESERVED... - Page 25 Low pressure connections – ¼’’ fittings, Small plastic blue • max 3 bar pipe 6x8mm provided within Watermaker - fresh water tank the scope of supply Schenker Italia THE PRESENT MANUAL BELONGS TO - - ALL RIGHTS RESERVED...
- Page 26 It is possible, in case of metal tanks, to make a ¼” threaded hole to connect the supplied male connector. Another option is to Tee into the tank air vent hose.There are no particular limits on the connection length. Schenker Italia THE PRESENT MANUAL BELONGS TO -...
-
Page 27: Electric Connections
4-9 4.5.2 Electric connections: wires (ZEN 150 24V DC) The electric connectors are positioned inside the small electric box connected to the computer box. The power supply, coming from the service batteries, needs to be connected to the terminals – and + . The connection to the vessel panel needs to be performed downstream the voltmeter and the ammeter of the vessel panelboard. - Page 28 IN RED: CONNECTIONS TO BE MADE DURING THE INSTALLATION Electrovalve (EV) Pump negative Pressure transducer Battery positive Connection to remote panel Battery negative Pump microswitch EV microswitch Pump positive Schenker Italia THE PRESENT MANUAL BELONGS TO - - ALL RIGHTS RESERVED...
-
Page 29: Functioning And Use
The first start-up procedure is necessary to start a new system, after a filter replacement or a chemical washing. The start-up procedure is mainly aimed to purge the air in the system and into the hoses. Schenker Italia THE PRESENT MANUAL BELONGS TO -... -
Page 30: Preliminary Checks Before Proceeding With The Start-Up Procedure
4. After 2-3 minutes, close the depressurization valve. The system starts going under pressure and the fresh water production begins. Check the working pressure of the unit is correct (6,5 – 7,5 bar). Schenker Italia THE PRESENT MANUAL BELONGS TO - - ALL RIGHTS RESERVED... -
Page 31: Normal Operating Procedure
1. Push ON/OFF to start the watermaker. 2. Push FLUSHING to flush and stop the watermaker. The watermaker will activate a flushing cycle then it will stop after 1 minute Schenker Italia THE PRESENT MANUAL BELONGS TO - - ALL RIGHTS RESERVED... -
Page 32: Working Cycle With Timer
In this case the system has to be manually restarted. Although this circumstance might be very unusual, it does not damage the system, but it is necessary to reset the valve with the following simple procedure: Schenker Italia THE PRESENT MANUAL BELONGS TO - - ALL RIGHTS RESERVED... - Page 33 Normally 18 complete turns at least are needed. 4. Unscrew the positioner knob back to its original position, until it can be turned no more. Schenker Italia THE PRESENT MANUAL BELONGS TO - - ALL RIGHTS RESERVED...
- Page 34 5 – FUNCTIONING AND USE COD: 150Z24.B.2021 5. Close the reset valve (lever in vertical position). 6. Close the depressurization valve (screw the valve). 7. Restart the system. Schenker Italia THE PRESENT MANUAL BELONGS TO - - ALL RIGHTS RESERVED...
-
Page 35: Maintenance (Routine And Special)
2-3 minutes the depressurization valve. Unscrew the filter housing counter clockwise by using the specific key provided Replace the active carbon Once per year fibre filter Schenker Italia THE PRESENT MANUAL BELONGS TO - - ALL RIGHTS RESERVED... -
Page 36: Check The Watermaker Working Pressure
The purpose of the shutdown is to flush the system. This might be useful in order to prevent the system from the creation of organic and inorganic sediments, as well as inhibit the growth of bacteria that could reduce the reverse osmosis membranes efficiency. Schenker Italia THE PRESENT MANUAL BELONGS TO - - ALL RIGHTS RESERVED... -
Page 37: Necessary Equipment
3. A bottle of powder SCHENKER CLEANING 1 (SC1). The solution must be prepared following the instruction indicated on the bottle label, and using unchlorinated water ( for instance water produced by the system can be an option). -
Page 38: Shutdown Operating Procedure
Pipes under the free water surface 3. Check they are well submerged in the solution and don't suck air. Open the depressurization valve. Schenker Italia THE PRESENT MANUAL BELONGS TO - - ALL RIGHTS RESERVED... - Page 39 It is necessary to perform the first start-up procedure when restarting the plant after a shutdown procedure, in order to purge the air and drain out chemicals in the systems. Schenker Italia THE PRESENT MANUAL BELONGS TO - - ALL RIGHTS RESERVED...
-
Page 40: Antifreeze Procedure (Winterizing Procedure In Cold Climate - Under 5°C)
HYDRAULIC SCHEME FOR hoses. WINTERIZING PROCEDURE FIG. 6-2 ATTENTION Before proceeding with any kind of service, it is strongly recommended to read carefully the instructions contained in this manual. Schenker Italia THE PRESENT MANUAL BELONGS TO - - ALL RIGHTS RESERVED... -
Page 41: Periodic Maintenance
The accumulator is factory loaded at a pressure of about 6 bar. The charge level must be periodically checked in order to guarantee a correct functioning to the watermaker. Schenker Italia THE PRESENT MANUAL BELONGS TO - - ALL RIGHTS RESERVED... -
Page 42: Troubleshooting
Purge air opening for a while the pressure valve Low production / high pressure Clogged filters Replace filters (> 10 Bar) Clogged membranes Perform washing with SC1 Cold seawater Normal condition Schenker Italia THE PRESENT MANUAL BELONGS TO - - ALL RIGHTS RESERVED... -
Page 43: Suggested Spare Parts
SC2 WASHING PRODUCT CRUISING KIT CRK136 PUMP HEAD 100/150 L SP10 PUMP MOTOR 150 24V MP15/24 MEMBRANE 4021 M4021 PORTABLE SALINITY TESTER PRESSURE TRANSDUCER SPARE SEALS KIT ZEN150 SSZ15 Schenker Italia THE PRESENT MANUAL BELONGS TO - - ALL RIGHTS RESERVED...
Need help?
Do you have a question about the ZEN 150 and is the answer not in the manual?
Questions and answers