Advertisement
Quick Links
Fountain Components
Image
Item Description
Falling Water II
Fountain Water
Feature
Falling Water II
Fountain Spiller
Stopper
Falling Water II
Fountain Pump
House
Falling Water II
Fountain Pump
Door
Falling Water II
Fountain Basin
Falling Water III
Fountain Base
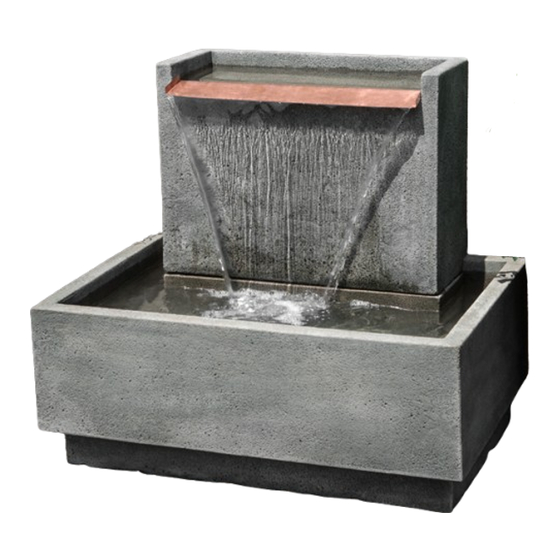
FT-295 Falling Water II Fountain
Fountain Information:
• Two people are recommended for the installation of this fountain!
• This fountain holds approximately 20 gallons of water.
• This fountain uses a large fountain cover: FTNCOV-LG
• Compatible with Refill Device and LED kits
• A special stopper is not required to use the refill kit for this fountain
Pump Information:
OEMPF525 - 525 GPH Pump (16 ft. cord length)
Tools Required:
Bubble Level
Screwdriver
Component
Quantity
Item #
FT-286A
1
FT-286B
1
FT-286C
1
FT-286D
1
FT-286F
1
FT-288E
1
Assembly Instructions
Pump Kit Parts List
Image
Component
PK500 Pump
(use adapter indicated)
12" length of 1/2" non-kink hose
2" length of 5/8" clear vinyl tubing
2" piece of 1/2" CPVC pipe
Hose Clamps
2.8 oz. tube of silicone
Copper Spiller
Proudly
MADE IN USA
Quantity
1
1
1
1
1
1
1
Wedges
3
rev 3/30/2020
Advertisement

Related Manuals for Campania International Falling Water II FT-295


Summary of Contents for Campania International Falling Water II FT-295
- Page 1 FT-295 Falling Water II Fountain Assembly Instructions Fountain Information: • Two people are recommended for the installation of this fountain! • This fountain holds approximately 20 gallons of water. • This fountain uses a large fountain cover: FTNCOV-LG • Compatible with Refill Device and LED kits •...
- Page 2 FT-295 Falling Water II Fountain Assembly Instructions Two people are recommended for the installation of this fountain! Fountain Set-Up: Assembly & Installation - A fountain can be difficult to install without knowing and understanding the steps involved. To ensure your fountain is installed properly, please read our instructions and tips before you begin.
- Page 3 FT-295 Falling Water II Fountain Assembly Instructions Step 7 - Place the water feature (FT-286A) on top of the pump cover and ensure that the pump cord exits through the hole provided. Step 8 - Insert the 2" CPVC pipe into the coupling protruding from the bottom of the water feature (FT-286A).
- Page 4 Maintenance: Pump Care - The fountain relies heavily on the quality of the pump. A well-maintained pump can last several years. Step 1 - Fully submerge: Ensure the pump is fully submerged at all times to avoid damage. Step 2 - E nsure water level is sufficient: Check water levels regularly as water may evaporate over time, and periodically change water to avoid algae buildup.
Need help?
Do you have a question about the Falling Water II FT-295 and is the answer not in the manual?
Questions and answers