Table of Contents
Advertisement
Advertisement
Table of Contents

Related Manuals for Fisherbrand Accu20


Summary of Contents for Fisherbrand Accu20
- Page 1 Accu20 Ultrapure Water System USER MANUAL www.eu.fishersci.com/fisherbrand...
- Page 2 This Manual Is Applicable to the Following Fisher Scientific Accu20 Models 15489689 Accu20 Water System 230V 15499689 Accu20 Water System, UV SET 230V www.eu.fishersci.com/fisherbrand...
-
Page 3: Table Of Contents
4.2 Replacing the UV Lamp (For UV Models) ..........30 4.3 Replacing the RO Membrane ..............32 4.4 Replacing the Fuse ..................34 5 BASIC TROUBLESHOOTING ................. 35 6 PARTS AND ORDER INFORMATION ............. 36 7 WARRANTY INFORMATION................38 www.eu.fishersci.com/fisherbrand... -
Page 4: Introduction
1) Use with a properly grounded electrical outlet of correct voltage and current handling capacity. 2) Replace fuses with those of the same type and rating. 3) Disconnect from the power supply prior to maintenance and service. 4) Refer servicing to qualified personnel. www.eu.fishersci.com/fisherbrand... -
Page 5: Product Features
1.1 Product Features The small footprint Accu20 lab water system is an ideal choice for users who need up to 20 liters of ultrapure water per day. Quality of ultrapure product water meets or exceeds ASTM, CLSI, CAP, and ISO Type I water standards. -
Page 6: Main Applications
HPLC mobile phase preparation • Preparation of reagent blank solutions • As sample diluents for GC, HPLC, AA, ICP-MS and other analytical techniques • Preparation of buffer and culture media for mammalian cell culture Preparation of molecular biology reagents, etc. www.eu.fishersci.com/fisherbrand... -
Page 7: Specifications
< 1 /mL (with a 0.2 µm final filter) (> 0.2 µm) UV lamp (optional) 185/254 nm dual wavelength Microorganism < 0.1 cfu/mL (with a 0.2 µm final filter) Pyrogen Content < 0.001 EU/mL (with a final ultrafiltration filter) www.eu.fishersci.com/fisherbrand... -
Page 8: Operation
1.4 Operation Accu20 water systems produce ultrapure water and RO water directly from tap water. Tap water is pretreated through a Pretreatment Cartridge (AccuDuo P Pack) to reduce free chlorine, larger particles and water hardness. Then most particles, ions and organic compounds are removed through the RO membrane. -
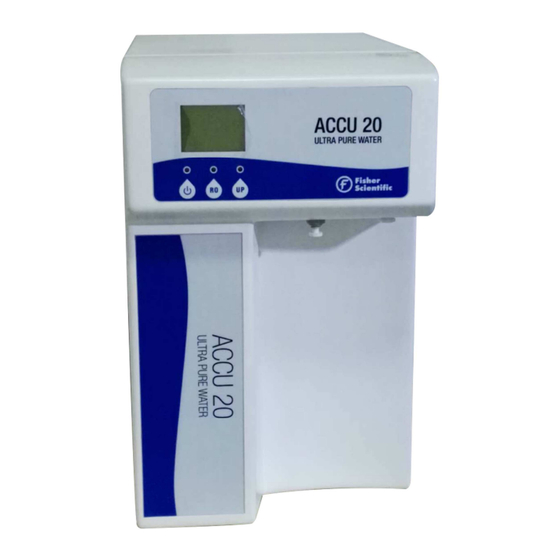
Page 9: The Control Panel
RS-232C interface to export data or print records Power Supply AC230 V ± 10%, frequency (50 ± 0.5) Hz; or AC110 V ± 10%, frequency (60 ± 0.5) Hz Maximum working temperature for conductivity meter UV lamp 185/254nm dual wavelength (optional) www.eu.fishersci.com/fisherbrand... -
Page 10: Installation
Scissors or a box opener to open packages and cut water tubing. A wrench to fasten the tubing connection. 2.2 Items Included Accu20 main system includes the following items: 1) One User Manual 2) Quality Certificate 3) Accessories Pack, including one power cord, one 3-way ball valve (1/2 inch NPTF INLET&NPTM Outlet, 3/8 inch quick connect ), 2... -
Page 11: System Structure And Flow Diagrams
2.3 System Structure and Flow Diagrams 2.3.1 System Front View Display Control Panel (see explanation on following page) Final Filter www.eu.fishersci.com/fisherbrand... - Page 12 RO indicator: Above RO Button. It turns solid GREEN when dispensing ultrapure water. If RO water does not meet quality standards, this light BLINKS. UP indicator: Above UP Button. It turns solid GREEN when dispensing ultrapure water. If UP water does not meet quality standards, this light BLINKS. www.eu.fishersci.com/fisherbrand...
- Page 13 2.3.3 System Back Side View Power switch Fuse Socket TAP IN In from Tap DRAIN RO Drain 2.3.4 Accu20 External Connection Diagram 9.53mm inlet tubing Tap water TAP IN 6.35mm outlet tubing DRAIN www.eu.fishersci.com/fisherbrand...
- Page 14 2.3.5 Accu20 Water Flow Diagram www.eu.fishersci.com/fisherbrand...
-
Page 15: Installation
(push in) Please follow the instruction below to remove the stoppers A. Insert the tweezer to the gap between the stopper and the collet. B. Pinch the tweezer and push it as the picture indicated to remove the stoppers. www.eu.fishersci.com/fisherbrand... - Page 16 4) Install P pack to the LEFT side position. Wet the O-rings on the cartridge with pure water, gently insert the lower end first into the opening on the system frame, then down to let the cartridge sit into its slot www.eu.fishersci.com/fisherbrand...
- Page 17 6) Lock the cartridge with the lock-key to the notch on the look-pin Insert the lock-key into the notch on the lock-pin 7) Install the U Pack cartridge to the RIGHT side of the P Pack in the same procedure as that for P Pack www.eu.fishersci.com/fisherbrand...
- Page 18 Note: DO NOT install the final capsule filter! The attached final filter will be installed after system initial start-up and degassing in the next chapter. End of System Installation Proceed to "System Start up and Operation" www.eu.fishersci.com/fisherbrand...
-
Page 19: System Start Up And Operation
If water hardness is greater than 100 ppm, Fisher Scientific suggest you to use an external water softening device to protect the RO membrane Tap Water connected and turned on P Pack cartridge installed U Pack cartridge installed Drain tubing installed and laid to the sink www.eu.fishersci.com/fisherbrand... -
Page 20: System Start Up And Time Setting
XX.X µS /cm 25 RO Water conductivity compensated to 25 Third row: UP status. XX.X MΩ·cm 25 Ultrapure (UP) water resistivity compensated to 25 Fourth row: System status. It displays system operation information and error messages. All messages scroll in sequence. www.eu.fishersci.com/fisherbrand... - Page 21 (failure). The green light above the UP button will blink. P Pack cartridge has reached its expected useful Exch. P PAK life. Exchange the cartridge. UV lamp reached their expected useful life. Check Exch. UV Lamp ultrapure water quality or replace the lamp. www.eu.fishersci.com/fisherbrand...
- Page 22 If the blinking of UP indicator light continues, replace the U pack cartridge. • Cartridge Life Reminder: System has preset cartridge usage timers (countdown) for both P Pack and UV lamp. System reminds you to replace them when these consumables are about to run out or have been exhausted. www.eu.fishersci.com/fisherbrand...
- Page 23 After turning on the power, system displays system type, serial number (S / N) for 5 seconds. At this point, system runs self-testing programs in the background. Accu20 S/N: S0RD50503 System automatically checks water pressure, determines the water supply situation.
- Page 24 Once the cleaning is completed, RO indicator light stops blinking and water quality reaches the standard. 3) Discharge the initial 5 - 10L of water (about 10 - 15 minutes) after installing a new purification cartridge. Press the UP button again to stop dispensing. www.eu.fishersci.com/fisherbrand...
- Page 25 2) Press the RO button to move the cursor, the corresponding number will blink. Press the UP button to increase, or press the RO and UP buttons simultaneously to decrease values. 3) After editing, press the START button twice to exit the editing mode. www.eu.fishersci.com/fisherbrand...
-
Page 26: Routine Operations
Press the RO button again to stop dispensing. If the START button is pushed when the system is in Ready mode, the system will go to Standby. No water will be dispensed. Press the START button again to put the system back into Ready mode. www.eu.fishersci.com/fisherbrand... -
Page 27: Maintenance
Remove Ca the RO membrane, 2 - 4 weeks Cartridge and Mg ions reducing RO production rate Oxidation and clogging Activated Remove of RO membranes, Carbon chlorine and 2 - 4 weeks reducing RO production Prefilter organics rate and rejection www.eu.fishersci.com/fisherbrand... -
Page 28: Replacing The Accuduo P Pack, U Pack Cartridges And The Final Filter
Power up the system, then press the START button. b) Press the UP button to degas the system and check for system leakage. If there is a leak, turn off the system and reinstall the cartridge. c) Press the UP button to put system into Ready. www.eu.fishersci.com/fisherbrand... - Page 29 Water resistivity should reach 18.2 MΩ·cm by then. 8) Press the UP button again to stop dispensing. 9) Install 0.2 µm final filter or an ultrafiltration filter as procedures described in 3.2.3. www.eu.fishersci.com/fisherbrand...
-
Page 30: Replacing The Uv Lamp (For Uv Models)
Keep the UV lamp straight in and out of the stainless steel chamber during its installation to avoid any action that could cause the lamp to break. Enlargement Top view UV Assembly 1) Switch off the system power, unplug the power cord. 2) Remove the system top cover. www.eu.fishersci.com/fisherbrand... - Page 31 (4-pin connector) as shown in the picture, and then gently insert the UV lamp completely into the chamber. 7) Cap the UV chamber with the black mask (see picture). 8) Reinstall the system top cover and tighten the screws. www.eu.fishersci.com/fisherbrand...
-
Page 32: Replacing The Ro Membrane
RO Housing RO OUT 1) Switch off the system power, unplug the power cord. 2) Remove the system left side panel. RO membrane housing is indicated in the picture above. 3) Remove the RO membrane housing from its support. www.eu.fishersci.com/fisherbrand... - Page 33 11) Press the START button to start a 180 second Flush, then the system will enter READY mode, press the UP button for 3 second to initiate the 1800 second cleaning procedure. The System will go back to READY mode after cleaning. www.eu.fishersci.com/fisherbrand...
-
Page 34: Replacing The Fuse
3) Use the back wall of the power cord receptacle as the point of support to pry the housing open 4) Slide the fuse out 5) Replace the blown fuse with the spare fuse located inside the fuse housing 6) Slide the fuse housing back into its original place www.eu.fishersci.com/fisherbrand... -
Page 35: Basic Troubleshooting
Resistivity sensor or meter Replace relevant parts failure Water leakage Leak from connections Shut off power and water supply. Remove system side panels, turn on water supply and check leaking points. Reconnect or replace leaking parts. www.eu.fishersci.com/fisherbrand... -
Page 36: Parts And Order Information
6 PARTS AND ORDER INFORMATION Fisher Scientific Accu20 Systems Catalog Number Accu20 System 15489689 Accu20 Water System 230V 15499689 Accu20 Water System, UV SET 230V Commonly Used Consumables Catalog Number Product Name Description Unit Reverse osmosis 15449669 RO membrane, 1/pk... - Page 37 Conductivity Sensor Low Pressure switch Pressure Gauge Pressure relief pump Commonly Used Connector Package Check Valve Flow Restrictor UV lamp ballast RO membrane housing (with connectors) Power Switch Fuse 3/8" PE tubing (5 meters) 1/4" PE tubing (5 meters) www.eu.fishersci.com/fisherbrand...
-
Page 38: Warranty Information
As a result, the information contained in this manual may be changed without further notice. Thermo Fisher Scientific assumes no responsibility for any errors that may appear in this manual. The plant's quality management system where this Accu20 system was manufactured has passed the ISO9001:2008 quality management system.
Need help?
Do you have a question about the Accu20 and is the answer not in the manual?
Questions and answers