
Related Manuals for Acer AT3720A


Summary of Contents for Acer AT3720A
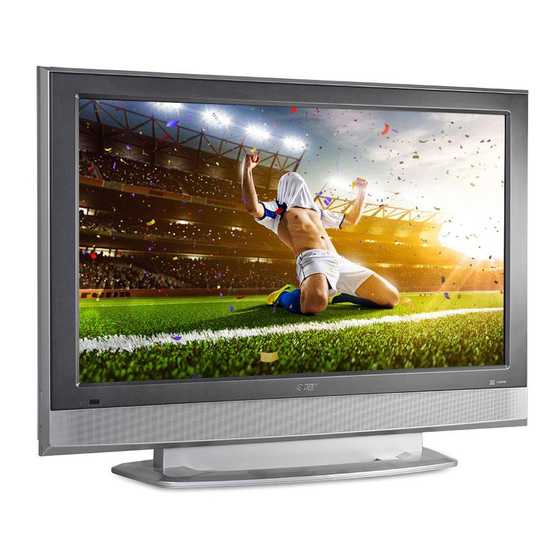
- Page 1 Acer AT3720A/3720B/3720 LCD TV Service Guide Service guide files and updates are available on the ACER/CSD web; for more information, please refer to http://csd.acer.com.tw PRINTED IN TAIWAN...
-
Page 2: Revision History
Revision History Please refer to the table below for the updates made on Acer LCD TV AT3720A/3720B/3720 service guide. Date Chapter Updates... - Page 3 Copyright Copyright © 2006 by Acer Incorporated. All rights reserved. No part of this publication may be reproduced, transmitted, transcribed, stored in a retrieval system, or translated into any language or computer language, in any form or by any means, electronic, mechanical, magnetic, optical, chemical, manual or otherwise, without the prior written permission of Acer Incorporated.
- Page 4 Conventions The following conventions are used in this manual: SCREEN MESSAGES NOTE WARNING CAUTION IMPORTANT Denotes actual messages that appear on screen. Gives bits and pieces of additional information related to the current topic. Alerts you to any damage that might result from doing or not doing specific actions.
- Page 5 DIFFERENT part number code to those given in the FRU list of this printed Service Guide. You MUST use the list provided by your regional Acer office to order FRU parts for repair and service of customer machines.
-
Page 7: System Specifications
∮ 3.5 mm Earphone jack for audio line input Video Functions Support PAL/NTSC/SECAM video format (for AT3720A) Support 480i/576i, 480p/576p, 1080i and 720p format Build in Dynamic adaptive smoothing filter Build in Dynamic temporal frame-filtering Noise Reduction Build in Dynamic motion and edge adaptive De-interlacing... - Page 8 Input current: 2.2A Standby consumption is under 5 Watts Speaker Internal speaker: 10 W * 2 stereo, volume adjustable Amplimfier: 10W * 2 stereo, volume adjustable Chapter 1...
-
Page 9: System Block Diagram
System Block Diagram System Block and Wiring Diagram INVERTER POWER Module SPEAKER LCD Main Board Block Diagram Chapter 1 PANEL MAIN Board IR Receiver I/O Board A-Tuner AV 1 AV 2 Component1 Component2 Key Board... -
Page 10: Board Layout
Board Layout Cable Arrangement Connector CN908 (Power Board) CN903 (Power Board) <-->CON15 (Main Board) CN904<-->CON11 CON6 (Main Board) -CN1(Button Board)-CN1 (IR Board) CON17 (Main Board) CON13 (Main Board) Cable Description Inverter Cable Audio Cable-Main board (audio) to power board Power Cable Button Board-IR Board (CN1)-Main Board (CN1) Cable LVDS Cable... -
Page 11: Lcd Tv Overview
LCD TV Overview A general introduction to Acer LCD TV ports, functions and indicators. AT3720A/AT3720B/AT3720 Front panle view The panel view below is for AT3720A/AT3720B/AT3720. Item Power On/Off Menu key Channel up/down Volume +/- Input key Chapter 1 Description Power on or off the LCD TV. - Page 12 T3720A Rear panel view Power switch AC-in HDMI VGA-in DVI-d Item Item PC Audio-in AV-Audio L/R + COMPONENT 1/2 AV-Audio L/R + CVBS 1/2 Analog antenna Chapter 1...
- Page 13 AT3720B Rear panel view Power switch AC-in HDMI VGA-in PC Audio-in Chapter 1 Item Item Audio L/R + CVBS + COMPONENT Audio L/R + CVBS + COMPONENT 1/2 Audio L/R + CVBS 1/2 + S-Video Analog antenna...
- Page 14 AT3720 Rear panel view Power switch AC-in HDMI VGA-in Item Item PC Audio-in AV-Audio L/R + CVBS + COMPONENT SCART Analog antenna Chapter 1...
-
Page 15: General Keys
AT3720A Remote controller General Keys Item POWER DISPLAY MUTE Input buttons (TV/AV/ COMPONENT/PC) SLEEP Number keys RECALL Chapter 1 Press to turn your TV on/off. Press to display input/channel information (dependent on input/source type). Press to toggle audio on and off. - Page 16 3 modes. Press to switch the sound system between stereo, main and SAP. Information is displayed in the top right-hand corner. Press to activate Acer Empowering Technology. Press to increase or decrease the volume. Press to sequentially select the TV channel.
- Page 17 AT3720B Remote controller General Keys Item POWER DISPLAY MUTE Input buttons (TV/AV/ COMPONENT/PC) SLEEP Number keys RECALL Chapter 1 Press to turn your TV on/off. Press to display input/channel information (dependent on input/source type). Press to toggle audio on and off. Press to select correct input mode.
- Page 18 3 modes. Press to select the sound input, displayed in the top right-hand corner (mono, stereo, bilingual). Press to activate Acer Empowering Technology. Press to increase or decrease the volume. Press to sequentially select the TV channel. Switch between PIP/PBP/POP modes.
- Page 19 AT3720 Remote controller General Keys Item POWER DISPLAY MUTE Input buttons (TV/AV/ SCART/PC) SLEEP Number keys. RECALL ENTER MENU TTX/MIX (TELETEXT/MIX) Directional keys/OK Chapter 1 Press to turn your TV on/off. Press to display input/channel information (dependent on input/source type). Press to toggle audio on and off.
- Page 20 WIDE VOL (+/-) CH (up/down) Teletext Item Colour buttons (R/G/Y/B) INDEX SIZE SUBTITLE SUBPAGE HOLD REVEAL Press to toggle scaling mode between 4:3; 16:9, Panorama and Letterbox 1, 2, 3 modes. Press to select the sound input, displayed in the top right-hand corner (mono, stereo, bilingual).
-
Page 21: Basic Connection
Basic connection Connecting the power cord Connect the AC cord into the AC input on the back of the set. Connect the male plug to the wall outlet as shown. For AT3720A: For AT3720B: For AT3720: Chapter 1... -
Page 22: Connecting An Antenna/Cable
Connecting an antenna/cable Connect the antenna cable to the appropriate antenna terminal on the back of the TV set as shown below. Getting started watching your TV Select the setup language you prefer. Please select country. Ensure that your co-axial cables connected correctly before proceeding. Chapter 1... - Page 23 Scan for analog channels. Setup is now complete. You are ready to begin watching TV. If you leave the setup process before it is complete, you will be given a choice of options: 1. Resume setup 2. Resume setup wizard at next startup 3.
-
Page 24: Connecting External Audio/Video Device
Connect your DVD player, VCR or audio/video equipment using the SCART port located at the rear of your LCD TV as shown below. For AT3720A: Source-IN Yellow White Blue Green S-video NOTE: Acer recommends the following priority for connection types: HDMI -> DVI ->D-Sub ->COMPONENT - > S-Video -> Composite. Chapter 1... - Page 25 For AT3720B: Yellow White Blue Green Chapter 1...
- Page 26 Source-IN Yellow White Blue Green * Acer recommends the following priority for connection types: HDMI -> COMPONENT -> SCART -> Composite. TV-OUT *SCART-out only works with analog broadcasts. Connecting a camera, camcorder, video am or headphones Connect your camera or camcorder to the video/audio ports on the rear of the TV set as shown below.
-
Page 27: Connecting A Pc Or Notebook Computer
To display PC output on your TV, connect your PC or notebook computer to the TV as shown below. For AT3720A: NOTE: For VGA and DVI input, Acer recommends setting your PC’s external monitor resolution to 1360 x 768 pixel @ 60 Hz. -
Page 28: Selecting The Input Source
For AT3720: Selecting the input source Once you have connected your antenna or external equipment to the TV, you need to select the correct input source. Press the corresponding button on the remote control to select the correct input source. Chapter 1... - Page 29 For AT3720A/AT3720B: Item TV key AV key COMPONENT key PC key For AT3720: Item TV key AV key COMPONENT key PC key Chapter 1 COMPONENT Input Button Guide Toggle Analog TV (ATV) between input sources. Toggle AV1, AV2, AV3-CVBS* and HDMI between input sources.
-
Page 30: Osd Navigation
OSD navigation Many of the advanced settings and adjustments are available through using the OSD (onscreen display) menus, as shown in the example screenshot below. Basic operations required to navigate these menus (Picture, Audio, Channel management, Options, Settings and Empowering) are described in this section. Navigating the OSD with the remote control NOTE: You can also interact with these menus using the front panel controls. -
Page 31: Adjusting The Osd Settings
Adjusting the OSD settings The OSD can be used for adjusting the settings of your LCD TV. Press the MENU key to open the OSD. You can use the OSD to adjust the picture quality, audio settings, channel settings, options, general settings, and Empowering Technology. For advanced settings, please refer to following page: Adjusting the picture quality Adjusting the audio settings... - Page 32 NOTE: The options available on the OSD may vary depending on the TV signal source. Chapter 1...
-
Page 33: Empowering Technology
Set-up Empowering mode More than 2 seconds The Empowering Key opens up the Acer Empowering Technology functions. In TV mode, the choice is between Scenario mode and Favorite channel. Set-up Empowering mode To change your Empowering Key’s default setting: Chapter 1 Press and hold the Empowering Key for more than two seconds to open the menu. -
Page 34: Default Setting In Different Empowering Mode
Default setting in different Empowering mode Scenario mode in TV (default setting) Scenario mode has five preset viewing modes designed to give you the best picture quality when watching a particular kind of program. There are five pre-defined audio and video settings for optimal enjoyment of the following scenarios: Standard TV, Movie, Sport, Concert, Game, User. - Page 35 OSD Navigation Many of the advanced settings and adjustments are available through using the OSD (on screen display) menus, as shown in the example screenshot below. Basic operations required ot navigate these menus (Picture, Audio, Settings, Options, Empowering) are described in this section. The first time you access the OSD, you will be asked to choose your language settings.
- Page 36 Teletext Most TV channels also broadcast information via the teletext feature. This Acer LCD TV has 252 pages of memory which will store pages and subpages, thereby reducing waiting time. The teletext buttons on the remote control are listed below.
-
Page 37: Advanced Features
Advanced Features PIP/PBP/POP Press the PIP/PBP button once to display activate picture-in-picture (PIP). Press twice to activate picture-by-picture (PBP). Press three times to activate picture-on-picture (POP). Then, the POP screens will display the TV Channel programs on by one. NOTE: The OSD menu is not available in PIP/POP/PBP modes. COMPONENT Swap Chapter 1... -
Page 38: Locking Tv Content
COMPONENT Swap NOTE: In PIP and PBP, the VGA and DVI sources only support input up to 1360x768 pixels at 60Hz. For resolutions higher than this, “Out of Range” will be displayed. NOTE: The POP can only support 1+12 when the main screen scurce is HD content or in VGA mode. Lock TV Locking TV content Lock TV allows you to enter a password and effectively stop anyone without the password from watching TV.. - Page 39 to enable this feature: Setting a personal PIN Locking your TV Chapter 1 Use the directional keys to navigate to the (see note) Enter a four-digit password. Type it again and press OK to reconfirm. Press MENU to exit. Use the directional keys to navigate to the Enter your PIN.
-
Page 40: Hardware Specifications And Configurations
Hardware Specifications and Configurations Electro / Optical Size of screen LCD panel supplier Screen aspect ratio Type of screen Screen resolution Display colors Chromaticity Color temperature White uniformity White dispersion Brightness Contrast Ration Uniformity Overscan Vision angle Gamma Response time (T Screen (lamp + LCD) life Panel interface 37 inches for AT370A/AT3720B/AT3720... - Page 41 Mains Power supply electrical specification Stand-by consumption Power consumption Mains disturbance behaviour Inverter Audio / Acoustical Audio input PC Stereo Input Built-in Speaker acoustical noise (complete Chapter 1 The power supply for this product is an internal converter, with a non-replaceable fuse internally. This converter is designed to meet CE mark requirement.
- Page 42 Hard / Soft Performance Languages supported Starting time Wake-up behaviour Stand-by reason Video and Audio Characteristics No. PARAMETER ( Channel: 11 ) 1 Video output level 2 Video S/N 3 Noise limiting sensitivity Video amplitude frequency characteristics 5 Audio output level 6 Audio S/N Scanning mode Analog TV naming...
- Page 43 Main HDMI Component 1 Component 2 Main HDMI Component 1 Component 2 TTX level TTX keys function Video standard supported Chapter 1 • POP sub window only Analog TV support • No auto SCART supported in POP mode • In POP12 mode, support component1 (up to 1080i), VGA / DVI (up to 1024 x 768 @ 60Hz) and HDMI (up to 1080i) •...
- Page 44 Video ADC and processing Time to synchronize Video management Aspect ratio Scenario functions Audio management Audio enhancement AV sub-format supported Copy protection management IR performance 7.5M in front of the IR sensor 10 bits (chroma and luma) • Luma / chroma AGC •...
-
Page 45: Environmental Requirements
Connectors Tuner type AV1 in AV2 in Component1 Component2 DVI-D HDMI PC D-sub in PC Audio in Environmental Requirements The TV shall meet the following environmental requirements under normal operating conditions. Operating Storage and Shipping Altitude Transportation Vibration Test The packaged display shall be capable of passing sinusoidal vibration test as specified in follows. A. - Page 46 B. The unit under test shall be run for a duration of 30 minute in each of following orientations. a. Top and bottom side (z axis) b. Left and right side (x axis) c. Front and rear side (y axis) The unit shall suffer no visible cosmetic damage and should operate no degradation indisplay quality after test.
-
Page 47: Machine Disassembly And Replacement
Machine Disassembly and Replacement This chapter contains step-by-step procedures on how to disassemble the notebook computer for maintenance and troubleshooting. To disassemble the computer, you need the following tools: Wrist grounding strap and conductive mat for preventing electrostatic discharge small Philips screwdriver flat head screwdriver Philips screwdriver tweezers... -
Page 48: General Information
General Information Before You Begin Before proceeding with the disassembly procedure, make sure that you do the following: Turn off the power to the system and all peripherals. Unplug the AC adapter and all power and signal cables from the system. Remove the battery pack. -
Page 49: Disassembly Procedure Flowchart
Disassembly Procedure Flowchart The flowchart on the succeeding page gives you a graphic representation on the entire disassembly sequence and instructs you on the components that need to be removed during servicing. For example, if you want to remove the system board, you must first remove the keyboard, then disassemble the inside assembly frame in that order. - Page 50 Disassembling Steps Remove the six screws fastening the stand to the LCD TV, then remove the stand. Then detach the stand assembly from the LCD TV. Remove the 15 screws holding the back cover. Detach the back cover from the LCD TV. Remove seven screws holding the EMI shielding on one side.
- Page 51 13. Remove the four screws fastening the left speaker. 14. Remove the four screws holding the right speaker. 15. Tear off the mylard cover the speaker cable and detach the speaker cable. 16. Take out the speaker cable from the clip and then take out the left and the right speaker. 17.
- Page 52 22. Remove two screws on the right as shown. 23. Remove another four screws fasteing the LCD moudle to the front bezel. 24. Then you can hold the LCD brackets and lift the entire LCD module then take it away. 25.
- Page 53 30. Remove four screws holding the LCD brackets to the LCD. 31. Then detach the LCD brackets from the LCD. 32. Remove the three screws holding the inverter bracket. 33. Detach the inverter bracket carefully. 34. Disconnect the inverter cable and backlight cables from the inverter. 35.
- Page 54 Chapter 3...
-
Page 55: Troubleshooting
Troubleshooting Use the following procedure as a guide for Acer LCD TV AT3720A/AT3720B and AT3720 problems. NOTE: The diagnostic tests are intended to test this model. Non-Acer products, prototype cards, or modified options can give false errors and invalid system responses. - Page 56 AT3720A Troubleshooting Guideline Can not power on Power code Plug in? LED Bright? LED Bright Green color ? LCD Panel can Display ? Check Power code Replace Power board or Main board Or IO board or All cable Check Remote control...
- Page 57 LCD no backligh Inverter power Cable had Plug in LCD Panel Backlight Bright ? Chapter 4 Change Inverter Power Cable Replacement Power/B LCD Panel Backlight Bright ? Replacement LCD Panel Inverter /B LCD Panel Backlight Bight Replacement Main/B...
- Page 58 Remote controller does not have function Remote Control have battery ? IR Board Cable plug in Press Remote Menu Key OSD can Display ? Change Battery Check IR/B cable or Replacement IR/B Cable Replacement IR/B Press Remote Menu Key OSD can Display ? Replacement M /B Chapter 4...
- Page 59 Button key does not have function Key Board Cable Check K/B cable or plug in Replacement K/B Cable Press Menu Key check Replacement K/B Cable have Function? Press Menu Key check Replacement K/B Cable have Function? Chapter 4...
- Page 60 RF no display RF Cable Check RF cable or plug in Replacement RF Cable Replacement I/O board Replacement M/B RF Can Display Chapter 4...
- Page 61 Component 1, 2 no display Check Component cable Component Cable or Replacement plug in? Component Cable Replacement I /O Board Component can display Replacement M/B Board Chapter 4...
- Page 62 AV1, AV2 no display Check CVBS cable or CVBS Cable Replacement CVBS plug in? Cable Replacement I /O Board CVBS cat display Replacement M/B Board Chapter 4...
- Page 63 Speaker does not have sound Audio R/L source had plug IN? Video can Display ? Mute turn off Volume set 50 Speaker R/L cable plug IN? Speaker have Sound Output Chapter 4 Check Audio R/L source cable Check Video cable or Replacement Video Cable Check Speaker cable or Replacement Speaker cable...
- Page 64 VGA no display DVI Cable Check DVI cable or plug in? Replacement DVI Cable Read EDID DATA EDID Data Normal ? Write EDID data DVI can display ? Replacement M /B Chapter 4...
- Page 65 10. DVI no display DVI Cable Check DVI cable or plug in? Replacement DVI Cable Read EDID DATA EDID Data Normal ? Write EDID data DVI can display ? Replacement M /B Chapter 4...
- Page 66 11. HDMI no display Check HDMI cable or HDMI Cable Replacement HDMI plug in? Cable Read EDID DATA EDID Data Normal ? Write EDID data HDMI can display ? Replacement M /B Chapter 4...
- Page 67 12. HDMI no sound HDMI Cable plug in ? Read EDID DATA EDID Data normal ? Sound output? Chapter 4 Check HDMI cable or Replacement HDMI CABLE Write EDID data Replacement Main/B...
- Page 68 13. VGA/DVI no sound PC/DVI can Display ? Turn off Mute function Volume set to 50 Audio Line in Cable Plug IN? Sound Normal ? Check Video cable or PC or Replacement VGA/DVI cable Check Line in cable or Replacement Line in Cable Replacement Main/B Chapter 4...
- Page 69 14. Component no sound Check Component cable Component Cable or Replacement plug in? Component Cable Mute turn-off Volume =30 Check Component cable Component Source Replacement can Display? Component Cable Component Sound Replacement IO /B Normal? Replace Component Sound Normal? Chapter 4...
- Page 70 15. AV1/S-video no sound AV1/S-Video/R-L Cable plug in? Mute turn-off Volume =30 AV1/S-Video Source can Display? AV1/S-Video Sound Normal? Check Video and R-L cable or Replacement Video or R-L Cable Check Video and R-L cable or Replacement Video or R-L Cable Replacement IO /B AV1/S-Video Sound Normal?
-
Page 71: Fru (Field Replaceable Unit) List
DIFFERENT part number code from those given in the FRU list of this printed Service Guide. You MUST use the local FRU list provided by your regional Acer office to order FRU parts for repair and service of customer machines. - Page 72 AT3720A Exploded Diagram AT3720A/AT3720B/AT3720 FRU List is not ready as the service guide released. We will add the FRU list as soon as possible. Chapter 4...
- Page 73 Chapter 4...
Need help?
Do you have a question about the AT3720A and is the answer not in the manual?
Questions and answers