Turbo Air PRO-26R-N Installation And Operation Manual
Refrigerators & freezers
Hide thumbs
Also See for PRO-26R-N:
- Installation and operation manual (28 pages) ,
- Installation and operation manual (24 pages) ,
- Installation and operation manual (28 pages)
Table of Contents
Advertisement
Quick Links
Turbo Air Speeds up the Pace of Innovation
PRO Series
Refrigerators & Freezers
Installation and Operation Manual
Please read this manual completely before attempting to install or operate this equipment.
SOLID DOOR REFRIGERATORS
PRO-26R-N
PRO-26-2R-N
PRO-50R-N
PRO-50-4R-N
PRO-77R-N
PRO-77-6R-N
GLASS & SOLID HALF DOOR
REFRIGERATORS
PRO-26R-GSH-N
PRO-50R-GSH-N
GLASS DOOR REFRIGERATORS
PRO-26R-G-N
PRO-50R-G-N
SOLID DOOR FREEZERS
PRO-26F-N
PRO-26-2F-N
PRO-50F-N
PRO-50-4F-N
PRO-77F-N
PRO-77-6F-N
PASS THRU REFRIGERATORS
PRO-26R-PT-N
PRO-50R-PT-N
PRO-26R-GSH-PT-N
PRO-50R-GSH-PT-N
PRO-26R-G-PT-N
PRO-50R-G-PT-N
ROLL-IN REFRIGERATORS & FREEZERS
PRO-26R-RI-N
PRO-50R-RI-N
PRO-26-2R-G-N
PRO-50-4R-G-N
PRO-26R-GS-PT-N
PRO-50R-GS-PT-N
PRO-26-2R-PT-N
PRO-50-4R-PT-N
PRO-26-2R-GS-PT-N
PRO-50-4R-GS-PT-N
PRO-26F-RI-N
PRO-50F-RI-N
www.turboairinc.com
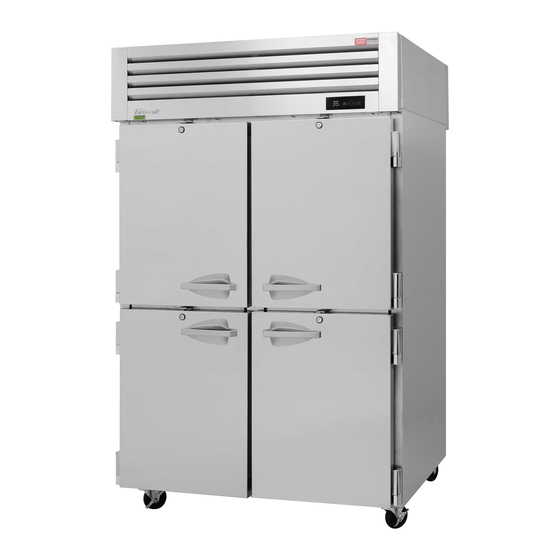
Full Stainless Steel Interior and Exterior
Advertisement
Table of Contents

Related Manuals for Turbo Air PRO-26R-N


Summary of Contents for Turbo Air PRO-26R-N
- Page 1 Turbo Air Speeds up the Pace of Innovation PRO Series Refrigerators & Freezers Installation and Operation Manual Please read this manual completely before attempting to install or operate this equipment. Full Stainless Steel Interior and Exterior SOLID DOOR REFRIGERATORS PRO-26R-N...
-
Page 2: Table Of Contents
CONTENTS PAGE NOTICE FOR HYDROCARBON REFRIGERATION UNITS 4 - 5 IMPORTANT SAFETY INFORMATION 6 - 9 SPECIFICATIONS SERIAL NUMBER INSTALLATION CLEANING & CAUTION BASIC OPERATION 14 - 19 TROUBLESHOOTING STAINLESS STEEL EQUIPMENT CARE & CLEANING WARRANTY STATEMENT 22 - 23 WARRANTY CARD... -
Page 3: Notice
NOTICE • This equipment is not intended for use by persons (including children) with reduced physical, sensory or mental capabilities, or lack of experience and knowledge unless they have been given supervision or instructions concern- ing the use of this equipment and the hazards involved by a person responsi- ble for their safety. -
Page 4: For Hydrocarbon Refrigeration Units
FOR HYDROCARBON REFRIGERATION UNITS WARNING This unit uses R-290 (propane), or R-600a (isobutane) as a refrigerant. These hydrocarbon refrigerants are highly environmentally compatible but also are flam- mable and combustible. Please read this manuel thoroughly before installing and operating the unit. Please take cautious measures to avoid risk of fire or explosion. PLEASE REFER TO THE LABEL INSIDE THE CABINET TO CHECK REFRIGERATION TYPE AND VOLUME. - Page 5 FOR HYDROCARBON REFRIGERATION UNITS WARNING • Handle the unit with care in order to avoid any serious damage to the refrigeration system. • The refrigerant tubing, condenser, and evaporator coils are easily prone to damage while handling, moving, installing, and cleaning the unit, which may lead to fire or even explosion.
-
Page 6: Important Safety Information
IMPORTANT SAFETY INFORMATION SAFETY PRECAUTIONS To avoid any risk of fire, explosion, electric shock, personal injury, material damage or incorrect use of the appliance, be sure to observe the following safety precautions. (After reading these owner’s manual instructions, please keep the manual booklet in a safe place for reference. - Page 7 IMPORTANT SAFETY INFORMATION INSTALLATION & USAGE WARNING • Do not install the unit in a damp place where it could be splashed with water. Incorrect insulation of the electrical parts may cause fire or electric shock. • Do not plug several appliances into the same sockets. This could cause overheating and risk start of a fire.
- Page 8 IMPORTANT SAFETY INFORMATION INSTALLATION & USAGE CAUTION • There is a risk of death from suffocation if a child puts the packing materials on his or her head. • Do not store any articles on top of the appliance. Articles may fall while opening or closing the door, and could cause personal injury or material damage.
- Page 9 IMPORTANT SAFETY INFORMATION PROPER DISPOSAL OF OLD APPLIANCE For environmental purposes, refrigeration appliances must be disposed of properly. This applies to your old appliance, and at the end of its service life, for your new appliance as well. WARNING Before disposing of old appliances, make them inoperable. Remove plug from mains, severe the power cable, and remove or destroy any snap or latch closures.
-
Page 10: Specifications
SPECIFICATIONS MODEL COM H.P. V/Hz REFRIGERANT AMPS WEIGHT 115V/60Hz R-290 315 lbs. PRO-26R-N 7.0A PRO-50R-N 115V/60Hz R-290 8.0A 485 lbs. R-290 697 lbs. PRO-77R-N 115V/60Hz 9.0A 115V/60Hz R-290 315 lbs. PRO-26-2R-N 7.0A 485 lbs. PRO-50-4R-N 115V/60Hz R-290 8.0A 115V/60Hz R-290 697 lbs. -
Page 11: Installation
Insufficient space causes vibration noise, inefficient refrigeration, damage to the refrigeration system, and the waste of electricity. (Turbo Air recommends that the rear of the unit should be no less than 5 inches from the wall) 3. - Page 12 INSTALLATION Ramp Installation For Roll In Models • Roll In Cabinets placed on the ground require flat and level ground to be set. Also, to comply with National Sanitation Foundation standards, sealant should be applied around the perimeter of the models’ base. •...
-
Page 13: Cleaning & Caution
CLEANING Before cleaning, unplug the unit and disconnect the power. Wipe and clean the inside and outside of appliance with a damp cloth. 1. CLEANING THE INTERIOR AND EXTERIOR - The interior and exterior of the unit can be cleaned using warm water with soap. - Do not use an abrasive cleaner because it will scratch the surface. -
Page 14: Basic Operation
BASIC OPERATION REFRIGERATORS PRO-26R-N PRO-26R-PT-N PRO-50R-PT-N PRO-50R-N PRO-77R-N PRO-26-2R-PT-N PRO-50-4R-PT-N PRO-26-2R-N PRO-26R-GSH-PT-N PRO-50-4R-N PRO-50R-GSH-PT-N PRO-77-6R-N PRO-26R-G-PT-N PRO-50R-G-PT-N PRO-26R-GSH-N PRO-26R-GS-PT-N PRO-50R-GSH-N PRO-50R-GS-PT-N PRO-26-2R-GS-PT-N PRO-26R-G-N PRO-50-4R-GS-PT-N PRO-50R-G-N PRO-26-2R-G-N PRO-26R-RI-N PRO-50-4R-G-N PRO-50R-RI-N 1. When the efrigerator is plugged in, the display panel will light up and make a beep sound. - Page 15 DISPLAY PANEL OF REFRIGERATOR COMPRESSOR RUNNING INDICATOR INNER TEMPERATURE DISPLAY (SEE PAGE 16) PRO Series Refrigerator DEFROST INDICATOR POWER BUTTON TURBO COOLING BUTTON (SEE PAGE 16) TEMPERATURE CONTROL BUTTON (SEE PAGE 16)
- Page 16 INNER TEMPERATURE DISPLAY 1. It displays the inside temperature. 2. Display range is 14˚F to 69˚F (-10˚C ~ +20˚C). 3. When the inside temperature is lower than 14˚F, the panel will display ‘ ’. and, higher than 69˚F, the panel will display ‘ ’.
- Page 17 BASIC OPERATION PRO-26F-N PRO-26-2F-N PRO-26F-RI-N FREEZERS PRO-50F-N PRO-50-4F-N PRO-50F-RI-N PRO-77F-N PRO-77-6F-N 1. When the freezer is plugged in, the Display panel will light up and make a beep sound. The compressor will then begin to run. 2. The default temperature setting is 1°F. 3.
- Page 18 DISPLAY PANEL OF FREEZER COMPRESSOR RUNNING INDICATOR INNER TEMPERATURE DISPLAY (SEE PAGE 19) PRO Series Freezer DEFROST INDICATOR POWER BUTTON TURBO FREEZE BUTTON (SEE PAGE 19) TEMPERATURE CONTROL BUTTON (SEE PAGE 19)
- Page 19 2. If it is necessary to change the intervals of defrost due to unusual operating conditions, it can be accomplished by adjusting the defrost setting (please contact Turbo Air technician). 3. Once all frost is eliminated, the temperature continues to rise until it reaches 60˚F (15˚C).
-
Page 20: Troubleshooting
TROUBLESHOOTING SYMPTOMS CAUSES SOLUTIONS Cooler is freezing • Temperature is set too low • Raise the temperature set food value Freezer is melting • Temperature is set too high • Lower the temperature set food. value The unit does not •... -
Page 21: Stainless Steel Equipment Care & Cleaning
STAINLESS STEEL EQUIPMENT CARE AND CLEANING CAUTION : Do not use any steel wool, abrasive or chlorine based products to clean stainless steel surfaces. Stainless Steel Opponents: There are three basic things which can break down your stainless steel’s passivity layer and allow corrosion to rear its ugly head. -
Page 22: Warranty Statement
Air and upon proper installation* (indoor building only) and start-up in accordance with the instruction packet supplied with each Turbo air unit. Turbo Air s obligation under this warranty is limited to a period of three (3) years from the date of original installation or thirty nine (39) months after shipment date from Turbo Air, whichever occurs first. - Page 23 United States. The extended warranty period specific to each Turbo Air product applies to all units sold by Turbo Air starting December 1, 2016.
- Page 24 NOTE...
- Page 25 NOTE...
- Page 26 NOTE...
-
Page 27: Warranty Card
Address: (Street / Unit #) (City) (State) (Zip Code) hereby inform and certify to Turbo Air Inc. (Manufacturer) that the product model (Owner’s Name) and serial number mentioned above was purchased on from (Date of Purchase) (Name of the Dealer) Turbo Air Inc. - Page 28 4184 E. Conant St., Long Beach, CA 90808 Toll Free: 1-800-381-7770 Fax: 310-900-1033 Email: warranty@turboairinc.com www.turboairinc.com...
Need help?
Do you have a question about the PRO-26R-N and is the answer not in the manual?
Questions and answers