Table of Contents
Advertisement
Available languages
Available languages
Quick Links
Advertisement
Table of Contents

Related Manuals for Alphacool ES Distro Plate C2


Summary of Contents for Alphacool ES Distro Plate C2
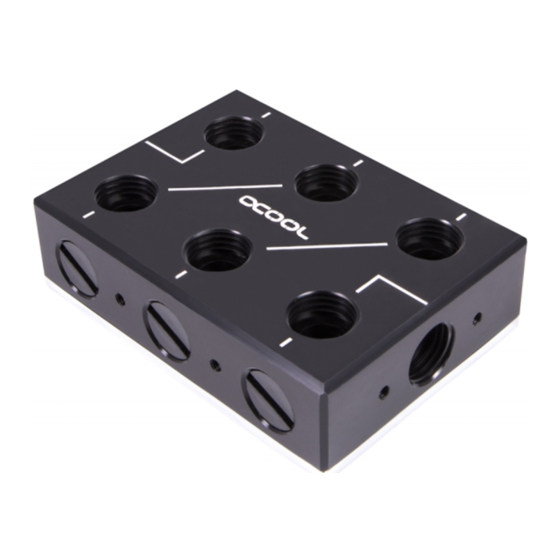
- Page 1 Alphacool ES Distro Plate C2 / C3 / C5...
-
Page 2: Table Of Contents
Alphacool International GmbH Alphacool ES Distro Plate C2 / C3 / C5 Deutsch Deutsch ......................3 Mounting with velcro tape ..............22 Sicherheitshinweise ..................3 Mounting on a fan Location ..............23 Montage Material ..................3 Mounting on the Universal Bracket ............. 24 Technische Details ..................4... -
Page 3: Deutsch
Deutsch Alphacool ES Distro Plate C2 / C3 / C5 Alphacool International GmbH Deutsch Sicherheitshinweise Lesen Sie die Sicherheitshinweise, bevor Sie mit der Installation beginnen. Montage Material 1x Klettband 2x Universalhalter 4x M3x8 4x M3x4 Verschlussschraube 4x bei Alphacool ES Distro Plate C2... -
Page 4: Technische Details
Alphacool International GmbH Alphacool ES Distro Plate C2 / C3 / C5 Deutsch Technische Details Maße in Millimeter... -
Page 5: Funktion
Deutsch Alphacool ES Distro Plate C2 / C3 / C5 Alphacool International GmbH Funktion Hilfslinien auf dem Patch-Panel erleichtern das Nachvollziehen des Wasserflusses. Die hier rot markierten Anschlüsse können jeweils als IN oder OUT verwendet werden. Oben links im Bild sind vier Anschlüsse rot markiert die zu eine An den Stirnseiten sind drei Anschlüsse zusammengefasst. -
Page 6: Montage
Klebefläche. Der Kleber lässt sich nur schwer entfernten. Kleben sie das Klettband auf die Alphacool ES Distro Plate Entfernen sie nun die zweite Schutzfolien. Kleben die die Alphacool ES Distro Plate an einen freien Platz im Gehäuse. -
Page 7: Montage An Einem Lüfterplatz
Deutsch Alphacool ES Distro Plate C2 / C3 / C5 Alphacool International GmbH Montage an einem Lüfter Platz 4x M3x8 4x M3 Mutter 4x M3x8 2x Halter für Lüfterlöcher Schrauben sie die beiden Halter an den Verteiler. Am Halter sind Langlöcher Montieren sie nun das Patchpanel mit der Halterung an ein Lüfterplatz. -
Page 8: Montage An Der Universalhalterung
Alphacool International GmbH Alphacool ES Distro Plate C2 / C3 / C5 Deutsch Montage an der Universalhalterung 4x M3x4 4x M3x4 2x Universalhalter 2x Verschluss- 6x Verschluss- schrauben schrauben 2x Universalhalter Beispiel 2 Beispiel 1 2x M3x8 Nutzen Sie das... -
Page 9: Anschließen Des Patchpanels
Deutsch Alphacool ES Distro Plate C2 / C3 / C5 Alphacool International GmbH Anschließen des Patchpanels Es gibt eine Vielzahl von Verschlauchungsmöglichkeiten. Auf den nächsten Seiten zeigen wir ihnen einige Beispiele. Beispiel 1 Seite 10 - 11 Beispiel 2 Seite 12 - 13... - Page 10 Alphacool International GmbH Alphacool ES Distro Plate C2 / C3 / C5 Deutsch Beispiel 1 - Eine vollbestückte Alphacool ES Distro Plate C3...
- Page 11 Deutsch Alphacool ES Distro Plate C2 / C3 / C5 Alphacool International GmbH Nutzen Sie das Verschlussschraub en-Tool. IN und OUT ist bei diesem Beispiel an den Stirnseiten des Patchpanels. Dort ist die Pumpe mit Ausgleichsbehälter angeschlossen. Die einzelnen Komponenten wie z.B.
- Page 12 Alphacool International GmbH Alphacool ES Distro Plate C2 / C3 / C5 Deutsch Beispiel 2 – Alphacool ES Distro Plate C3 mit seitlichen Anschlüssen...
- Page 13 Deutsch Alphacool ES Distro Plate C2 / C3 / C5 Alphacool International GmbH Nutzen Sie das Verschlussschraub en-Tool. In diesem Beispiel sind die Grafikkarten CPU-Kühler und die Pumpe mit Ausgleichsbehälter seitlich an der Alphacool ES Distro Plate C3 angeschlossen.
- Page 14 Alphacool International GmbH Alphacool ES Distro Plate C2 / C3 / C5 Deutsch Beispiel 3 – Drei Komponenten an der Alphacool ES Distro Plate C5...
- Page 15 Deutsch Alphacool ES Distro Plate C2 / C3 / C5 Alphacool International GmbH Nutzen Sie das Verschlussschraub en-Tool. IN und OUT ist bei diesem Beispiel an den Stirnseiten des Patchpanels. Die Drei Komponenten können aus Kühlern, Pumpen oder Radiatoren bestehen.
- Page 16 Alphacool International GmbH Alphacool ES Distro Plate C2 / C3 / C5 Deutsch Beispiel 4 – 2 Alphacool ES Distro Plate in Reihe...
- Page 17 Deutsch Alphacool ES Distro Plate C2 / C3 / C5 Alphacool International GmbH Nutzen Sie das Verschlussschraub en-Tool. In diesem Beispiel sind die Grafikkarten seitlich an der Alphacool ES Distro Plate C3, und zwei Komponenten an einer Alphacool ES Distro Plate C2 angeschlossen.
-
Page 18: Inbetriebnahme
Alphacool International GmbH Alphacool ES Distro Plate C2 / C3 / C5 Deutsch Inbetriebnahme Kontrollieren sie alle Anschlüsse. Nicht verwendete Anschlüsse müssen mit einer Verschlussschraube, hier im Bild rot dargestellt, verschlossen sein. Wir empfehlen ausschließlich klare Kühlflüssigkeiten aus unserer eigenen Produktion (CKC, Tec Protect oder Eiswasser... -
Page 19: English
English Alphacool ES Distro Plate C2 / C3 / C5 Alphacool International GmbH English Safety Instructions Read the safety instructions before starting the installation. Assembly Material 1x Velcro tape 2x Universal bracket 4x M3x8 4x M3x4 Screw plug 4x by Alphacool ES Distro Plate C2... -
Page 20: Technical Details
Alphacool International GmbH Alphacool ES Distro Plate C2 / C3 / C5 English Technical details Dimensions in millimetres... -
Page 21: Funktion
English Alphacool ES Distro Plate C2 / C3 / C5 Alphacool International GmbH Funktion In order to better follow the water flow, all connections are connected with a line. So one connection can be used as in and another one from the compound can be an OUT. -
Page 22: Assembly
Do not touch the adhesive surface. The adhesive is difficult to remove. Stick the Velcro tape to the Alphacool ES Distro Plate Now remove the second protective foil. Glue the Alphacool ES Distro Plate to a free space in the case. -
Page 23: Mounting On A Fan Location
English Alphacool ES Distro Plate C2 / C3 / C5 Alphacool International GmbH Mounting on a fan Location 4x M3x8 4x M3 Nut 4x M3x8 2x Fan Bracket Screw the two suitable holders to the distributor. The holder has slots, so the Now mount the patch panel with bracket to a fan location. -
Page 24: Mounting On The Universal Bracket
Alphacool International GmbH Alphacool ES Distro Plate C2 / C3 / C5 English Mounting on the Universal Bracket 4x M3x4 4x M3x4 2x Universal Bracket 2x Screw plug 6x Screw plug 2x Universal Bracket Example 2 Example 1 2x M3x8 Use the screw plug -Tool. -
Page 25: Connecting The Patch Panel
English Alphacool ES Distro Plate C2 / C3 / C5 Alphacool International GmbH Connecting the Patch Panel There is a lot of of configurations available. On the following pages we show you some examples. Example 1 Page 10 - 11... - Page 26 Alphacool International GmbH Alphacool ES Distro Plate C2 / C3 / C5 English Example 1 - A fully assembled Alphacool ES Distro Plate C3...
- Page 27 English Alphacool ES Distro Plate C2 / C3 / C5 Alphacool International GmbH Use the screw plug -Tool. In this example, IN and OUT is on the front sides of the Alphacool ES Distro Plate C3. The pump with expansion tank is connected here.
- Page 28 Alphacool International GmbH Alphacool ES Distro Plate C2 / C3 / C5 English Example 2 - Alphacool ES Distro Plate C3 with side connections...
- Page 29 Use the screw plug -Tool. In this example, the graphics cards CPU cooler and the pump with expansion tank are connected to the side of the Alphacool ES Distro Plate C3. Here is good to see how the water flow is directed.
- Page 30 Alphacool International GmbH Alphacool ES Distro Plate C2 / C3 / C5 English Example 3 - Three components on Alphacool ES Distro Plate C5...
- Page 31 -Tool. In this example, IN and OUT is on the front sides of the Alphacool ES Distro Plate C5. The three components can consist of coolers, pumps or radiators. ATTENTION: In this configuration, two spaces remain unused. Note that an OUT must always be connected to an IN to form a water circuit.
- Page 32 Alphacool International GmbH Alphacool ES Distro Plate C2 / C3 / C5 English Example 4 - 2 Alphacool ES Distro Plate in series...
- Page 33 English Alphacool ES Distro Plate C2 / C3 / C5 Alphacool International GmbH Use the screw plug -Tool. In this example, the graphics cards are connected to the side of the Alphacool ES Distro Plate C3. And two components are connected to an Alphacool ES Distro Plate C2.
-
Page 34: Startup
Alphacool International GmbH Alphacool ES Distro Plate C2 / C3 / C5 English startup Check all connections. Unused connections must be closed with a screw plug, shown here in red in the picture. We recommend only clear cooling liquids from our own production (CKC or ice water Crystal no UV liquid!) or pure distilled or... -
Page 35: Français
Français Alphacool ES Distro Plate C2 / C3 / C5 Alphacool International GmbH Français Avis général de sécurité Lisez les instructions de sécurité avant de commencer l‘installation. Matériel d'assemblage 1x ruban adhésif 2x Le support universel 4x M3x8 4x M3x4 Bouchon à... -
Page 36: Détails Techniques
Alphacool International GmbH Alphacool ES Distro Plate C2 / C3 / C5 Français Détails techniques Dimensions en millimètres... -
Page 37: Funktion
Français Alphacool ES Distro Plate C2 / C3 / C5 Alphacool International GmbH Funktion Afin de mieux suivre le débit de l'eau, tous les raccordements sont reliés par une ligne. Ainsi, une connexion peut être utilisée comme dans et une autre de l'enceinte peut être une OUT. -
Page 38: Le Montage
L'adhésif est difficile à enlever. Coller la bande Velcro sur la plaque de distribution Alphacool ES Retirez maintenant le deuxième film de protection. Collez la plaque de distribution Alphacool ES sur un espace libre dans le logement. -
Page 39: Montage Sur Un Ventilateur Place
Français Alphacool ES Distro Plate C2 / C3 / C5 Alphacool International GmbH Montage sur un ventilateur Place 4x M3x8 4x M3 l'écrou 4x M3x8 2x Fixation pour trous de ventilateur Vissez les deux supports appropriés au distributeur. Le support a de longs Montez maintenant le panneau de brassage avec son support à... -
Page 40: Montage Sur Le Support Universel
Alphacool International GmbH Alphacool ES Distro Plate C2 / C3 / C5 Français Montage sur le support universel 4x M3x4 4x M3x4 2x Le support universel 2x Bouchon à 6x Bouchon à 2x Le support universel Exemple 2 Exemple 1... -
Page 41: Connecter Le Patch Panel
Français Alphacool ES Distro Plate C2 / C3 / C5 Alphacool International GmbH Connecter le Patch Panel Il existe de nombreuses configurations possibles. Dans les pages suivantes, nous vous présentons quelques exemples. Example 1 Page 10 - 11 Example 2 Page 12 - 13... - Page 42 Alphacool International GmbH Alphacool ES Distro Plate C2 / C3 / C5 Français Exemple 1 - Une plaque Distro C3 Alphacool ES entièrement assemblée...
- Page 43 Français Alphacool ES Distro Plate C2 / C3 / C5 Alphacool International GmbH Utilisez l'outil de bouchage à vis Dans cet exemple, l'entrée et la sortie se trouvent sur les côtés avant de la plaque de distribution C3 de l'Alphacool ES. La pompe avec le vase d'expansion est connectée...
- Page 44 Alphacool International GmbH Alphacool ES Distro Plate C2 / C3 / C5 Français Exemple 2 - Alphacool ES Distro Plate C3 avec connexions latérales...
- Page 45 Français Alphacool ES Distro Plate C2 / C3 / C5 Alphacool International GmbH Utilisez l'outil de bouchage à vis Dans cet exemple, le refroidisseur de l'unité centrale des cartes graphiques et la pompe avec réservoir d'expansion sont connectés sur le côté de la plaque Distro C3 de...
- Page 46 Alphacool International GmbH Alphacool ES Distro Plate C2 / C3 / C5 Français Exemple 3 - Trois composants sur la plaque de distribution Alphacool ES C5...
- Page 47 à vis Dans cet exemple, IN et OUT se trouvent sur les faces avant de la plaque de distribution Alphacool ES C5. Les trois composants peuvent être des refroidisseurs, des pompes ou des radiateurs. ATTENTION : Dans cette configuration, deux espaces restent inutilisés. Notez qu'une OUT doit toujours être connectée à une IN...
- Page 48 Alphacool International GmbH Alphacool ES Distro Plate C2 / C3 / C5 Français Exemple 4 - 2 Alphacool ES Distro Plate en série...
- Page 49 Français Alphacool ES Distro Plate C2 / C3 / C5 Alphacool International GmbH Utilisez l'outil de bouchage à vis Dans cet exemple, les cartes graphiques sont connectées sur le côté de l'Alphacool ES Distro Plate C3. Et deux composants sont connectés à...
-
Page 50: Mise En Œuvre
Alphacool International GmbH Alphacool ES Distro Plate C2 / C3 / C5 Français Mise en œuvre Vérifiez toutes les connexions. Les connexions non utilisées doivent être fermées avec un bouchon à vis. Nous recommandons de n'utiliser que des liquides de refroidissement clairs issus de notre propre production (CKC ou eau... - Page 51 Français Alphacool ES Distro Plate C2 / C3 / C5 Alphacool International GmbH Imprint: Alphacool International GmbH Marienberger Str. 1 38122 Braunschweig Support: +49 (0) 531 28874 – 0 Fax: +49 (0) 531 28874 – 22 E-Mail: info@alphacool.com General Managers: Andreas Rudnicki, Nathanael Draht, Fabian Noelte WEEE-Reg.-Nr.: DE 544444...
Need help?
Do you have a question about the ES Distro Plate C2 and is the answer not in the manual?
Questions and answers