Advertisement
Installation Manual for LED Performance Bulbs (Type H4)
Thank you very much for purchasing PIAA product. Read this instruction
manual thoroughly for proper use of the product. After completing your
installation, please keep this manual for future reference.
For customers ..............................・ Please forward this manual to the next owner.
For installation service agents
※ marks and marks
in this manual indicate important notices for
installing this product. Be sure to follow these
notices in order to ensure safe and reliable work.
Contents
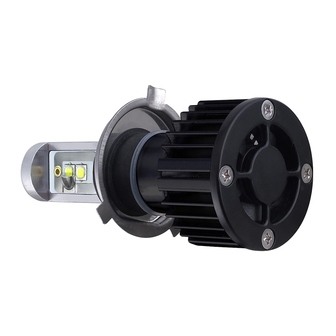
① LED bulb assembly
(H4 type) 【2 pieces】
② Controller【2 pieces】
......... Be sure to hand over this instruction manual to
the customer after installation.
ー1ー
Indicates procedures or situations
that may cause bodily harm if used
improperly.
Indicates items that may cause
damage or abnormality to products
if used improperly.
③ Tie wrap【6 pieces】
PKI-0045
Advertisement
Table of Contents

Related Manuals for Piaa H4


Summary of Contents for Piaa H4
- Page 1 PKI-0045 Installation Manual for LED Performance Bulbs (Type H4) Thank you very much for purchasing PIAA product. Read this instruction manual thoroughly for proper use of the product. After completing your installation, please keep this manual for future reference. For customers …………………………・ Please forward this manual to the next owner.
- Page 2 ● This product can be installed in lamps that use a H4 bulb. Before replacing the bulb with the new one, make sure to check the markings on the old bulb. Make sure there is no problem before continuing.
- Page 3 PKI-0045 Precautions for Use ● If there is abnormal vibration or sound when the vehicle is in motion, immediately stop the vehicle in a safe location and inspect the vehicle. ● Keep the product out of reach of infants. Otherwise infants may swallow or break the product, leading to injury.
- Page 4 PKI-0045 【1】Replacement procedure ※ When installing this product on some vehicles, the installation work may be easier if parts such as the headlamps, front bumpers or front grill are removed. Remove such parts before installation as deemed necessary. (1) Before starting the installation work, refer to the vehicle's installation manual and verify the place where the bulb will be installed and carry out the installation.
- Page 5 PKI-0045 (3) Install the metal cap to the vehicle's lamp unit lamp unit(①). Fix it firmly in place ① using the bulb spring (②). metal cap ● When installing the metal cap section to the main body of the lamp, be very careful not to drop the cap inside the housing.
- Page 6 PKI-0045 (6)Take the O-ring that was removed in Step (4) and install it to the LED bulb. (7)Install the metal cap section to the LED bulb following procedures (Steps ① to ⑥) as shown in the following illustrations. ① Prepare the harness that will be metal cap lamp unit attached to the LED bulb face down.
- Page 7 PKI-0045 (8) Connect the LED bulb assembly (part ①) and the controller (part ②). LED bulb assembly(part①) controller LED bulb controller (part ②) (9) Connect the vehicle's connector to the controller's connector (Part no.②) and make sure the lamp lights up. controller's connector Vehicle's connector controller (part ②)
- Page 8 y≦0.150+0.640x 0.44 y≧0.050+0.750x 0.42 0.440≧y≧0.382 0.40 0.38 0.36 0.34 Japanese Industrial Standards 0.32 (JIS) white light range 0.30 0.28 0.26 0.30 0.32 0.34 0.36 0.38 0.40 0.42 0.44 0.46 0.48 0.50 0.52 0.54 0.56 PIAA CORPORATION www.piaa.co.jp www.piaa.com ー8ー...
Need help?
Do you have a question about the H4 and is the answer not in the manual?
Questions and answers