
Related Manuals for Beko WIY72545


Summary of Contents for Beko WIY72545
- Page 1 Washing Machine User Manual WIY72545 Document Number= 2820526034_EN/ 31-07-17.(15:07)
- Page 2 Please read this user manual first! Dear Customer, Thank you for prefering a Beko product. We hope that you get the best results from your product which has been manufactured with high quality and state-of-the-art technology. Therefore, please read this entire user manual and all other accompanying documents carefully before using the product and keep it as a reference for future use.
-
Page 3: Table Of Contents
TABLE OF CONTENTS 1 General safety instructions 1.1 Life and property safety ---------------------------------------------------------------------------5 1.2 Children's safety -----------------------------------------------------------------------------------6 1.3 Electrical safety ------------------------------------------------------------------------------------6 1.4 Hot surface safety ---------------------------------------------------------------------------------7 2 Important instructions for environment 2.1 Compliance with WEEE Directive ------------------------------------------------------------------8 2.2 Package information ------------------------------------------------------------------------------8 3 Intended use 4 Your washing machine 4.1 Overview -------------------------------------------------------------------------------------------9... - Page 4 TABLE OF CONTENTS 4.6.10.1 Auxiliary functions ------------------------------------------------------------------------------------29 4.6.10.2 Functions/Programmes Selected by Pressing the Function Buttons for 3 Seconds --------------30 4.6.11 Delayed Start --------------------------------------------------------------------------------------------31 4.6.12 Starting the programme --------------------------------------------------------------------------------32 4.6.13 Progress of programme ---------------------------------------------------------------------------------32 4.6.14 Loading door lock ---------------------------------------------------------------------------------------32 4.6.15 Changing the selections after programme has started -----------------------------------------------32 4.6.16 Cancelling the programme------------------------------------------------------------------------------33 4.6.17 End of programme --------------------------------------------------------------------------------------33 4.6.18 Your machine features "Standby Mode".
-
Page 5: General Safety Instructions
General safety instructions This section includes security instructions which may help prevent the injuries and material damage risks. All kinds of warranties shall be invalid if these instructions are not observed. 1.1 Life and property safety Never place the product on a carpet-covered floor. Electrical parts will get overheated since air cannot circulate from under the device. -
Page 6: Children's Safety
1.2 Children's safety This product can be used by the children who are at the age of 8 and over and the people whose physical, sensory or mental skills are not fully developed or who do not have necessary required experience and knowledge as long as they are supervised or trained about the safe use of the product and its risks. -
Page 7: Hot Surface Safety
Do not wash the product by spraying or pouring water onto it! Risk of electric shock! Never touch the power cable plug with wet hands! Do not grab the power cord to unplug the machine, always unplug it by holding the socket with one hand, and pulling the plug with the other hand. -
Page 8: Important Instructions For Environment
Important instructions for environment 2.1 Compliance with WEEE Directive This product complies with EU WEEE Directive (2012/19/EU). This product bears a classification symbol for waste electrical and electronic equipment (WEEE). This product has been manufactured with high quality parts and materials which can be reused and are suitable for recycling. -
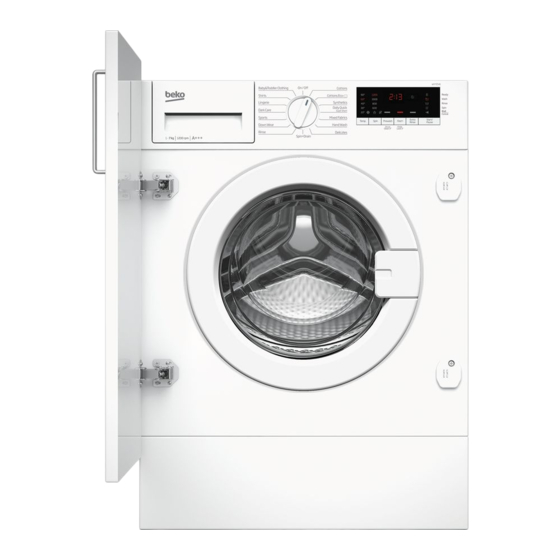
Page 9: Your Washing Machine
Your washing machine 4.1 Overview 1- Power cable 2- Top panel 3- Control panel 4- Filter cap 5- Adjustable feet 6- Loading door 7- Detergent drawer 8- Drain hose 9 / EN Washing Machine / User’s Manual... -
Page 10: Package Contents
4.2 Package Contents 1- Power cable 2- Drain hose 3- Transportation safety bolts * 4- Mains water inlet hose (One of the following filter types is used for the mains hose connection.) a- Electronical water shut-off b- Mechanical water shut-off c- Standard 5- User Manual 6- Blind plug**... -
Page 11: Technical Specifications
4.3 Technical specifications Complying Commission Delegated Regulation (EU) No 1061/2010 Supplier name or trademark Beko Model name WIY72545 Rated capacity (kg) Energy efficiency class / Scale from A+++ (Highest Efficiency) to D (Lowest Efficiency) A+++ Annual Energy Consumption (kWh) Energy consumption of the standard 60°C cotton programme at full load (kWh) 0,850 Energy consumption of the standard 60°C cotton programme at partial load (kWh) -
Page 12: Installation
4.4 Installation • Preparation of the location and electrical, tap water and waste water installations at the place of installation is under customer's responsibility. • Make sure that the water inlet and discharge hoses as well as the power cable are not folded, pinched or crushed while pushing the product into its place after installation or cleaning procedures. -
Page 13: Removing The Transportation Locks
4.4.3 Removing the transportation locks Loose all bolts with an appropriate wrench until they turn freely. Remove the transport safety bolts by turning them slightly. Insert the plastic covers in the bag containing the user manual to the openings on the rear panel. -
Page 14: Connecting The Drain Hose To The Drain
Tighten the nuts of the hose by hand. Never use a tool when tightening the nuts. When hose connection is completed, check whether there is leak problems at the connection points by opening the taps fully. If any leaks occur, turn off the tap and remove the nut. -
Page 15: Adjusting The Feet
4.4.6 Adjusting the feet CAUTION: In order to ensure that the product operates more silently and vibration-free, it must stand level and balanced on its feet. Balance the machine by adjusting the feet. Otherwise, the product may move from its place and cause crushing and vibration problems. CAUTION: Do not use any tools to loosen the lock nuts. -
Page 16: Electrical Connection
4.4.7 Electrical connection Connect the product to a grounded outlet protected by a 13 A fuse. Our company shall not be liable for any damages that will arise when the product is used without grounding in accordance with the local regulations. •... -
Page 17: Initial Use
Important Fitting a different plug As the colours of the wires in the mains lead of this appliance may not correspond with the coloured markings identifying the terminals on your plug, proceed as follows: Connect the green - yellow or green (earth) wire to the terminal in the plug marked ‘E’... -
Page 18: Preparation
4.5 Preparation 4.5.1 Sorting the laundry • Sort laundry according to type of fabric, colour, and degree of soiling and allowable water temperature. • Always obey the instructions given on the garment tags. LAUNDRY WASH SYMBOLS Machine Wash Symbols WASH Maximum Water Temperatures... -
Page 19: Preparing Laundry For Washing
4.5.2 Preparing laundry for washing • Laundry items with metal attachments such as, underwired bras, belt buckles or metal buttons will damage the machine. Remove the metal pieces or wash the clothes by putting them in a laundry bag or pillow case. •... -
Page 20: Loading The Laundry
4.5.4 Loading the laundry 1. Open the loading door. 2. Place laundry items loosely into the machine. 3. Push the loading door to close until you hear a locking sound. Ensure that no items are caught in the door. 4.5.5 Correct load capacity The maximum load capacity depends on the type of laundry, the degree of soiling and the washing programme desired. - Page 21 4) Right compartment with “ ” symbol (liquid softener compartment) (II) Main Wash Compartment Before starting the washing Programme, put powder detergent into the left compartment with number “II”. Use the detergent manufacturer’s measuring cup and follow the instructions on the package. Powder bleach/stain remover must also be put into this compartment.
- Page 22 (I) Pre-Wash Compartment Put the powder pre-wash detergent or powder stain remover into the middle compartment with number “I”. You can also put liquid bleach into this compartment while the machine takes in water during pre-wash or first rinsing step. Adding the liquid bleach while the machine takes in water allows it to be diluted before it is poured onto the laundry.
-
Page 23: Tips For Efficient Washing
4.5.8 Tips for efficient washing Clothes Light colours and Delicates/ Colours Dark colours whites Woolens/Silks (Recommended (Recommended (Recommended (Recommended temperature range temperature range temperature range temperature range based on soiling level: based on soiling level: based on soiling based on soiling 40-90ºC) cold-40ºC) level: cold-40ºC) -
Page 24: Operating The Product
4.6 Operating the product 4.6.1 Control panel WIY72545 Baby&Toddler Clothing Cottons Ready Shirts 1200 Cottons Eco Wash 1000 Lingerie Synthetics Rinse Daily Quick Spin Dark Care Super Short Cancel Sports Mixed Fabrics Extra Start/ Temp. Spin Prewash Fast+ Pause Rinse... -
Page 25: Programme And Consumption Table
4.6.4 Programme and consumption table Auxiliary functions Selectable temperature Programme range °C 92,983 2,25 1200 • • • Cold-90 Cottons 1,70 1200 • • • Cold-90 1,05 1200 • • • Cold-90 60** 0,850 1200 Cold-60 Cottons Eco 60** 0,710 1200 Cold-60 40** 0,690 1200... -
Page 26: Main Programmes
4.6.5 Main programmes Depending on the type of fabric, use the following main programmes. • Cottons You can wash your durable cotton laundry (sheets, bedlinen, towels, bathrobes, underwear etc.) in this programme. When the quick wash function button is pressed, programme duration becomes notably shorter but effective washing performance is ensured with intense washing movements. - Page 27 • Daily Quick / Super Short Use this programme to wash your lightly soiled or unspotted cotton clothes in a short time. The programme duration can be reduced up to 14 minutes when the quick wash function is selected. When the quick wash function is selected, maximum 2 (two) kg of laundry must be washed.
-
Page 28: Special Programmes
4.6.7 Special programmes For specific applications, select any of the following programmes. • Rinse Use when you want to rinse or starch separately. • Spin+Drain You can use this function to remove the water on the garment of drain the water in the machine. -
Page 29: Auxiliary Function Selection
The programme will resume. Water is drained, laundry is spun and the programme is completed. If the programme has not reached the spinning step, you can change the speed without switching the machine to Pause mode. 4.6.10 Auxiliary function selection Select the desired auxiliary functions before starting the programme. -
Page 30: Functions/Programmes Selected By Pressing The Function Buttons For 3 Seconds
4.6.10.2 Functions/Programmes Selected by Pressing the Function Buttons for 3 Seconds • Drum Clean Press and hold the auxiliary function button 1 for 3 seconds to select the programme. Use regularly (once in every 1-2 months) to clean the drum and provide the required hygiene. -
Page 31: Delayed Start
4.6.11 Delayed Start With the Delayed Start function the startup of the programme may be delayed up to 19 hours. Delayed start time can be increased by increments of 1 hour. Do not use liquid detergents when you set Delayed Start! There is the risk of staining of the clothes. -
Page 32: Starting The Programme
4.6.12 Starting the programme 1. Press Start / Pause button to start the programme. 2. Programme follow-up light showing the startup of the programme will turn on. If no programme is started or no button is pressed within 1 minute during programme selection process, the machine will switch to Pause mode and the illumination level of the temperature, speed and loading door indicator lights will decrease. -
Page 33: Cancelling The Programme
Changing the auxiliary function, speed and temperature Depending on the step the programme has reached, you can cancel or select the auxiliary functions. See, "Auxiliary function selection". You can also change the speed and temperature settings. See, "Spin speed selection" and "Temperature selection". -
Page 34: Your Machine Features "Standby Mode
4.6.18 Your machine features "Standby Mode". After you switch on your machine with On-Off button, if no programme is started or no other procedure is performed at the selection step or no action is taken within approx. 2 minutes after the selected programme ends, your machine will switch to energy saving mode automatically. -
Page 35: Maintenance And Cleaning
4.7 Maintenance and cleaning Service life of the product extends and frequently faced problems decrease if cleaned at regular intervals. 4.7.1 Cleaning the detergent drawer Remove any powder residue buildup in the drawer. To do this; a. You can remove the detergent drawer by pulling it towards yourself strongly. If more than a normal amount of softener and liquid detergent mixture starts to remain in the softener compartment, the siphon must be cleaned. -
Page 36: Cleaning The Body And Control Panel
After every washing make sure that no foreign substance is left in the drum. If the holes on the bellow shown in the figure is blocked, open the holes using a toothpick. Foreign metal substances will cause rust stains in the drum. Clean the stains on the drum surface by using cleaning agents for stainless steel. -
Page 37: Draining Remaining Water And Cleaning The Pump Filter
4.7.5 Draining remaining water and cleaning the pump filter The filter system in your machine prevents solid items such as buttons, coins and fabric fibers clogging the pump impeller during discharge of washing water. Thus, the water will be discharged without any problem and the service life of the pump will extend. If the machine fails to drain water, the pump filter is clogged. -
Page 38: Troubleshooting
Troubleshooting Problem Reason Solution Programme does not start • *Press the Start / Pause / Cancel Start / Pause / Cancel button was not pressed. button. after closing the door. • Reduce the amount of laundry and It may be difficult to close the loading door in case make sure that the loading door is of excessive loading. - Page 39 Problem Reason Solution Loading door cannot be Door lock is activated because of the water level • Drain the water by running the Pump or Spin programme. in the machine. opened. • Wait until the programme completes. Machine is heating up the water or it is at the spinning cycle.
- Page 40 Problem Reason Solution Washing performance is Insufficient amount of detergent has been used • Use the recommended amount of detergent appropriate for water over a long period of time. poor: Laundry turns grey. hardness and the laundry. (**) • Select the proper temperature for the Washing was made at low temperatures for a laundry to be washed.
- Page 41 Problem Reason Solution It does not rinse well. The amount, brand and storage conditions of the • Use a detergent appropriate for the washing machine and your detergent used are inappropriate. laundry. Keep detergents closed in an environment free of humidity and do not expose them to excessive temperatures.
- Page 42 Problem Reason Solution Detergent residue in the Detergent is put in wet drawer. • Dry the detergent drawer before putting in detergent. detergent drawer. (**) • Keep detergents closed in an Detergent has gotten damp. environment free of humidity and do not expose them to excessive temperatures.
-
Page 43: Built-In Installation
BUILT-IN INSTALLATION GUIDE BUILT-IN INSTALLATION 820 mm 153 mm 43 / EN Washing Machine / User’s Manual... - Page 44 44 / EN Washing Machine / User’s Manual...
- Page 45 45 / EN Washing Machine / User’s Manual...
- Page 46 46 / EN Washing Machine / User’s Manual...
- Page 47 IF THE CABINET DOOR OPENS TO RIGHT IF THE CABINET DOOR OPENS TO LEFT 47 / EN Washing Machine / User’s Manual...
- Page 48 48 / EN Washing Machine / User’s Manual...
- Page 49 49 / EN Washing Machine / User’s Manual...
- Page 50 50 / EN Washing Machine / User’s Manual...
- Page 51 Service Ref. No. Service Ref. No. 1493 1493 51 / EN Washing Machine / User’s Manual...
- Page 52 52 / EN Washing Machine / User’s Manual...
- Page 55 If you have purchased an extended guarantee please refer to the instructions contained within the extended guarantee agreement document. Otherwise please call the appropriate number above where service can be obtained at a charge. Should you experience any difficulty in obtaining service please contact the Beko Customer Help-Line. Tel: 0845 600 4911...
- Page 56 Guarantee Washing Machine Your new Beko product is guaranteed against the cost of breakdown repairs for twelve months from the date of the original purchase. What is covered? • Repairs necessary as a result of faulty materials, defective components or manufacturing defect.
Need help?
Do you have a question about the WIY72545 and is the answer not in the manual?
Questions and answers