Spelsberg BCS Pure Assembly Instructions/Operating Instructions
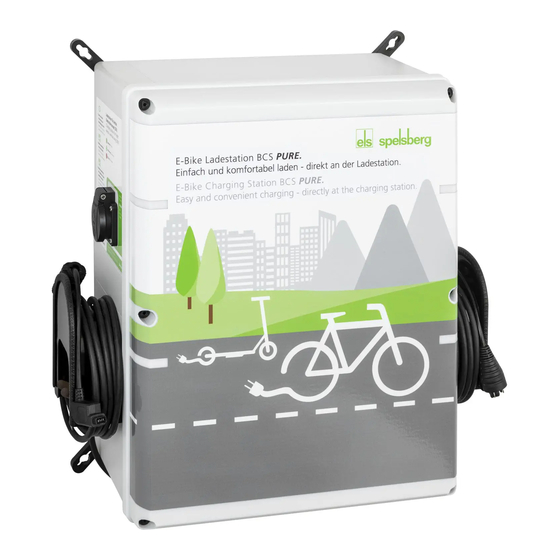
E-bike charging station
Hide thumbs
Also See for BCS Pure:
- Assembly instructions/operating instructions (40 pages) ,
- Operating instructions manual (12 pages) ,
- Operating instructions manual (12 pages)
Chapters
Table of Contents
Troubleshooting

Related Manuals for Spelsberg BCS Pure


Summary of Contents for Spelsberg BCS Pure
- Page 1 Montage - / Mode d’emploi Borne de recharge pour E-Bike BCS Pure / BCS Smart Assembly instructions I Operating instructions E-Bike Charging Station BCS Pure / BCS Smart...
-
Page 2: Table Of Contents
Contenu mode d’emploi À propos de ce manuel . . . . . . . . . . . . . . . . . . . . . . . . . . . . . . . . . . . . . . . . . . . . . . . . . . . . . . . . . . . . . . . . . . . . . . 3 Explication des symboles . -
Page 3: Explication Des Symboles
à la connexion optionnelle au nuage par Ethernet, WIFI ou téléphonie mobile à utiliser avec le portail de gestion https://bcs.spelsberg.com et l' Application gratuite BCS Finder pour Android et iOS. En outre, l' Application offre un menu de navigation qui permet de rechercher les bornes de recharge connectées. -
Page 4: Utilisation Conforme
Warning Danger pour la santé ► N'utilisez pas la borne de recharge à des températures extérieures inférieures à –25 °C ou supérieures à +40 °C. ► En cas d'incendie, ne défaites pas le couvercle de la borne de recharge pour E-Bike. Utilisez des moyens d'extinctions homologués pour appareils électroniques. -
Page 5: Éléments De Commande Et Raccords
La borne de recharge met hors tension les points de recharge dans les conditions ambiantes suivantes : „ surcharge „ température trop élevée „ température trop basse „ humidité trop élevée „ tentative de sabotage (BCS Smart seulement) Éléments de commande et raccords Fig . -
Page 6: Montage
Montage Caution Danger de blessures Des composants endommagés peuvent blesser l'utilisateur. ► Ne montez pas la borne de recharge : – près de matériaux inflammables. – dans des zones à risque d'explosion. – dans un environnement salin ou humide. – à... - Page 7 700 min. 1400 min. 700 min. Fig . 3 : Distances en cas de montage mural (en mm) Mesures de montage en mm...
-
Page 8: Fixation Sans Pattes De Fixation Extérieurs
Fixation sans pattes de fixation extérieurs Pour la fixation de la borne de recharge, il faut : „ 4 vis (diamètre maximal 6 mm, tête de vis au minimum 8,5 mm, au maximum 10,5 mm) „ 4 chevilles adaptées Fig . 5 : Extraction de l'insert fileté Fig . -
Page 9: Fixation Avec Pattes De Fixation Extérieurs
Fixation avec œillets de fixation extérieurs Pour la fixation de la borne de recharge, il faut : „ 4 pattes de fixation extérieurs ABL-10 (distance du mur 10 mm) ou ABL-40 (distance du mur 40 mm) „ 4 vis pour les pattes de fixation extérieurs (inclues) „... -
Page 10: Raccordement Électrique De La Borne De Recharge
Raccordement électrique de la borne de recharge Warning Danger de mort par choc Electrocution En cas d'erreur lors du raccordement au câble d'alimentation électrique, il existe un danger de choc electrocution. ► Confiez le raccordement au câble d'alimentation électrique au personnel électricien autorisé... -
Page 11: Mise En Service De La Bcs Smart
La mise en service est réservée à du personnel spécialisé autorisé. La borne de recharge pour vélos BCS Smart peut être connectée en ligne au portail Spelsberg BCS, qui permet de bénéficier de tous les services. À l'état de livraison, elle est déjà équipée d'un accès LTE, qui comporte des coûts séparés. -
Page 12: Connexion Par Wifi
► Retirez le bouchon de l'ouverture qui se trouve sur la partie inférieure de la borne de recharge et guidez le câble Ethernet dans le boîtier, en le faisant passer dans le presse-étoupe ouvrant qui est inclus dans la pochette d'accessoires. ►... -
Page 13: Led États/Diagnostic
► À l'aide du Smartphone ou de l'ordinateur, connectez-vous au nouveau WIFI de la borne de recharge. Utilisez les données d'accès qui sont indiquées sur l'autocollant d'enregistrement à l'intérieur du boîtier. (SSID = BCS / mot de passe = bcs2smart). ►... -
Page 14: Connexion Par Téléphonie Mobile
Effectuez les étapes suivantes : ► Appelez l'URL suivante pour vous enregistrer en tant qu'utilisateur : bcs.spelsberg.com/spelsberg/registration (Avis : l'adresse e-mail saisie sert également de nom d'utilisateur pour l'identification) Remplissez le formulaire en ligne et confirmez la déclaration de protection des données. - Page 15 Ajout d'une borne à l'organisation Vous pouvez ajouter une borne de recharge à une organisation existante. Pour ajouter une borne de recharge, vous avez besoin : „ d'un compte utilisateur dans une organisation existante „ de l'ID d'enregistrement qui se trouve sur l'autocollant dans la borne de recharge Effectuez les étapes suivantes pour enregistrer une borne de recharge BCS SMART à...
-
Page 16: Nettoyage
Le mode Maintenance se désactive automatiquement après 4 heures. Sinon, réinitialisez le mode dans le portail. Note Pour assurer un fonctionnement parfait, utilisez seulement des pièces de rechange originales de Spelsberg (pour les informations de contact, voir la dernière page). -
Page 17: Dépannage
Fig . 15 : Position des fusibles ► Identifiez les fusibles à l'aide des désignations E1(chauffage d'armoire de commande en option), X4 (point de recharge en haut à gauche vu de devant), X5 (point de recharge en haut à droite vu de devant), T2 (point de recharge en bas à... - Page 18 Panne Cause possible Remède ► La LED du point de Recherche cyclique de surcharge Éliminez la surcharge. recharge spécifique du système est allu- mée en rouge ► La LED du point de Panne de la borne de recharge Débranchez le câble de recharge du recharge spécifique véhicule.
-
Page 19: Garantie
Garantie La durée de validité légale de la garantie s'applique. Si le produit est défectueux, contactez la filiale du fabricant dans votre pays ou votre installateur électronicien. Pour le traitement des services de réparation ou en garantie, il faut également envoyer les documents suivants : „... - Page 20 Table of contents About these instructions . . . . . . . . . . . . . . . . . . . . . . . . . . . . . . . . . . . . . . . . . . . . . . . . . . . . . . . . . . . . . . . . . . . . . 21 Explanation of the symbols .
-
Page 21: About These Instructions
Before assembly and operation, carefully read through these instructions and keep them in a safe place. Hand over to the user if the product is sold. It is available in the download area at www.spelsberg.de. The new BCS Smart variant also allows monitored and controlled charging for e-bikers and operators of the charging station via optional cloud connection via LAN, WLAN or mobile phone for use with the management portal https://bcs.spelsberg.com and the free app BCS Finder for Android &... -
Page 22: Intended Use
Warning Health hazard ► Do not operate the charging station at outside temperatures below –25 °C or above +40 °C. ► In case of fire, do not remove the cover of the E-Bike charging station. ► Use extinguishing agent only approved for electronic devices. Do not use water for extinguishing. -
Page 23: Control Elements And Connections
The charging station switches off the charging point in case of the following ambient conditions: „ Overload „ Temperature too high „ Temperature too low „ Humidity too high „ Sabotage attempts (BCS Smart only) Control elements and connections Figure 1: Overall view Pos . -
Page 24: Installation
Installation Caution Risk of injuries The user may be injured by damaged components. ► Do not mount the charging station: – near to flammable materials. – In potentially explosive areas. – in salty or wet surroundings. – in the vicinity of aggressive vapours. –... - Page 25 700 min. 1400 min. 700 min. Figure 3: Distances for wall assembly (in mm) Assembly dimensions in mm...
-
Page 26: Fastening Without External Fixing Brackets
Fastening without external fixing brackets You need the following for fastening the charging station: „ 4 screws (diameter maximum 6 mm, screw head at least 8.5 mm, maximum 10.5 mm) „ 4 matching dowels Figure 5: Lever out the threaded insert Figure 6: Lever out the threaded insert Figure 4: Fixing points (corner) -
Page 27: Fastening With External Fixing Brackets
Fastening with external fixing brackets You need the following for fastening the charging station: „ 4 external fixing brackets ABL-10 (wall distance 10 mm) or ABL-40 (wall distance 40 mm) „ 4 screws for the external fixing brackets (enclosed) „ 4 screws (diameter maximum 6 mm, screw head at least maximum 12 mm) „... -
Page 28: Connecting The Charging Station Electrically
Connecting the charging station electrically Warning Danger to life due to electric shock There is a risk of electric shock caused by mistakes when connecting to the electrical supply lines. ► Have the connection to the electric supply line carried out by a locally approved qualified electrician. -
Page 29: Starting Up The Bcs Smart
Starting up may only be carried out by an authorised specialist. The smart BCS bicycle charging station can be connected with the Spelsberg BCS portal online in order to be able to use all services. In its delivery state, it is already equipped with an LTE access where separate costs may result. -
Page 30: Connection Via Wlan
► Guide the Ethernet cable through the screw connection - use a suitable cable and observe the torque (screw connection torque 8 Nm). ► Connect the Ethernet cable to the intended connecting point, see fig. 1 - LAN line connection. Ensure for a sufficient bending radii when routing the Ethernet cable. -
Page 31: Led States / Troubleshooting
► Using a smartphone or computer, connect to the new WLAN of the charging station. Use the registration data of the registration sticker inside the housing. (SSID = BCS / password = bcs2smart). ► Open the screen bcs.smart in the web browser on the smartphone or computer. The configuration screen of the charging station opens. -
Page 32: Connection Via Mobile Communications
Carry out the following steps: ► Call up the following URL to register as a user: bcs.spelsberg.com/spelsberg/registration (Note: the e-mail address specified is also the user name for registration at the same time) Fill in the online form and confirm the privacy policy. - Page 33 Add a station to the organisation A new charging station can be added to an existing organisation. To add a charging station, you need: „ A user account in an existing organisation „ The registration ID on the sticker within the charging station Carry out the following steps to register a BCS SMART charging station to an organisation: „...
-
Page 34: Cleaning
Portal in order to deactivate the sabotage warning per e-mail. All functions remain active. The maintenance mode itself is ended after 4 hours. Otherwise reset the mode in the portal. Note To ensure for correct operation, use only original spare parts from Spelsberg (contact data, see last page). Replacing the microfuse... -
Page 35: Troubleshooting
Figure 15: Position of the fuses ► Identify the fuses on the electric PCB (Fig. 15) using the designations E1(Switch cabinet heating optional), X4 (Charging point top left as viewed from the front), X5 (Charging point top right as viewed from the front), T2 (Charging point bottom left as viewed from the front) and T3 (Charging point bottom right as viewed from the front). - Page 36 Error Possible cause Correction ► The LED on the Cyclic check of the overload Remove the overload. system-specific charging point illu- minates red ► The LED on the Error on the charging station Disconnect the charge cable from the system-specific vehicle.
-
Page 37: Warranty
Warranty The statutory warranty period applies. If the product is defective, please contact the branch of the manufacturer in your country, or your electrician. For processing any repairs or warranties, the following documents must be enclosed: „ a copy of the invoice with date of purchase „... - Page 40 Günther Spelsberg GmbH + Co. KG Visit us on Facebook! Im Gewerbepark 1, D-58579 Schalksmühle Postfach 15 20, D-58571 Schalksmühle, Germany We reserve the right to make changes in www.facebook.com/spelsberg.de www.facebook.com/spelsberg.de Phone: +49 (0) 23 55 / 8 92-0 line with technical progress.
Need help?
Do you have a question about the BCS Pure and is the answer not in the manual?
Questions and answers