Table of Contents
Advertisement
Quick Links
Advertisement
Table of Contents

Related Manuals for AEG FSS73718P


Summary of Contents for AEG FSS73718P
- Page 1 FSS73718P User Manual Dishwasher USER MANUAL...
-
Page 2: Table Of Contents
5. PROGRAMME SELECTION.................9 6. BASIC SETTINGS ..................... 11 7. WIRELESS CONNECTION................15 8. BEFORE FIRST USE..................16 9. DAILY USE......................17 10. HINTS AND TIPS....................20 11. CARE AND CLEANING..................22 12. TROUBLESHOOTING..................26 13. TECHNICAL INFORMATION................31 14. ENVIRONMENTAL CONCERNS..............32 My AEG Kitchen app... -
Page 3: Safety Information
ENGLISH FOR PERFECT RESULTS Thank you for choosing this AEG product. We have created it to give you impeccable performance for many years, with innovative technologies that help make life simpler – features you might not find on ordinary appliances. Please spend a few minutes reading to get the very best from it. - Page 4 Children between 3 and 8 years of age and persons • with very extensive and complex disabilities shall be kept away from the appliance unless continuously supervised. Children of less than 3 years of age should be kept •...
-
Page 5: Safety Instructions
13 A ASTA (BS 1362) fuse (UK and Ireland only). www.youtube.com/electrolux www.youtube.com/aeg 2.3 Water connection How to install your 60 cm • Do not cause damage to the water Dishwasher Sliding Hinge hoses. - Page 6 • The following spare parts will be available for 7 years after the model has been discontinued: motor, circulation and drain pump, heaters and heating elements, including heat pumps, piping and related equipment including hoses, valves, filters and aquastops, structural and interior...
-
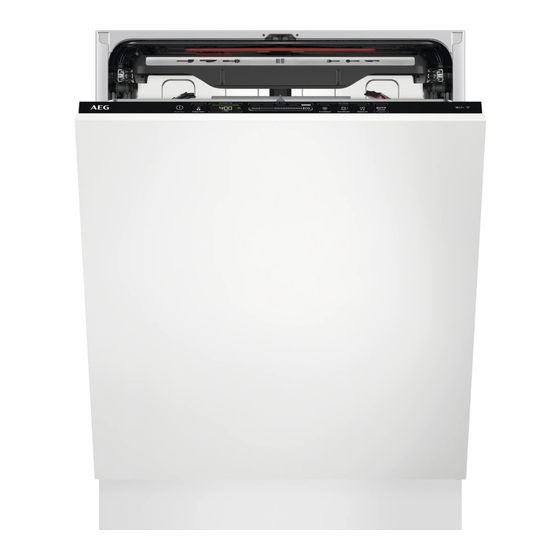
Page 7: Product Description
ENGLISH 3. PRODUCT DESCRIPTION Ceiling spray arm Rinse aid dispenser Upper spray arm Detergent dispenser Lower spray arm Lower basket Filters Upper basket Rating plate Cutlery drawer Salt container Air vent 3.1 Beam-on-Floor • The red light flashes when the appliance has a malfunction. -
Page 8: Control Panel
4. CONTROL PANEL On/Off button / Reset button MY TIME selection bar Delay Start button / Remote start EXTRAS buttons button AUTO Sense program button Display 4.1 Display 4.2 ECOMETER The ECOMETER indicates how the programme selection impacts energy and water consumption. -
Page 9: Programme Selection
ENGLISH 5. PROGRAMME SELECTION 5.1 MY TIME The appliance senses the degree of soil and the amount of dishes in the baskets. MY TIME selection bar allows to select a It adjusts the temperature and quantity of suitable dishwashing cycle based on water as well as the wash duration. - Page 10 5.4 Programmes overview Programme Dishwasher Degree of soil Programme phases EXTRAS load Quick Crockery, Fresh • Dishwashing 50 °C • ExtraPower cutlery • Intermediate rinse • GlassCare • Final rinse 45 °C • AirDry Crockery, Fresh, lightly • Dishwashing 60 °C •...
-
Page 11: Basic Settings
ENGLISH Water (l) Energy (kWh) Duration (min) 1) 2) Programme 10.5 - 12.9 0.92 - 1.06 1h 30min 11.6 - 14.2 1.00 - 1.15 2h 40min 11 - 13.5 1.12 - 1.26 0.860 AUTO Sense 10.4 - 13.3 0.76 - 1.22 120 - 170 Machine Care 9.7 - 11.8... - Page 12 You can change the basic settings in To enter setting mode, press and hold setting mode. simultaneously about 3 seconds. When the appliance is in setting mode, The lights related to the Previous, OK the bars of the ECOMETER represent and Next are on.
- Page 13 ENGLISH Water hardness German de‐ French de‐ mmol/l Clarke de‐ Water softener lev‐ grees (°dH) grees (°fH) grees 47 - 50 84 - 90 8.4 - 9.0 58 - 63 43 - 46 76 - 83 7.6 - 8.3 53 - 57 37 - 42 65 - 75 6.5 - 7.5...
- Page 14 Acoustic signals sound also the next programme. This activity when a malfunction of the increases the total water consumption of appliance occurs. It is not a programme by additional 4 litres and...
-
Page 15: Wireless Connection
• Mobile device connected to the app. This functionality allows you to wireless network. remotely control and monitor your 1. Launch My AEG Kitchen app on your dishwasher. mobile device and follow the My AEG Kitchen app can be downloaded instructions in the app. -
Page 16: Before First Use
7.2 How to deactivate the Refer to "Daily use" to activate the remote start. wireless connection 7.4 How to reset the network Press and hold simultaneously credentials for 2 seconds. If you want to connect to a different • The indicator is off. -
Page 17: Daily Use
ENGLISH CAUTION! The compartment (B) is for rinse aid only. Do not fill it with detergent. CAUTION! Only use rinse aid designed specifically for dishwashers. 6. Turn the cap of the salt container 1. Open the lid (C). clockwise to close the salt container. 2. - Page 18 "Wireless connection". 1. Press • The light related to the button is • The display shows APP. 2. Close the appliance door. 3. Use My AEG Kitchen app to remotely operate the appliance. Opening the door CAUTION! deactivates the remote start.
- Page 19 ENGLISH 2. Press the button dedicated to the 3. Press repeatedly until the display option you want to activate. shows the desired delay time (from 1 • The light related to the button is to 24 hours). 4. Close the appliance door to start the •...
-
Page 20: Hints And Tips
The function comes into operation start is set. automatically: • When the programme is completed. If you open the door during the delay • After 5 minutes if a programme was start countdown, the countdown is not started. - Page 21 ENGLISH 10.2 Using salt, rinse aid and 4. When the programme is completed, adjust the water softener according detergent to the water hardness in your area. 5. Adjust the released quantity of rinse • Only use salt, rinse aid and detergent aid.
-
Page 22: Care And Cleaning
10.6 Unloading the baskets After the programme is completed, water can still 1. Let the tableware cool down before remain on the inside you remove it from the appliance. Hot surfaces of the appliance. items can be easily damaged. - Page 23 ENGLISH 11.4 External cleaning • Clean the appliance with a moist soft cloth. • Only use neutral detergents. • Do not use abrasive products, abrasive cleaning pads or solvents. 11.5 Cleaning the filters 4. Wash the filters. The filter system is made of 3 parts. 5.
- Page 24 CAUTION! 3. To install the spray arm back, press it An incorrect position of the downwards. filters can cause bad washing results and damage to the appliance. 11.6 Cleaning the lower spray We recommend to clean the lower spray arm regularly to prevent soil from clogging the holes.
- Page 25 ENGLISH toothpick, to remove particles of soil from the holes. 1. Release the stoppers on the sides of the sliding rails of the cutlery drawer and pull the drawer out. 4. To install the spray arm back, press the spray arm upwards and simultaneously turn it counterclockwise until it locks into place.
-
Page 26: Troubleshooting
5. To install the spray arm (C) back, insert the mounting element (B) in the spray arm and fix it in the delivery tube (A) by turning it clockwise. Make sure that the mounting element locks into place. 6. Install the cutlery drawer on the sliding rails and block the stoppers. - Page 27 ENGLISH Problem and alarm code Possible cause and solution The anti-flood device is on. • Close the water tap. The display shows i30. • Make sure that the appliance is correctly installed. • Make sure the baskets are loaded as instructed in the user manual.
- Page 28 Problem and alarm code Possible cause and solution The remaining time in the • This is not a defect. The appliance is working correctly. display increases and skips nearly to the end of the pro‐ gramme duration. Small leak from the appli‐...
- Page 29 ENGLISH 12.1 The product number 1. Press and hold simultaneously code (PNC) for about 3 seconds. The display shows the PNC of your If you contact an Authorised Service appliance. Centre, you need to provide the product 2. To exit the PNC presentation, press number code of your appliance.
- Page 30 Problem Possible cause and solution Traces of rust on cutlery. • There is too much salt in the water used for washing. Refer to "The water softener". • Silver and stainless steel cutlery were placed together. Do not place silver and stainless steel items close to‐...
-
Page 31: Technical Information
ENGLISH 12.3 Problems with wireless connection Problem Possible cause and solution Activating wireless connection • Wrong wireless network ID or password. Cancel the is not successful. setup and start it again to enter the correct credentials. Refer to "Wireless connection". •... -
Page 32: Environmental Concerns
Water supply pressure bar (minimum and maximum) 0.5 - 10 MPa (minimum and maximum) 0.05 - 1.0 Water supply max 60 °C Cold water or hot water Capacity Place settings 1) Refer to the rating plate for other values. - Page 36 My AEG Kitchen app The software in this product contains components that are based on free and open source software. AEG gratefully acknowledges the contributions of the open software and robotics communities to the development project. To access the source code of these free and open source software components whose license conditions require publishing, and to see their full copyright information and applicable license terms, please visit: http://aeg.opensoftwarerepository.com (folder NIU5)
Need help?
Do you have a question about the FSS73718P and is the answer not in the manual?
Questions and answers