Table of Contents
Advertisement
Advertisement
Table of Contents

Related Manuals for Bosch WGA254U0AU


Summary of Contents for Bosch WGA254U0AU
- Page 1 Washing machine WGA254U0AU Instruction Manual and Installation Instructions...
- Page 2 Your new washing machine Display rules : Warning! You have chosen a Bosch washing machine. This combination of symbol and signal word indicates a possibly dangerous Please take a few minutes to read and situation. Not heeding the warning can become familiar with the advantages of cause death or injuries.
-
Page 3: Table Of Contents
Contents e n I n s t r u c t i o n M a n u a l a n d I n s t a l l a t i o n I n s t r u c t i o n s Intended use. -
Page 4: Intended Use
Intended use Cleaning and maintenance . . . 37 Intended use Appliance housing/control panel . . . 37 Drum ......37 This appliance is intended for private ■... -
Page 5: Safety Instructions
Safety instructions Do not allow children to Safety instructions ■ clean or maintain this appliance unsupervised. T he following safety information Keep children under 3 years S a f e t y i n s t r u c t i o n s and warnings are provided to ■... -
Page 6: Installation
Safety instructions The mains voltage on your Warning ■ power socket must match Risk of poisoning! the rated voltage specified Detergents and care products on the appliance may result in poisoning if (identification plate). The consumed. connected loads and the If accidentally swallowed, seek required fuse protection are medical advice. - Page 7 Safety instructions If you take hold of any of the Warning ■ appliance's protruding parts Risk of electric shock/fire/ (e.g. the appliance door) in material damage/damage to order to lift or move it, these the appliance! parts may break off and If the appliance's mains cable is cause injury.
-
Page 8: Operation
Safety instructions The appliance is secured for Caution! ■ transportation by transport Material damage/damage to locking devices. If the the appliance transport locking devices are If the water pressure is too ■ not removed before the high or too low, the appliance is operated, this appliance may not be able to may result in damage to the... - Page 9 Safety instructions Warning Warning Risk of injury! Eye/skin irritation! If you support your weight/sit Detergent and care products ■ on the appliance door when may spray out if the detergent it is open, the appliance may drawer is opened while the tip over, which may result in appliance is in operation.
-
Page 10: Cleaning/Maintenance
Safety instructions Cleaning/Maintenance Warning Risk of poisoning! Warning Poisonous fumes may be given Risk of death! off by cleaning agents that The appliance is powered by contain solvents, e.g. cleaning electricity. There is a risk of solvent. electric shock if you come into Do not use cleaning agents that contact with live components. -
Page 11: Environmental Protection
Environmental protection Caution! Environmental Material damage/damage to protection the appliance Cleaning agents and agents for P ackaging/used appliance pretreating laundry (e.g. stain E n v i r o n m e n t a l p r o t e c t i o n removers, prewash sprays, etc.) Dispose of packaging in an environmentally-responsible... -
Page 12: Tips On Economical Use
Positioning and connecting Tips on economical use Always fill the appliance with the ■ maximum amount of laundry for each programme. Wash normally soiled laundry ■ without pretreating. For light and normal soiling in ■ laundry, you can save energy and detergent. -
Page 13: Safety Instructions
Positioning and connecting In addition, a hose clamp (24 - 40 mm Notes diameter, available from specialist In addition to the safety information ■ retailers) is required to connect the listed here, the local water and water outlet hose to a siphon. electricity supplier may have special requirements. -
Page 14: Installing The Appliance In A Kitchenette
Positioning and connecting Installing the appliance in a Take the hoses out of the holders. kitchenette Warning Risk of death! There is a risk of electric shock if you touch live components. Do not remove the appliance covering plate. Notes Recess width of 60 cm required. -
Page 15: Removing The Support Struts
Positioning and connecting Fit the covers. Undo and remove the screws on the horizontal transport strut. Lock the covers firmly in place by applying pressure to the snap-in Remove the transport strut. hooks. Hose and cable lengths Removing the support struts Connection on left side Unscrew and remove all screws in the vertical transport struts. -
Page 16: Water Inlet
Positioning and connecting Do not bend, squash, modify or cut Connection on right side ■ through the water supply hose (otherwise its strength is no longer guaranteed). Only tighten the screw connections ■ by hand. If the screw connections are tightened too much with a tool (pliers), the thread may be damaged. -
Page 17: Water Outlet
Positioning and connecting – Model: Aqua-Stop Caution! Damage to the appliance/fabrics If the end of the drain hose is immersed in the drained water, water may be sucked back into the appliance and may damage the appliance/fabrics. Make sure that: The plug does not block drainage ■... -
Page 18: Alignment
Positioning and connecting Check the alignment of the Drainage into a plastic pipe with ■ appliance with a spirit level, and rubber bushing or into a drainage adjust it if necessary. Change the height by turning the appliance feet. All four appliance feet must stand firmly on the ground. -
Page 19: Before Washing For The First Time
Positioning and connecting Insert mains plug. Notes Turn the water tap on. The mains voltage and voltage ■ Close the door. Do not load any indicated on the appliance (rating laundry. plate) are the same. Run two cycles of Cottons i 90 °C The connected load and fuse programme. - Page 20 Positioning and connecting b) Insert and tighten the screws. Installing the transport locks: Remove the covers and keep them in a safe place. Use a screwdriver if Note: necessary. c) Clip the hoses securely in the holders. Before switching on the appliance again: Insert all four sleeves.
-
Page 21: Getting To Know The Appliance
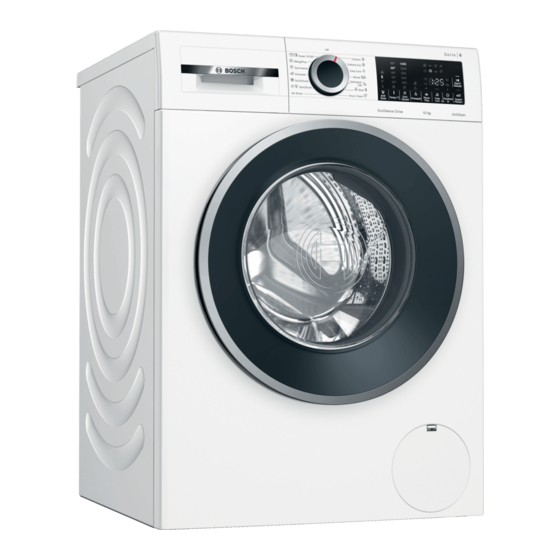
Getting to know the appliance Getting to know the appliance A ppliance G e t t i n g t o k n o w t h e a p p l i a n c e Detergent drawer Control panel Loading door Service flap... -
Page 22: Control Panel
Getting to know the appliance Control panel Programme default settings can be changed. Overview of all programme default settings ~ Page 30 Additional programme settings can be selected. Overview of all additional programme settings ~ Page 31 Start/Reload A button for starting, interrupting, (e.g. -
Page 23: Display Panel
Getting to know the appliance Display panel Additional programme settings Programme default settings Display Setting Anti Stain °/¶/º/· Display Setting Description Prewash — - 90° Temperature Temperature that +1/+2/+3 Rinse Plus can be set in °C Easy Iron — = cold SpeedPerfect 2 - 1400* Spin speed Spin speed in rpm... -
Page 24: Laundry
Laundry Sorting laundry Laundry Sort your laundry according to the care P rotecting your laundry and instructions and manufacturer's L a u n d r y appliance information on the care labels, depending on: Caution! Type of fabric/fibre ■ Damage to the appliance/textiles Colour ■... -
Page 25: Starching
Detergent Starching Detergent Laundry should not be treated Note: C orrect selection of detergent with fabric softener. D e t e r g e n t The care label is crucial to ensure Switch on the appliance. correct detergent selection, temperature Select the à... -
Page 26: Saving Energy And Detergent
Detergent Saving energy and detergent For light and normal soiling, you can save energy (lower washing temperature) and detergent. Saving Soiling/note Reduced temper- Light ature and deter- No visible dirt or stains. Cloth- gent quantity as ing has taken on some body per the recom- odour, e.g.: mended dosage... -
Page 27: Overview Of Programmes
Overview of programmes Overview of programmes S electable programme O v e r v i e w o f p r o g r a m m e s Programme/Type of washing Options/Information Name of the programme Max. load as kg depending on the model and the pro- Brief explanation of the programme and for which fabrics it is gramme... - Page 28 Overview of programmes Programme/Type of washing Options/Information Mixed o 4.0 kg Mixed load of cottons and synthetic fabrics. — - 60 °C 400 - 1400 rpm x Anti Stain, T Prewash, Ï Rinse Plus, p Easy Iron, G SpeedPerfect possible Delicates/Silk “...
- Page 29 Overview of programmes Programme/Type of washing Options/Information 0 [ Spin/Drain For spinning with a selectable spin speed and subsequent draining. If you have selected 2, it will run [ Drain pro- 2 - 1400 rpm gramme, the water is only drained after rinse process, no spin cycle.
-
Page 30: Programme Default Settings
Programme default settings ñ Finished in Programme default Before starting the programme, you settings can preselect the programme end ("Finish in" time) in 0.5h (h = hour) Y ou can change the default settings for increments (between “minimum P r o g r a m m e d e f a u l t s e t t i n g s selected programmes. -
Page 31: Additional Programme Settings31
Additional programme settings T (Prewash) Additional programme Prewash for heavily soiled laundry. settings Touch T (Prewash) to activate or deactivate it. You can find possible additional N ote: A d d i t i o n a l p r o g r a m m e s e t t i n g s programme settings in the overview;... -
Page 32: Operating The Appliance
Operating the appliance With the G SpeedPerfect Open the appliance door. Note: additional programme setting activated, the maximum load of washing will be reduced. Operating the appliance Select programme/switch on P reparing the appliance the appliance O p e r a t i n g t h e a p p l i a n c e The appliance was tested before delivery. -
Page 33: Measure And Add Detergent And Care Products
Operating the appliance Filling the dispensers Pull out the detergent drawer. Warning Eye / skin irritation! If the detergent drawer is opened while the appliance is running, detergent/care product may run out. Carefully open the drawer. If detergent/care product comes into Notes contact with eyes or skin, rinse Unfold and load presorted items... -
Page 34: Starting The Programme
Operating the appliance Be careful when opening the Childproof lock ■ detergent drawer while the appliance You can lock the appliance to prevent is running. the settings you have set from being Measuring aid A* for liquid detergent changed inadvertently. To do this, activate the childproof lock. -
Page 35: Changing The Programme
Operating the appliance Removing laundry/switching Notes Do not leave the door open for too off the appliance ■ long when adding laundry as water from the laundry may leak out. Set programme selector to Off. For safety reasons, the door remains Open the door and remove the ■... -
Page 36: Appliance Settings
Appliance settings 3: The volume of the button signals. ■ Appliance settings 0 = off, 1 = quiet, 2 = medium, 3 = loud, Y ou can change the following settings: 4 = very loud A p p l i a n c e s e t t i n g s The volume of the end signal. -
Page 37: Cleaning And Maintenance
Cleaning and maintenance Drum Cleaning and maintenance Warning Risk of injury/material damage/ damage to the appliance! Warning C l e a n i n g a n d m a i n t e n a n c e Permanently washing at low Risk of death! temperatures and a lack of ventilation There is a risk of electric shock if touch... -
Page 38: Cleaning The Measuring Aid A For Liquid
Cleaning and maintenance To remove the insert: Push the insert Leave the detergent drawer open Note: upwards from below with your finger. so that any residual water can evaporate. Cleaning the measuring aid A for liquid detergent If it contains liquid detergent residue: Hold the measuring aid, pull the cover upward and disconnect them. -
Page 39: Drain Pump Is Blocked
Cleaning and maintenance Clean the measuring aid Carefully unscrew the pump cover; Note: regularly to avoid residue and residual water may leak out. blockages. Clean the interior, pump cover thread and pump housing. The impeller in the drain pump must be Drain pump is blocked able to rotate. -
Page 40: The Drain Hose At The Siphon Is Blocked
Cleaning and maintenance The drain hose at the siphon Clean the filters: is blocked Disconnect the hose from the rear of the appliance. Turn the programme selector to Off. Pull out the mains plug. Loosen the hose clamp. Carefully remove the drain hose; residual water may leak out. -
Page 41: Faults And What To Do About Them
Faults and what to do about them Caution! Faults and what to do Water damage! about them Any escaping water may cause water damage. E mergency release Do not open the door if water can be F a u l t s a n d w h a t t o d o a b o u t t h e m seen through the glass. -
Page 42: Information On The Display Panel
Faults and what to do about them Information on the display panel Display Cause/Remedy Flashes fast + signal: The door was opened and the water level is too high. Õ ■ Close the door, continue the programme with Start/Reload A button or select [ Drain. -
Page 43: Faults And What To Do About Them
Faults and what to do about them Faults and what to do about them Faults Cause/Remedy Water is leaking from the Attach the drain hose correctly or replace it. ■ appliance. Tighten the screw fitting on the supply hose. ■ The door cannot be The temperature in drum is too high to open the door. - Page 44 Faults and what to do about them Faults Cause/Remedy Water is not visible in the Not a fault – the water is below the visible area. drum. The wrong detergent/fab- Empty the dispenser(s), clean it/them and pour in the correct product. ric softener has been ~ "Emptying the detergent draw, cleaning the detergent drawer and its hous- poured into the dis-...
- Page 45 Faults and what to do about them Faults Cause/Remedy Odours, stain formation in Run the Drum Clean Û programme without laundry. the appliance. Add washing powder or a detergent containing bleach. Note: To prevent foaming, only use half the amount of detergent recommend- ed by the detergent manufacturer.
-
Page 46: After-Sales Service
After-sales service After-sales service I f you cannot rectify a fault yourself, A f t e r - s a l e s s e r v i c e (~ "Faults and what to do about them" on page 41), please contact our after- sales service. -
Page 47: Consumption Values Table
Supplementary sheet for the installation and operating instructions Consumption values table E nergy and water consumption, programme duration and residual moisture for S u p p l e m e n t a r y s h e e t f o r t h e i n s t a l l a t i o n a n d o p e r a t i n g i n s t r u c t i o n s the main washing programme (approximate values) Programme... -
Page 48: Technical Information
Technical information Technical information T echnical data T e c h n i c a l i n f o r m a t i o n Dimensions: 84.8 cm x 59.8 cm x 59.0 cm (height x width x depth) Weight: 79 kg Mains connection:... -
Page 49: Information For Test Institute
Technical information Information for test institute Items Instruction Pre-treatment of new Run two empty runs of Cottons i 90 °C with 1400 rpm: appliance The 1st run with 50g detergent and 8g anti sudsing agent, the 2nd run without detergent and sudsing agent. According to standard AS NZS 2040.1-2005 AS NZS 2040.2-2005... -
Page 50: Aqua-Stop Warranty
Aqua-Stop warranty Aqua-Stop warranty O nly for appliances with Aqua-Stop A q u a - S t o p w a r r a n t y In addition to warranty claims against the vendor based on the purchase agreement and to our appliance warranty, we will provide compensation under the following conditions: If water damage is caused due to a... - Page 52 Free and easy registration – also on mobile phones: www.bosch-home.com/welcome Looking for help? You´ll find it here. Expert advice for your Bosch home appliances, need help with problems or a repair from Bosch experts. Find out everything about the many ways Bosch can support you: www.bosch-home.com/service Contact data of all countries are listed in the attached service directory.
Need help?
Do you have a question about the WGA254U0AU and is the answer not in the manual?
Questions and answers
is this cold wash and takes powder and fabric softner all manual
The Bosch WGA254U0AU is not exclusively a cold wash machine. It supports various temperature settings, including cold washes and temperatures up to 90°C, depending on the selected program. It also allows the use of different detergents, including powder, based on fabric type. Fabric softener can be added manually.
This answer is automatically generated