Table of Contents
Advertisement
Quick Links
Advertisement
Table of Contents

Related Manuals for aram huvis ASM


Summary of Contents for aram huvis ASM
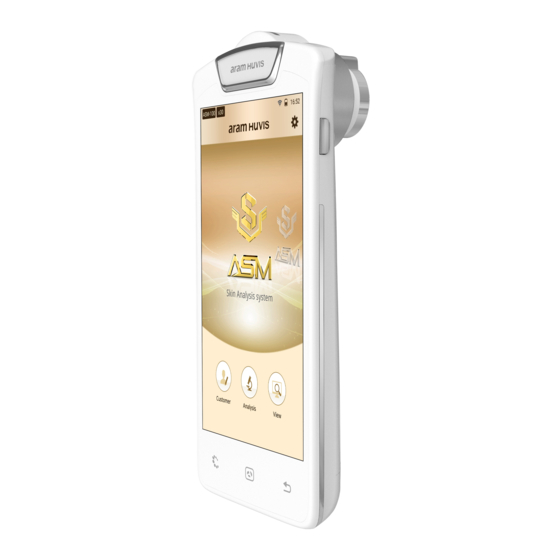
- Page 1 User Manual...
-
Page 2: Table Of Contents
Contents A . Components B. H/W Parts ⅰ . Both Sides ⅱ. Settings C. System Settings ⅰ . Date & Time ⅱ . Wi-Fi ⅲ.Sleep ⅳ .Language D. Application ⅰ . Settings ⅱ. Full Analysis Moisture Sebum Pore Melanin Acne Wrinkle Sensitivity Result... -
Page 3: Components
Components Skin lens Main unit with skin lens Sebum paper Cradle Charger (5V/3A) (100ea) USB cable Cleaning cloth Manual Air blower A. Components... -
Page 4: H/W Parts
H/W Parts Both Sides ASM lens Indicate LED Volume up & down button On/o button Lens change button X1 lens Flash USB slot(5v 3A) B. H/W Parts - Both Sides... -
Page 5: Ⅱ. Settings
H/W Parts Settings How to turn on the power Press and hold “Power” button. Take your finger o from the button a er "Indicate LED" turned on blue. How to turn o on the power Press and hold “Power” button. Touch "Power o ". - Page 6 H/W Parts Settings The default charger is American plug. Plug can be added or changed for each country. (EU, UK, AU and etc) Refer to the details as below how to change the plug type. Pull out american type plug from adaptor. For European type, push down European plug to American plug on the adaptor.
-
Page 7: System Settings
System Settings Date & Time Touch button. Go to "Date & time" Touch button. Go to "Set date". Select the date and touch Check if the setting is “OK” button. correctly applied. C. System Settings - Date & Time... - Page 8 System Settings Date & Time Touch “Select time zone” Select proper time zone. Check if the setting is correctly applied. Change into the current time Touch “Set time”. Check if the setting is and touch “OK” button. correctly applied. C. System Settings - Date & Time...
-
Page 9: Ⅱ . Wi-Fi
System Settings Wi-Fi Touch “Wi-Fi”. Choose proper Wi-Fi signal. Turn on Wi-Fi using On/O button Put Wi-Fi password. Wait until the device is connected to Wi-Fi. C. System Settings - Wi-Fi... -
Page 10: Ⅲ.sleep
System Settings Wi-Fi Once the device is connected to Wi-Fi, you could see the Wi-Fi mark on upper side of the screen. Wi-Fi Usage Email ☞ Wi-Fi connection is needed to send analysis data by email. *Reference : page 7 (Wi-Fi), page 20(Email). So ware update ☞... -
Page 11: Ⅳ .Language
System Settings Language Touch “Language & input”. Go to "Language". Select preferred language. C. System Settings - Language... -
Page 12: Application
Application Settings Touch button. Go to "General Settings". Available to change Language, Version and Email setting. D. Application - Settings... -
Page 13: Crm
Application Input the information. Touch "Customer". Touch to register new customer. A er putting all information, User's profile is created on the list. Touch button to start touch Then touch user's profile to start analyzing. analyzing. D. Application - CRM... -
Page 14: Moisture
Application Moisture A er checking the message "Touch to Touch the button. skin please", push the sensor completely Please wait until vibration and sound. * Never put the sensor on the skin before to marked area of the face. the message "Touch to skin please". * All surface of the sensor should be pushed completely. -
Page 15: Sebum
Application Sebum U-zone T-zone Take a picture of pink area of Put the sebum paper on Put the sebum paper on T-zone the sebum paper. U-zone of the cheek, then of forehead, then press it for press it for 2~3 seconds. 2~3 seconds. -
Page 16: Pore
Application Pore zoom out zoom in Touch to activate camera Touch screen to bring Touch button to analyze. and put the camera onto the a camera into focus and then marked area of the face. touch to take a picture. Touch button to compare Touch... -
Page 17: Melanin
Application Melanin zoom out zoom in Touch to activate camera Touch screen to bring Touch button to analyze. and put the camera onto the a camera into focus and then marked area of the face. touch to take a picture. Touch button to compare Result will appear. -
Page 18: Acne
Application Acne zoom out zoom in Touch to activate camera Touch screen to bring Touch button to analyze. and put the camera onto the a camera into focus and then marked area of the face. touch to take a picture. Touch button to compare Result will appear. -
Page 19: Wrinkle
Application Wrinkle zoom out zoom in Touch to activate camera Touch screen to bring Touch button to analyze. and put the camera onto the a camera into focus and then marked area of the face. touch to take a picture. * For wrinkle photo, take picture of outer eye area in widthways to check crow's feet. -
Page 20: Sensitivity
Application Sensitivity zoom out zoom in Touch to activate camera Touch screen to bring Touch button to analyze. and put the camera onto the a camera into focus and then marked area of the face. touch to take a picture. Touch button to compare Result will appear. -
Page 21: Result
Application Result Touch button or "Show All Result" to see overall result. Available to check the result. The worst results will be marked in red. D. Application - Result... -
Page 22: Ⅰ . Email
Application Email Before sending Email, Touch Go to "Send Email". the device shall be connected to Wi-Fi. * Reference : page 7. A er selecting sender's mail Select the mail account to Select “Gmail” address, put receiver's mail address. register on the list. Then touch "Send"... -
Page 23: Ⅱ. Mirroring
Application Mirroring Touch button. Go to "General Settings". Set the mirroring option "On". Capture QR code using QR code reader app. Automatically moved to App store. D. Application - Mirroring... - Page 24 Application Mirroring Install “Aram VIEWER”. Then, go to “Wi-Fi Setting”. In your mobile device go to Wi-Fi Mirroring will be started. setting. Then find SSID and connect it. D. Application - Mirroring...
-
Page 25: Ⅲ. View Mode
Application View Mode In view mode, it is able to Touch “View”. take pictures with capture button. The user can select analysis The user can mark the defect or parameter to take pictures concern according to the image in proper mode. with note function. -
Page 26: Warranty
Warranty The product undergoes strict quality management and inspection process before production and introduction to market. In case of functional or operational defect occurs under normal condition of use within 10 days a er purchase, we will repair it for free or replace in new product. When this product goes out under the normal use, we will repair it free of charge under warranty. - Page 27 MEMO...
- Page 28 FCC Compliance Statement This device complies with part 15 of the FCC rules. Operation is subject to the following two conditions: (1) This device may not cause harmful interference, and (2) this device must accept any interference received, including interference that may cause undesired operation. FCC Interference Statement This equipment has been tested and found to comply with the limits for a Class B digital device, pursuant to part 15 of the FCC Rules.
- Page 29 HEAD OFFICE #401~402 Bundang Seoul National University Hospital Health Care Innovation Park, 172, Dolma-ro, Bundang-gu, Seongnam-si, Gyeonggi-do, 13605 Rep. Korea PRODUCTION DIVISION & FACTORY #909 Byucksan Technopia, 560, Dunchon-daero, Jungwon-gu, Seongnam-si, Gyeonggi-do, 13230 Rep. Korea Tel: 070-4687-1712 / Fax: 031-732-6330 / Email: info@aramhuvis.com http://www.aramhuvis.com...
Need help?
Do you have a question about the ASM and is the answer not in the manual?
Questions and answers