
Related Manuals for Beko ASGL142PX


Summary of Contents for Beko ASGL142PX
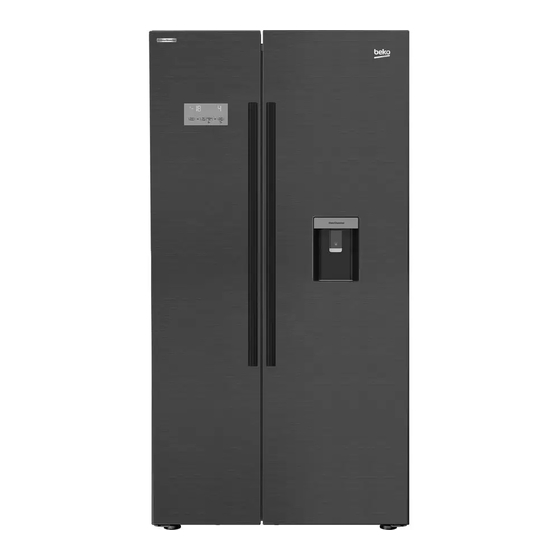
- Page 1 ASD241B ASL141B ASDL251B ASDM241Z ASD241S ASL141S ASDM241PX ASD241X ASL141W ASL141PX ASD241W ASL141X ASGL142PX...
- Page 2 Please read these instructions first before using your appliance Thank you for choosing a Beko appliance. Please take some time to read this user manual before using your appliance, to ensure you know how to safely operate the controls and functions.
-
Page 3: Table Of Contents
1. Safety and environment 5 Operating the product instructions 5.1. Indicator panel....12 1.1. General safety ....3 5.2. -
Page 4: Safety And Environment Instructions
Safety and environment instructions This section provides the safety for their safety. Children should not be instructions necessary to prevent allowed to play with this device. the risk of injury and material In case of malfunction, unplug the • damage. Failure to observe these device. -
Page 5: Intended Use
Important instructions for safety and environment Plug the product into an earthed • 1.1.1 HC warning socket. Earthing must be done by a If the product comprises a cooling qualified electrician. system using R600a gas, take If the product has LED type lighting, •... -
Page 6: Child Safety
Important instructions for safety and environment Do not keep sensitive products • 1.5. Compliance with requiring controlled temperatures RoHS Directive (vaccines, heat sensitive medication, • This product complies with EU WEEE Directive medical supplies, etc.) in the (2011/65/EU). It does not contain harmful and refrigerator. -
Page 7: Your Refrigerator
Your refrigerator Congratulations on your choice a Beko quality Appliance which has been designed to give you service for many years. 1- Freezer compartment 8- Odour filter 2- Fridge compartment 9- Chiller compartment 3- Fan 10- Crisper compartment 4- Butter-cheese compartments... -
Page 8: Installation
Installation 3.1. Appropriate Always have the repair procedures carried out by installation location the Authorised Service Agent. Manufacturer shall not be held liable for damages that may arise from WARNING: If the door of the procedures carried out by unauthorised persons. room where the product will be To make the product ready for use, make sure placed is too small for the product... -
Page 9: Electrical Connection
Installation WARNING: If the product has a failure, it should not be operated unless it is repaired by Authorised Service Agent! There is the risk of electric shock! 3.4. Adjusting the feet If the product stands unbalanced after installation adjust the feet. Taking help from someone to slightly lift the refrigerator will facilitate this process. -
Page 10: Illumination Lamp
Installation Packaging must be adequate and the rules of transportation printed on the package must be followed. Original packaging and foam materials should be kept for future transportations. WARNING: Packaging materials adjusting nut are dangerous for the children. fixing nut Keep packaging materials in a safe place away from reach of the children. -
Page 11: Preparation
Preparation 4.1. Things to be done 4.2. Efficient operation for energy saving Specified energy consumption value of your refrigerator is determined under maximum load by Connecting the product to electric energy saving systems is removing the freezer compartment upper rack and risky as it may restrict operation while other racks and two bottom drawers are in of the product. -
Page 12: Initial Use
Preparation 4.4. Initial use Before starting to use the product, check that all preparations are made in accordance with the instructions in sections "Important instructions for safety and environment" and "Installation". • Clean the interior of the refrigerator as recommended in the “Maintenance and cleaning”... -
Page 13: Operating The Product
Operating the product 5.1. Indicator panel Indicator panels may vary according to the product model. 7.1 7.2 1. Economic use 2. High temperature / fault alert 3. Energy saving function (display off) 4. Rapid cooling 5. Vacation function 6. Cooler compartment temperature setting 7. - Page 14 Operating the product 1. Economic use 5. Vacation function This sign will light up when the freezer To activate the Vacation function, , press the quick compartment is set to -18°C', the most fridge button for 3 seconds; this will activate the economical setting.
- Page 15 Operating the product 8. Keypad lock 11. Rapid freezing Press the display off button, simultaneously for 3 For rapid freezing, press the button ; this will seconds. The keypad lock sign will light up and the activate the rapid freezing indicator ( keypad lock will be activated;...
-
Page 16: Neo-Frost Cooling System
Operating the product 5.2. Neo-Frost • Divide the food into portions according Cooling System to your family's daily or meal based consumption needs. Thanks to the two separate cooling systems, • Pack the food in an airtight manner to cooling speed is much faster than traditional prevent them from drying even if they refrigerators. -
Page 17: Recommendations For Preserving The Frozen Food
Operating the product 5.4. Recommendations 5.6. Deep-freeze for preserving the information frozen food Food must be frozen as rapidly as possible when • Frozen food that you have purchased they are put in a refrigerator in order to keep them should be stored in accordance with in good quality. -
Page 18: Icematic And Ice Storage
Operating the product 5.7. Icematic and ice 5.8. Ice making storage container *optional *optional Fill the ice container with water and place it into Using the Icematic’ the freezer compartment. Fill the Icematic with water and place it into its Your ice will be ready approximately in two hours. -
Page 19: Chiller Compartment
Operating the product 5.9. Chiller 5.12. Crisper compartment Crisper of the refrigerator is designed specially to keep the vegetables fresh without losing their *optional humidity. For this purpose, cool air circulation is The chiller compartment maintains a lower intensified around the crisper in general. Remove temperature then the rest of the fridge, ideal for the door shelves that stand against the crisper storing fresh meat fish and deli items. -
Page 20: Odour Filter
Operating the product 5.13. Odour filter 5.14. Drip tray *optional *optional Odour filter prevents unpleasant odour build-up in your refrigerator. Water that dripped while using the water dispenser Odour filter can be located in the fridge accumulates in the spillage tray. You can remove compartment on the back wall.Pull the cover into the tray by pulling it to yourself or pressing on its which the odour filter is installed downwards from... -
Page 21: Water Dispenser
Operating the product 5.15. Water Dispenser 5.17. Filling the water dispenser's tank *optional Water tank filling reservoir is located inside the The water dispenser will provide chilled water on door rack. Open the reservoir cover and pour in tap, without the need for any plumbing. As you clean drinking water. -
Page 22: Cleaning The Water Tank
Operating the product Use clean and pure drinking water only. Capacity of the water tank is 3 liters; do not overfill. Push the lever of the water dispenser with a rigid glass. If you are using disposable plastic glasses, push the lever with your fingers from behind the glass. -
Page 23: Humidity Controlled Crisper
Operating the product 5.19. Humidity controlled crisper (FreSHelf) (This feature is optional) Humidity rates of the vegetables and fruit are kept under control with the feature of humidity- controlled crisper and the food is ensured to stay fresh for longer. We recommend you to place the leafy vegetables such as lettuce, spinach and the vegetables which are sensitive to humidity loss, in a horizontal... -
Page 24: Maintenance And Cleaning
Maintenance and cleaning 6.1 Avoiding bad odours Cleaning your fridge at regular intervals will extend the service life of the prod- Materials that may cause odour uct. are not used in the production of our refrigerators. However, due to WARNING: Unplug the product inappropriate food preserving conditions before cleaning it. -
Page 25: Troubleshooting
Troubleshooting Check this list before contacting the product does not restart after this service. Doing so will save you time period, contact the service. and money. This list includes frequent Defrosting is active. >>> This • complaints that are not related to faulty is normal for a fully-automatic workmanship or materials. - Page 26 Troubleshooting The cooler compartment • The doors were opened frequently • temperature is set to a very high or kept open for long periods. >>> degree. >>> Temperature setting The warm air moving inside will of the cooler compartment has cause the product to run longer.
- Page 27 Troubleshooting The product is not standing in full • There is sound of wind blowing coming from the upright position on the ground. >>> product. Adjust the stands to balance the The product uses a fan for the • product. cooling process.
- Page 28 If you have purchased an American style Fridge freezer, the standard guarantee starts from the date of original purchase of the product, and lasts for a period of twenty four (24) months unless Beko plc (the “Manufacturer”) agrees to extend the guarantee for the product in writing.
- Page 29 11. Optional extras, where available (i.e. extendable feet) are supplied on a chargeable basis only. Does Beko offer replacements? This is a repair-only guarantee. On occasion, the Manufacturer may at its sole discretion, replace your product with a new product instead of carrying out a repair.
- Page 30 If you are resident in the Republic of Ireland, this guarantee will be governed by Irish law and the Irish courts will have jurisdiction. This guarantee is provided by Beko plc. Beko House, 1 Greenhill Crescent, Watford, Hertfordshire. WD18 8QU.
- Page 31 Beko Free standing appliances come with a 12 month parts and labour guarantee as standard, Beko Built-in appliances come with a 12 month parts and labour guarantee as standard. This is extended to 24 months, free of charge, upon registration of the appliance. When you register your appliance for additional guarantee, you will automatically activate the ProSmart Motor 10 year guarantee.
- Page 32 Further details are available at http://www.beko.co.uk/cookie-and- privacy. 13. These Terms and Conditions are governed by the laws of England and Wales; manufacturer: Beko plc, Beko House, 1 Greenhill Crescent, Watford WD18 8QU. Company Registration Number: 02415578.
- Page 33 Complete the required details and click send message. Product registrations For UK registrations please visit beko.co.uk/register and for the Republic of Ireland visit beko.ie/register. 32 /32 EN Refrigerator / User Manual...
- Page 34 57 3771 0000/BE...
Need help?
Do you have a question about the ASGL142PX and is the answer not in the manual?
Questions and answers