Table of Contents
Advertisement
Quick Links
Advertisement
Table of Contents

Subscribe to Our Youtube Channel
Related Manuals for Beko ASP34B32VPS


Summary of Contents for Beko ASP34B32VPS
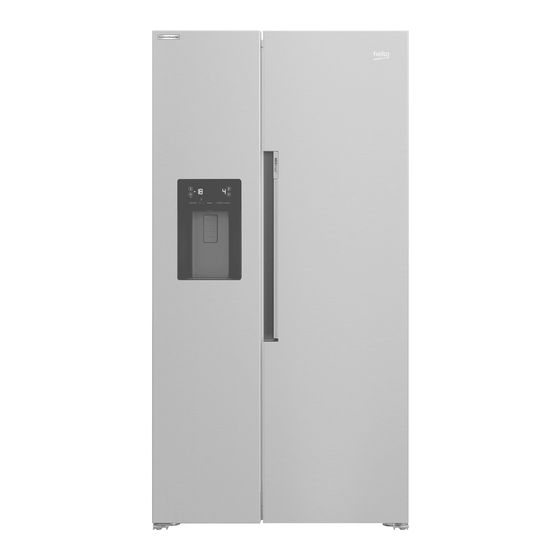
- Page 1 Refrigerator User Manual ASP34B32VPS 58 6323 0000/AA...
- Page 2 Please read these instructions first before using your appliance Thank you for choosing a Beko appliance. Please take some time to read this user manual before using your appliance, to ensure you know how to safely operate the controls and functions.
-
Page 3: Table Of Contents
1 Safety Instructions 5 Preparation 5.1 What to do for energy saving ... 17 1.1 Purpose of usage....3 5.2 First operation . -
Page 4: Safety Instructions
Safety Instructions • This section includes the safety instructions 1.2 Safety of children, vulnerable necessary to prevent the risk of personal injury persons and pets or material damage. • This product may be used by children aged 8 • Our company shall not be held responsible for years and older and persons with underdevel- damages that may occur if these instructions oped physical, sensory or mental capabilities or... -
Page 5: Electrical Safety
Safety instructions • Check for any damage on the product before 1.3 Electrical safety installing it. Do not have the product installed if • The product shall not be plugged into the outlet it is damaged. during installation, maintenance, cleaning, re- • Place the product on a level and hard sur- pair, and transportation operations. -
Page 6: Operational Safety
Safety instructions • Do not put ice cream, ice cubes or frozen food tions made as per local or national regulations. to your mouth as soon as you take them out of • The product's power cable must be unplugged the freezer. -
Page 7: Maintenance And Cleaning Safety
Safety instructions • Do not hit or exert excessive pressure on glass 1.7 Maintenance and cleaning surfaces. Broken glass may cause injuries and/ safety or material damages. • The cooling system in your product contains • Do not pull by the door handle if you shall move R600a refrigerant. -
Page 8: Environmental Instructions
Environmental instructions 2.1 Compliance with the WEEE Directive and Disposing of the Waste Product: This product complies with EU WEEE Directive (2012/19/EU). This product bears a classification symbol for waste electrical and electronic equip- ment (WEEE). This symbol indicates that this product shall not be disposed with other house- hold wastes at the end of its service life. -
Page 9: Your Refrigerator
Your Refrigerator 1- Freezer compartment 9- Bottle shelf 2- Cooler compartment 10- Glass shelves 3- Cooler compartment door shelves 11- Fan 4- Egg Holder 12- Frozen food storing compartments 5- Bottle shelf 13- Freezer compartment glass shelf 6- Adjustable stands 14- Icematic 7- Crispers 15- Ice storage box... -
Page 10: Installation
Installation 4.1 The right place for installation • The product requires adequate air circulation to function efficiently. If the product will be placed Read the “Safety Instructions” section first! in an alcove, remember to leave at least 5 cm distance between the product and the ceiling and the walls. -
Page 11: Adjustment Of The Feet
Installation In order to adjust the doors vertically, 4.3 Adjustment of the feet •Loosen the fixing nut at the bottom If the product is not in balanced position, adjust the •Screw adjusting nut (CW/CCW) according to the front adjustable stands by rotating right or left. position of the door •Tighten the fixing nut for the final position In order to adjust the doors horizontally, • Loosen the fixing screw at the bottom • Loosen the fixing bolt on the top • Screw the adjusting bolt (CW/CCW) on the side... -
Page 12: Electrical Connection
Installation 4.4 Electrical connection 4.5 Water connection (Optional) WARNING: WARNING: Do not use extension or Unplug the product and multi sockets in power connection. the water pump (if available) during connection. The product’s water mains, filter and carboy connections must be rendered by authorizer WARNING: Damaged power cable service. -
Page 13: Connecting Water Hose To The Product
Installation 4.6 Connecting water hose to the 4.7 Connecting to water mains product (Optional) To connect the water hose to the product, To use the product by connecting to the cold water follow the instructions below. mains, a standard 1/2” valve connector must be 1. -
Page 14: For Products Using Water Carboy
Installation 1. Attach the connector into the faucet adaptor 2. Connect the other end of the water hose to and tighten by hand / tool. the water pump by pushing the hose into the pump’s hose inlet. 2. To avoid damaging, shifting or accidentally 3. -
Page 15: Fixing External Filter On The Wall (Optional)
Installation 4.10 Fixing external filter on the wall (Optional) WARNING: Do not fix the filter on the product. Check to see the following parts are supplied with your product’s model: 4. Attach the water hose extending from the top of the filter to the product’s water connection adaptor, (see 4.6.) 1. -
Page 16: Internal Filter
Installation 4.11.Internal filter 1. “Ice Off” indicator must be active while installing the filter. Switch the ON-OFF The internal filter provided with the product is not indicator using the “Ice” button on the screen. installed upon delivery; please follow the instructions below to install the filter. - Page 17 Installation Remove the water filter by-pass cover by pulling. A few drops of water may flow out after removing the cover; this is normal. 1. Place the water filter cover into the mechanism and push to lock in place. 2. Push the “Ice” button on the screen again to cancel the “Ice Off”...
-
Page 18: Preparation
Preparation energy while maintaining the freshness of your Read the “Safety Instructions” section first! foodstuff. • In case of multiple options are present glass shelves must be placed so that the air outlets 5.1 What to do for energy saving at the backwall are not blocked, prefably air mehmet outlets are remaining below the glass shelf. -
Page 19: Operating The Product
Operating the Product Read the “Safety Instructions” section first! • Do not use any mechanical tools or any other tools than the recommendations of the manufacturer to speed up the thawing operation. • Do not use parts of your refrigerator such as the door or drawers as a support or a step. -
Page 20: Operation Of The Product
Operation of the Product Read the “Safety Instructions” section first! 6.2 Indicator panel *7.1 *7.2 Indicator panels may vary depending on the model of your product. Audial and visual functions of the indicator panel will assist in using the refrigerator. 11.2 11.1 1. - Page 21 Using the product 1. Freezer compartment temperature setting Use this function when placing fresh foods into the cooler compartment or to rapidly cool the Pressing the button ( ) will enable the freezer food items. When this function is activated, the compartment temperature to be set at -18,-19,- refrigerator will be engaged for 1 hour.
- Page 22 Using the product 11.2 Alarm off warning In case of power failure/high temperature alarm, after checking the food located in the freezer compartment press the alarm off button to clear the warning. 12. Autoeco Press the auto eco button ( ), for 3 seconds to activate this function.
-
Page 23: Deodoriser Module
Using the product 6.3 Deodoriser Module (FreshGuard) *May not be available in all models The deodoriser module quickly eliminates the bad smells in your refrigerator before they permeate the surfaces. Thanks to this module, which is placed on the ceiling of the fresh food compartment, the bad odours dissolve while the air is actively being passed on the odour filter, then the air that has been cleaned by the filter is re-emitted to the fresh food... -
Page 24: Humidity Controlled Crisper (Everfresh+)
Using the product 6.4 Humidity controlled 6.5 Blue Light/HarvestFresh crisper (EverFresh+) *May not be available in all models *May not be available in all models For Blue light, Thanks to the humidity controlled crisper, Vegetables and fruit stored in crispers illuminated vegetables and fruits may be stored for a longer with blue light continue to perform photosynthesis period at an environment with ideal humidity... -
Page 25: Using The Water Fountain
Using the product 6.6 Using the water fountain 6.7 Filling the water tank of *May not be available in all models the water fountain Open the lid of the water tank as shown in the figure. Fill in pure and clean drinking water. The first few glasses of water taken from Close the lid. - Page 26 Using the product Do not fill the water tank with fruit juice, fizzy beverages, alcoholic beverages or any other liquids incompatible for use in the water fountain. Using such liquids will cause malfunction and irreparable damage in the water fountain. Using the fountain in this way is not within the scope of warranty.
-
Page 27: Dairy (Cold Storage) Bin
Using the product 6.13 Icematic and ice storage box 6.9 Dairy (cold storage) bin *May not be available in all models *May not be available in all models Fill the icematic with water and put in place. The “The dairy (cold storage) bin ” provides lower ice will be ready after approximately two hours. -
Page 28: Taking Ice / Water
Using the product 6.14 Taking ice / water • The water may be cloudy during first use of the filter; do not consume the first 10 glasses (Optional) of water. To take water ( ) / ice cube ( ) / fragmented • You must wait approximately 12 hours to get ice ( ), use the display to select the respective... -
Page 29: Ice-Maker
Using the product 6.16 Ice-maker (Optional) Ice maker is located on the upper section of the freezer cover. Hold the handles on the sides of the ice stock reservoir and move up to remove. Remove the ice-maker decorative lid by moving OPERATION ... - Page 30 Using the product When ice does not come out, check for any ice stuck While taking broken Ice, cubed ice may in the canal and remove it. Regularly check the ice come first. There is a case of coming cubed ice while taking broken ice.
-
Page 31: Freezing Fresh Food
Using the product 6.17 Freezing fresh food • Mark each food pack by writing the date on the package before freezing.This will allow you to • To preserve food quality, the food items placed determine the freshness of each pack every in the freezer compartment must be frozen as time the freezer is opened. -
Page 32: Placing The Food
Using the product Boil the vegetables and filter the water to extend the frozen storage time. Place the food in air-tight packages after filtering and place in the freezer. Bananas, tomatoes, lettuce, celery, boiled eggs, potatoes and similar food items should not be frozen. -
Page 33: Maintenance And Cleaning
Maintenance and cleaning • On the products without a No-Frost feature, WARNING: Read the “Safety water droplets and icing up to a thickness of a Instructions” section first! finger may occur on the rear wall of the freezer compartment. Do not clean, and never apply oils WARNING: Unplug the refrigerator or similar materials. -
Page 34: Cleaning Of The Products With Glass Doors
Maintenance and cleaning 7.2 Cleaning of the Products 7.3 Preventing Odours with Glass Doors The product is manufactured free of any Remove the protective foil on the glasses. odorous materials. However, keeping the food in There is a coating on the surface of the glasses. inappropriate sections and improper cleaning of This coating minimizes formation of stains and internal surfaces may lead to odours. -
Page 35: Troubleshooting
Troubleshooting Check this list before contacting the service. Doing • In case of sudden power failure or pulling so will save you time and money. This list includes the power plug off and putting back on, the frequent complaints that are not related to faulty gas pressure in the product's cooling system workmanship or materials. - Page 36 Troubleshooting The food items kept in cooler compartment • The new product may be larger than the drawers are frozen. previous one. Larger products will run for longer periods. • The cooler compartment temperature is • The room temperature may be high. >>> set to a very low degree.
- Page 37 Troubleshooting There is sound of wind blowing coming from • The food items may be in contact with the the product. upper section of the drawer. >>> Reorganize the • The product uses a fan for the cooling food items in the drawer. process.
- Page 38 If you have purchased an American style Fridge freezer, the standard guarantee starts from the date of original purchase of the product, and lasts for a period of twenty four (24) months unless Beko plc (the “Manufacturer”) agrees to extend the guarantee for the product in writing.
- Page 39 11. Optional extras, where available (i.e. extendable feet) are supplied on a chargeable basis only. Does Beko offer replacements? This is a repair-only guarantee. On occasion, the Manufacturer may at its sole discretion, replace your product with a new product instead of carrying out a repair.
- Page 40 If you are resident in the Republic of Ireland, this guarantee will be governed by Irish law and the Irish courts will have jurisdiction. This guarantee is provided by Beko plc. Beko House, 1 Greenhill Crescent, Watford, Hertfordshire. WD18 8QU.
- Page 41 Beko Free standing appliances come with a 12 month parts and labour guarantee as standard, Beko Built-in appliances come with a 12 month parts and labour guarantee as standard. This is extended to 24 months, free of charge, upon registration of the appliance. When you register your appliance for additional guarantee, you will automatically activate the ProSmart Motor 10 year guarantee.
- Page 42 (GDPR). You can opt into this service during the registration process. Further details are available at http://www.beko.co.uk/cookie-and-privacy. 7. These Terms and Conditions are governed by the laws of England and Wales; manufacturer: Beko plc, Beko House, 1 Greenhill Crescent, Watford WD18 8QU. Company Registration Number: 02415578. HOW TO OBTAIN SERVICE FOR YOUR APPLIANCE Please keep your purchase receipt or other proof of purchase details in a safe place;...
- Page 43 • The Retailer (Purchased from) and Date of purchase will be printed on your purchase receipt or other proof of purchase paperwork Recording of these details alone will not count as proof of purchase. A valid proof of purchase is required for requesting service under guarantee.
- Page 44 Send us a secure message through our online contact us form. Please visit our website, click Contact Us and choose a product support topic from the list of options. Complete the required details and click send message. Product registrations For UK registrations please visit beko.co.uk/register and for the Republic of Ireland visit beko.ie/ register.
- Page 45 Therefore, please be advised that repairs by professional repairers (who are not authorized by Beko) shall void the guarantee. Self-Repair...
- Page 46 Beko, and will void the warranty of the product. Therefore, it is highly recommended that end-users refrain from the...
Need help?
Do you have a question about the ASP34B32VPS and is the answer not in the manual?
Questions and answers