Advertisement
Quick Links
Advertisement

Related Manuals for SMART-AVI SM-DVN Matrix Series


Summary of Contents for SMART-AVI SM-DVN Matrix Series
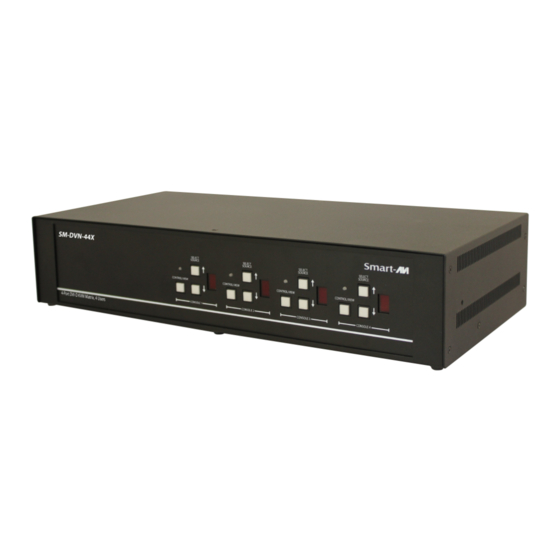
- Page 1 SM-DVN matrix series Advanced 4/8-Port DVI-D matrix KVM USER MANUAL SM-DVN-44X 4-Port DVI-D KVM Matrix, 4 Users SM-DVN-82X 8-Port DVI-D KVM Matrix, 2 Users SM-DVN-84X 8-Port DVI-D KVM Matrix, 4 Users 1-800-284-2131 www.smartavi.com Advanced 4/8 DVI-I Matrix KVM...
-
Page 2: Table Of Contents
Table of contents TECHNICAL SPECIFICATIONS_____________________________________________________________ 3 WHAT’S IN THE BOX?_____________________________________________________________________ 4 SM-DVN FRONT AND REAR_______________________________________________________________ 4 INSTALLATION____________________________________________________________________________ 5-8 LED’s BEHAVIOR__________________________________________________________________________ 11 SYSTEM OPERATION______________________________________________________________________ 12 TROUBLESHOOTING______________________________________________________________________ 12 TECHNICAL SUPPORT_____________________________________________________________________ 12 LIMITED WARRANTY STATEMENT________________________________________________________ 13 Advanced 4/8 DVI-I Matrix KVM... -
Page 3: Technical Specifications
Technical Specifications VIDEO Format DVI-I Dual Link SM-DVN-44X (4) DVI-I 29-pin (female) / DVI-D Host Interface SM-DVN-82X / SM-DVN-84X (8) DVI-I 29-pin (female) / DVI-D SM-DVN-82X (2) DVI-I 29-pin (female) / DVI-D User Console Interface SM-DVN-44X / SM-DVN-84X (4) DVI-I 29-pin (female) / DVI-D Max Resolution 2560 x 1600 @ 60Hz;... -
Page 4: What's In The Box
What’s in the box? SM-DVN Unit 4/8-port DVI-D Matrix KVM PS12VDC2A or 12V DC, 2A (minimum) power adapter with center-pin positive polarity or PS12VDC3A 12V DC, 3A (minimum) power adapter with center-pin positive polarity. User Manual SM-DVN-84X rear SM-DVN-84X front SM-DVN-44X rear SM-DVN-44X front Advanced 4/8 DVI-I Matrix KVM... -
Page 5: Installation
installation 1. Ensure that power is turned off or disconnected from the unit and the computers. 2. Use a DVI cable to connect the DVI output port from each computer to the corresponding DVI-D IN ports of the unit. 3. Use a USB cable (Type-A to Type-B) to connect a USB port on each computer to the respective USB ports of the unit. - Page 6 Installation (continued) SM-DVN-84X Shown Advanced 4/8 DVI-I Matrix KVM...
- Page 7 Installation (continued) EDID Learn: The KVM is designed to learn the connected monitor’s EDID upon power up. In the event of connecting a new monitor to the KVM, a power recycle is required. The KVM will indicate to the user that the EDID learn process is ongoing by flashing the LED next to DVI OUT port 1.
- Page 8 System operation There are three ways to control the SM-DVN: Keyboard Hotkeys, RS-232 Serial Commands, and Front Panel Buttons. All modes of control will allow the user the set their desired configurations. front panel control To switch to an input port for a given console, push the UP or DOWN buttons as many times as needed to navigate to the desired channel.
- Page 9 Custom hotkey triggers Users are able to customize the keys that trigger Hotkeys. The default trigger for hot key function on the Keyboard is Ctrl +Ctrl. The trigger function can be used to change to double Ctrl, Shift, or Scroll Lock.
-
Page 10: Led's Behavior
Led’s behavior User Console Interface – Display LED: Status Description Monitor is not connected Monitor is connected Flashing (back panel) EDID problem – Learn EDID to fix the problem Front Panel – Port Selection LED’s: Status Description View Mode Green Control Mode EDID Learn - Front Panel LED’s: All LED’s are turned on for 1 second. -
Page 11: System Operation
System operation Front Panel Control Below is a list of commands sent through button presses on the front panel. Refer to diagram below for the names of buttons: Press CAC button - Toggle between Control and View mode Press UP button - Increment current channel, loop back to 1 after ch. 8 ... -
Page 12: Troubleshooting
Troubleshooting No Power Make sure that the power adapter is securely connected to the power connector of the unit. Check the output voltage of the power supply and make sure that the voltage value is around 12VDC. Replace the power supply. No Video ... -
Page 13: Limited Warranty Statement
Limited warranty statement A. Extent of limited warranty SmartAVI, Inc. warrants to the end-user customers that the SmartAVI product specified above will be free from defects in materials and workmanship for the duration of 1 year, which duration begins on the date of purchase by the customer. - Page 14 NOTICE The information contained in this document is subject to change without notice. SmartAVI makes no warranty of any kind with regard to this material, including but not limited to, implied warranties of merchantability and fitness for particular purpose. SmartAVI will not be liable for errors contained herein or for incidental or consequential damages in connection with the furnishing, performance or use of this material.
Need help?
Do you have a question about the SM-DVN Matrix Series and is the answer not in the manual?
Questions and answers