
Related Manuals for Argox MP Series


Summary of Contents for Argox MP Series
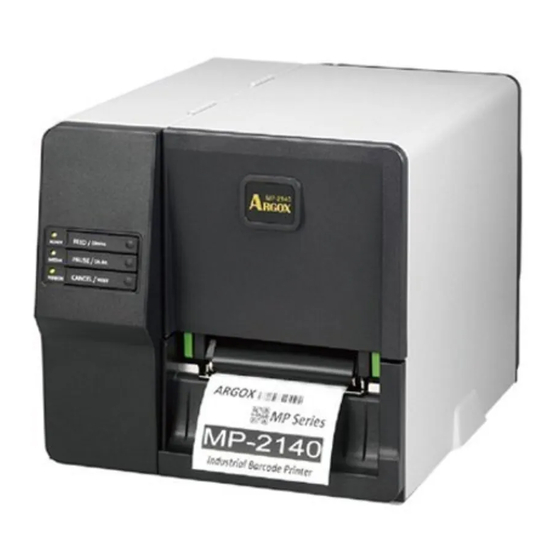
- Page 1 MP Series User's Manual MP-2140 / MP-2140Z http://www.argox.com service@argox.com V1.0-11-12-2017...
-
Page 2: Table Of Contents
Placing Media Roll ............15 Sensor type ...............19 Loading Ribbon ..............22 Preparing Ribbon ..............22 Placing Ribbon Rolls ............23 3. Printer Operations ............. 29 LED Indicators ...............29 Buttons ..................31 Media Calibration ..............32 Printing a Configuration Report ..........33 MP Series - User’s Manual... - Page 3 General Specification ............63 Fonts, Barcodes, and Graphics Specification ......65 Printer Programming Language PPLA ......65 Printer Programming Language PPLB ......66 Printer Programming Language PPLZ ....... 67 Interface Specification ............68 USB Interface ..............68 MP Series - User’s Manual...
- Page 4 Auto Polling ..............70 7. Index ................. 73 Rotary Cutter and Guillotine Cutter Installation ....73 Rotary Cutter and Guillotine Cutter Settings ......76 Rotary Cutter with Paper Jam ..........79 Guillotine Cutter with Paper Jam ..........80 MP Series - User’s Manual...
- Page 5 MP Series - User’s Manual...
-
Page 6: Introduction
(including, without limitation, damages for loss of business profits, business interruption, loss of business information, or other pecuniary loss) arising out of the use of or the results of use of or inability to use such product, even if Argox Information MP Series - User’s Manual... -
Page 7: Document Icons
Caution - Hot: Warns of a situation where excessive heat could cause a burn to avoid. Caution - Sharp: Warns of a situation where fingers may be hurt by sharp edges of cutter blade. MP Series - User’s Manual... -
Page 8: Getting Started
2. Getting Started Thank you for choosing MP Series printer, which is ideally designed to easily bring more efficiency for your business. This manual will help you get to know your new printer and provide sufficient information needed. Unpacking Printer After receiving your printer, please unpack and check first before use: 1. -
Page 9: Package Contents
Power Cord USB Cable Ribbon Core Adaptors Ribbon 1” ID Core for Quick Installation Guide Power Cord Printer USB cable Ribbon Core Adaptors 1” ID Core for Ribbon MP Series - User’s Manual... -
Page 10: Printer Overview
Printer Overview Front View: Top Access Door Front Panel Front Cover Printer’s front panel includes: 3 LED indicators (READY, MEDIA and RIBBON) 3 buttons (FEED, PAUSE and CANCEL) MP Series - User’s Manual... -
Page 11: Rear View
Rear View: Parallel Port USB Port RS232 Serial Port Power Switch AC Power connector Interior View I MP Series - User’s Manual... -
Page 12: Interior View Ii
Media Supply Guide DIP Switch Media Supply Hanger Ribbon Pick-up Holder Head Latch Interior View II MP Series - User’s Manual... -
Page 13: Connecting Power Cord
Print Head Media Shaft Ribbon Supply Holder Media Guide Head open Transmissive Sensor Switch Platen Roller Reflective Sensor Tear Bar / Front Cover Connecting Power Cord MP Series - User’s Manual... -
Page 14: Loading Media
2. Connect AC power cord to AC Power connector of printer. 3. Plug the other end of the power cord into an appropriately grounded Power outlet. Power outlet Power switch AC Power connector AC Power cord Loading Media MP Series - User’s Manual... -
Page 15: Preparing Media
Placing Media Roll 1. Open Top access door of the printer. Top access door 2. Find the Central point of Media supply hanger first, represented by MP Series - User’s Manual... - Page 16 Knob Turn clockwise to loosen. Turn anticlockwise to tighten it. 3. Flip down the Media supply guide at right. MP Series - User’s Manual...
- Page 17 Flip up the Media supply guide at right and slide in until it touches the edge of media roll. 4. Push the Head latch to open the printer module. MP Series - User’s Manual...
- Page 18 PUSH Head latch Pull a short length of media till it reaches the Platen roll of printer. Locate the media under Media shaft. Media shaft Platen roller MP Series - User’s Manual...
-
Page 19: Sensor Type
Reflective correctly. Labels with black-marks: (movable) if black-mark is narrower than media width, adjust sensor’s positions to locate directly under black-marks. Transmissive Labels with holes at central positions, (centrally e.g. tags. fixed) MP Series - User’s Manual... - Page 20 Note: For thermal transfer printing mode, ribbon is required to be installed. Refer the steps in section: “Loading Ribbon” Press the FEED button to feed labels out of the printer. FEED button MP Series - User’s Manual...
- Page 21 7. To tear media, pull the media edge against the Tear-off bar as in the direction below: Tear-off bar Tear Direction Note: If printer will be printed in thermal transfer mode, which requires ribbon to be installed, continue the next section, “Loading Ribbon”. MP Series - User’s Manual...
-
Page 22: Loading Ribbon
3. For direct thermal printing, do not load ribbon in the printer. Preparing Ribbon Find the two Ribbon Core Adaptors in printer package and fix them into the empty core for ribbon and new ribbon supply roll, from the left to the right. MP Series - User’s Manual... -
Page 23: Placing Ribbon Rolls
Placing Ribbon Rolls 1. Open Top access door of the printer. Top access door 2. Push the Head latch to open the printer module. PUSH Head latch MP Series - User’s Manual... - Page 24 3. Lift up the printer module to check the Ribbon supply holder. Ribbon supply holder MP Series - User’s Manual...
- Page 25 4. Install one ribbon roll and rotate it until the notches align and lock into the left side of Ribbon supply holder, and then into the right. Note: The Ribbon Supply Holder accepts the coated side of ribbon to be wound ink-side IN or wound ink-side OUT. MP Series - User’s Manual...
- Page 26 Ribbon pick-up holder, and then the right. Ribbon pick-up holder Pull a short length of ribbon from Ribbon supply holder. Move upward and attach to Core for ribbon on Ribbon pick-up holder. MP Series - User’s Manual...
- Page 27 OUT only. 6. Close the printer module, and then press firmly at both sides to properly latch it until you hear a click. Rotate Thumb wheel of Ribbon pick-up holder to remove slack and MP Series - User’s Manual...
- Page 28 Thumb wheel 7. Double-check the installation path of media and ribbon: MP Series - User’s Manual...
-
Page 29: Printer Operations
3. Printer Operations LED Indicators There are three LED indicators on printer’s front panel - READY, MEDIA and RIBBON. These indicators display operation status of the printer to help MP Series - User’s Manual... - Page 30 Off – direct thermal mode; no need to install ribbon. Blinking – Ribbon is used out; install new ribbon. Note: Mode selection between thermal transfer and direct thermal can be set via labeling software, windows driver, printer commands, or Switch. MP Series - User’s Manual...
-
Page 31: Buttons
Perform a media calibration. Press again to resume printing. CALIBR. Interrupt and delete a print CANCEL Reset to factory default task. settings. Force printer to continue RESET after an error is solved. MP Series - User’s Manual... -
Page 32: Media Calibration
For more details, refer to the section, “Sensor type”. Steps: 1. Turn off the printer 2. Press and hold the PAUSE/CALIBR. Button first, and then turn on the printer. 3. Once both READY and MEDIA indicators blink, release the MP Series - User’s Manual... -
Page 33: Printing A Configuration Report
Perform a self-test and print a configuration report, to check printer’s print quality and internal settings. Steps: 1. Turn off the printer. Load media and ribbon. 2. Press and hold the FEED/CONFIG. button while turning on the printer. MP Series - User’s Manual... - Page 34 Printer now will print out a configuration report. 4. Printer will enter Dump mode after printing configuration, if it’s with Argox PPLB emulation. To return to normal operation mode from Dump mode, press the CANCEL/RESET button. Another way is to turn off printer power, and then restart printer.
- Page 35 Sample of Configuration Report – based on MP-2140: MP Series - User’s Manual...
-
Page 36: Dip Switch
Down to Up, printer will be set to Transmissive sensor. Printer is forced and fixed to Position is: Direct thermal Reflective sensor setting. Labeling software, windows Down driver, or printer commands cannot change sensor (On) setting. MP Series - User’s Manual... -
Page 37: Resetting To Factory Default Settings
2. All settings stored in FLASH memory are retained even after turning off the printer. 3. The print length meter cannot be reset to 0. 4. After resetting the printer and before printing, please perform media calibration again. MP Series - User’s Manual... -
Page 38: Communications
4. Communications Interfaces and Requirements Argox MP printer series come with a nine-pin Electronics Industries Association (EIA) RS-232 serial data interface, a USB interface, and Centronics Parallel. A variety of interface options are suitable for versatile applications: Note: 1. Please be sure to plug the power cord into the power connector on the back of printer before connecting communication cables. -
Page 39: Serial (Rs-232) Interface Requirements
36-pin parallel connector on one end, which is plugged into the parallel port located on the back of the printer. The other end of the parallel interface cable connects to the printer connector at the host MP Series - User’s Manual... -
Page 40: Serial And Parallel Cabling Requirements
3. Do not tie the data cables to power wire conduits. Communicating with Printer Seagull driver Argox provides with printer can be applied to all applications under Windows XP/ Vista/ Windows 7/ Windows 8/windows 10, supporting 32-bit/ 64-bit operation systems. With this driver you can operate any popular Windows software applications including Argox Bartender UL label editing software or MS Word, etc., to print to this... -
Page 41: Installing A Plug And Play Printer Driver (For Usb Only)
Drivers can be downloaded from Argox website Installing a Plug and Play printer driver (for USB only) Note: We strongly recommend that you use the Seagull Driver Wizard instead of the Microsoft Windows Add Printer Wizard when installing and updating your Drivers by Seagull. - Page 42 USB cable, then the Windows Add Hardware Wizard will automatically detect the printer and display a dialog that allows you to install a driver. Click Cancel and do not install the driver using this wizard. MP Series - User’s Manual...
- Page 43 3. Run the driver from Argox website. On the prompt, Windows Printer Driver, select “I accept…” and click "Next": 4. Assign the directory to keep Seagull driver, (for example: C:\Seagull) and click "Next": MP Series - User’s Manual...
- Page 44 5. Make sure the first option ”Run Driver Wizard…” is checked, and click "Finish" 6. Select “Install printer drivers” and click "Next": MP Series - User’s Manual...
- Page 45 8. If USB cable is well-connected to PC and to printer, and printer is powered on, this Seagull Driver Wizard prompt will pop up. Select the first radio button to “Install a driver for a Plug and Play printer”: Argox MP-2140 PPLB USB002 Then click “Next”. MP Series - User’s Manual...
- Page 46 9. Enter Printer name (i.e. Argox MP-2140 PPLB) and select "do not share this printer”, and click "Next" Argox MP-2140 PPLB 10. Check all the data on the showing screen, if it is correct, click "Finish". Argox MP-2140 PPLB USB002 Argox MP-2140 PPLB MP Series - User’s Manual...
- Page 47 11. After the related files have been copied to your system, click "Finish". Installing printer “Argox MP-2140 PPLB”….. 12. After driver installation is complete, click "Close". The driver should now be installed. Installed printer Argox MP-2140 MP Series - User’s Manual...
-
Page 48: Installing A Printer Driver (For Other Interfaces Except Usb)
Connect the Parallel cable or Serial cable to the proper port on the printer and also on your computer. 2. Run the driver from Argox website. On the prompt, Windows Printer Driver, select “I accept…” and click "Next". MP Series - User’s Manual... - Page 49 3. Assign the directory to keep Seagull driver, (for example: C:\Seagull) and click "Next". 4. Click "Finish". Select Install printer drivers and Click "Next" MP Series - User’s Manual...
- Page 50 5. This Seagull Driver Wizard prompt will pop up: MP Series - User’s Manual...
- Page 51 6. Select model & emulation - the following examples are based on model MP-2140 PPLB: Argox MP-2140 PPLB 7. Select the port of the printer and click "Next". MP Series - User’s Manual...
- Page 52 8. Enter Printer name (i.e. Argox MP-2140 PPLB) and select "do not share this printer”, and click "Next". Argox MP-2140 PPLB Check all the data on the showing screen, if it is correct, click "Finish". Argox MP-2140 PPLB LPT1 Argox MP-2140 PPLB...
- Page 53 After the related files have been copied to your system, click "Finish". Installing printer “Argox MP-2140 PPLB”….. 10. After driver installation is complete, click "Close". The driver should now be installed. Installed printer Argox MP-2140 MP Series - User’s Manual...
-
Page 54: Troubleshooting
Check the position of the driver, and select label sensor. continuous media. Media out Supply the media roll. Media not installed Install the media roll. Media jam Recover the jam. Note: If problem continues, perform media calibration. MP Series - User’s Manual... - Page 55 Note: If you use direct thermal, set by labeling software, windows driver, printer commands, or Switch. Other Problems Indication READY LED Blinking Problems Solutions Remarks Serial IO error Check the baud rate, format Not for Centronics. or protocol between host and printer. MP Series - User’s Manual...
- Page 56 Memory full Check graphics and soft fonts Need to reboot the from host. Delete by system. application software for those no longer in use. Note: After a problem is solved, press CANCEL to continue printing. MP Series - User’s Manual...
-
Page 57: Printer Status
Printing job will start until the temperature of PRINT HEAD HEAT MEDIA TPH goes down. Print head latch is not closed. To print label the HEAD OPEN READY head latch must be closed. MP Series - User’s Manual... -
Page 58: Transmission Problems
Seagull Driver for your Windows system and the label printer has been selected. Recovery After correcting problems, simply press the CANCEL button or restart the printer. Make sure the LEDs are not blinking and remember to resend your files. MP Series - User’s Manual... -
Page 59: Printer Maintenance
The media may not be qualified, or not match with ribbon. Adjust the Darkness (heat temperature). Slow down the print speed. Refer to the following and clean the related spare parts. MP Series - User’s Manual... -
Page 60: Cleaning Print Head
4. Rub the print head with a cotton bud moistened with “Ethanol” or “IPA”. 5. Check for any traces of black coloring or adhesive on the cotton after cleaning. 6. Repeat if necessary until the cotton is clean after it is passed over the head. MP Series - User’s Manual... - Page 61 Left to Right only, or, from Right to Left only, to clean “Heating Line” of print head gently without excessive stress. Do not wipe back and forth, to avoid dust or dirt on cleaning cotton would be attached onto print head again. MP Series - User’s Manual...
-
Page 62: Cleaning Roller
Cleaning Media Compartment Clean the media compartment with a cotton bud that has been moistened with a mild detergent. Every time a media roll is printed, you should clean this compartment to reduce the incidence dust. MP Series - User’s Manual... -
Page 63: Product Specification
Max Width:4.33”(110mm) Min Width:1”(25.4mm) Media Thickness:0.0025”~0.01”(0.0635~0.254mm)** Max roll capacity(OD):8”(203mm) Core size:1”(25.4mm)/ 1.5”(38.1mm) / 3”(76.2mm) Ribbon roll – max OD: 2.6”(67mm) Ribbon Length: max 300m Ribbon Core size – ID: 1”(25.4mm) Ribbon Width: 1”~4”, Wax, Wax/Resin, Resin MP Series - User’s Manual... - Page 64 Internal Universal Switching Power supply Power Source Input voltage: 100~240V, 50~60Hz Operation Temperature: 40F~100F (4C~38C), Operation 10% ~ 90% non-condensing, Environment Storage Temperature: -4F~122F (-20C~50C) Optional Items Cutter, Peeler, Stacker, RTC Card, ArgoKee Agency Listing **Special configuration MP Series - User’s Manual...
-
Page 65: Fonts, Barcodes, And Graphics Specification
Interleaved 2 of 5 (Standard/with modulo 10 checksum/ with human readable check digit/ with modulo 10 checksum & shipping bearer bars) 、 GS1 Data bar (RSS) MaxiCode、PDF417、Data Matrix (ECC 200 only) 、 2D Barcodes QR code、Composite Codes、Aztec Barcode、 Micro PDF417 MP Series - User’s Manual... -
Page 66: Printer Programming Language Pplb
German Postcode、Matrix 2 of 5、 UPC Interleaved 2 of 5、EAN-13 2/5 digit add-on、 UPCA 2/5 digit add-on、UPCE 2/5 digit add-on、 GS1 Data bar (RSS) MaxiCode、PDF417、Data Matrix (ECC 200 only) 、 2D Barcodes QR code、Composite Codes、Aztec Barcode MP Series - User’s Manual... -
Page 67: Printer Programming Language Pplz
Code 93、Code 39 with check sum digit、 MSI、EAN-8、Codabar、Code 11、EAN-13、Plessey、 GS1 Data bar (RSS) 、Industrial 2 of 5、 Standard 2 of 5、Logmars MaxiCode、PDF417、Data Matrix (ECC 200 only) 、 2D Barcodes QR code、Composite Codes、Aztec Barcode、 Micro PDF417 MP Series - User’s Manual... -
Page 68: Interface Specification
USB Interface Connector Terminal Pin Assignment Signal Description VBUS Differential data signaling pair - Differential data signaling pair + Ground USB series “B” Receptacle Interface MP Series - User’s Manual... -
Page 69: Serial Interface
Output. Pin 9 is reserved for KDU (keyboard device unit) Note: Pin 9 are reserved for KDU (keyboard device unit), therefore do not connect these pins if you are using a general host like a PC. MP Series - User’s Manual... -
Page 70: Parallel (Centronics) Interface
PCs via different ports. However as no port contention is made for this printer, if both PCs transmit data at the same time the data may become damaged in the receiving buffer. MP Series - User’s Manual... - Page 71 RX 3 …… 3 TX RX 2 …… 3 TX GND 7 …… 5 GND GND 5 …… 5 GND pin 4 pin 4 pin 5 pin 6 pin 6 pin 7 pin 20 pin 8 MP Series - User’s Manual...
- Page 72 Handshaking: XON/XOFF as well as CTS/RTS (hardware flow control). If you run an application with the bundled printer driver under Windows and use the serial port, you should check the above parameters and set the flow control to "Xon/Xoff "or "hardware". MP Series - User’s Manual...
-
Page 73: Index
Rotary Cutter, whose installation steps are same as for Guillotine Cutter: 1. Power off printer first. Open Top Access Door and push Head latch to open printer module. Loose the screw which fixes plate of Front Cover. MP Series - User’s Manual... - Page 74 2. Hold and pull Front Cover to the right, to remove it off from printer. 3. Thread Cutter Cable through the hole between print module and case. 4. Find screws in cutter‘s box. Install Cutter Module by fixing Cutter Bracket on Printer Chassis with screws at both sides. MP Series - User’s Manual...
- Page 75 6. Find Cutter Baby Board in cutter‘s box, and then install onto J16 socket on printer main board. 7. Assemble back the printer case. Now cutter installation has been completed through the steps above. To load media, please refer to the section – “Loading Media” MP Series - User’s Manual...
-
Page 76: Rotary Cutter And Guillotine Cutter Settings
Seagull Driver for printer. The following installation steps are based on MP-2140 as an example. 1. Check MP-2140 driver. Go to the prompt of Printer Properties, click on the tag, “Tools’: 2. Click the “Configure” setting of driver, select “Cutter Setup”: MP Series - User’s Manual... - Page 77 3. “Cutter Setup” prompts will be indicated as below. Check on the radio button, “Rotary” if there’s Rotary Cutter installed. Then click “OK“: Check on the radio button, “Guillotine” if there’s Guillotine Cutter installed. Then click “OK“: MP Series - User’s Manual...
- Page 78 4. Go to “Printing Preference” prompt of MP-2140 driver and then click on the “Stock” tag. Check “Mode” settings and select “Cut”. ※ If there’s Guillotine Cutter installed and partial cut function is needed, select “Partial Cut” in “Mode” settings. MP Series - User’s Manual...
-
Page 79: Rotary Cutter With Paper Jam
Check the Cam as marked in Figure 2; find a slotted screwdriver to turn counter-clockwise. During turning the Cam of cutter, release the blade from paper and them remove the paper from the cutter. Figure 1. Figure 2. MP Series - User’s Manual... -
Page 80: Guillotine Cutter With Paper Jam
Then paper can be removed from the cutter. Figure 1. Figure 2. Guillotine Cutter with full cut function: Turn counter-clockwise. Guillotine Cutter with partial cut function: Turn clockwise. MP Series - User’s Manual...
Need help?
Do you have a question about the MP Series and is the answer not in the manual?
Questions and answers