Table of Contents
Advertisement
Quick Links
Advertisement
Table of Contents

Related Manuals for Beko GN163020W


Summary of Contents for Beko GN163020W
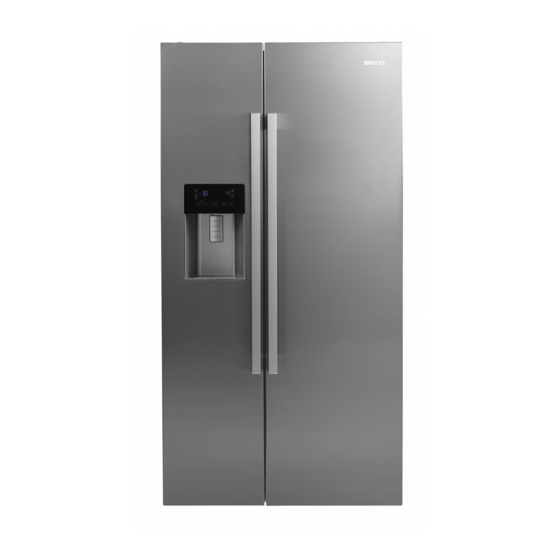
- Page 1 GN163020X GN162320X GN163020W GN162620JZX...
- Page 2 Please read this manual before using the product! Dear Customer, We'd like you to make the best use of our product, which has been manufactured in modern facilities with care and meticulous quality controls. Thus, we advice you to read the entire user manual before you use the product. In case the product changes hands, do not forget to hand the guide to its new owner along with the product.
-
Page 3: Table Of Contents
Table of Contents 1. Safety and environment instructions 3 4 Preparation 1.1. General safety..... . . 3 4.1. What to do for energy saving ... 17 1.1.1 HC warning . -
Page 4: Safety And Environment Instructions
Safety and environment instructions – staff kitchen areas in shops, This section provides the safety offices and other working instructions necessary to prevent environments; the risk of injury and material – farm houses and by clients in damage. Failure to observe these hotels, motels and other residential instructions will invalidate all type environments;... - Page 5 Safety and environment instructions Unplug the product during Plug the product into an • • installation, maintenance, earthed socket. Earthing cleaning and repair. must be done by a qualified If the product will not be used electrician. • for a while, unplug the product If the product has LED type •...
-
Page 6: Hc Warning
Safety and environment instructions 1.1.2 For models with Take care to avoid trapping any • water dispenser part of your hands or body in any of the moving parts inside Pressure for cold water inlet • the product. shall be maximum 90 psi (6.2 Do not step or lean on the door, bar). -
Page 7: Child Safety
Safety and environment instructions The product should be used to 1.5. Compliance with RoHS Directive • store food and beverages only. • This product complies with EU WEEE Directive (2011/65/EU). It does not contain harmful and Do not keep sensitive •... -
Page 8: Refrigerator
Refrigerator 1- Freezer compartment 10- Odour filter 2- Cooler compartment 11- Zero degree compartment 3- Fan 12- Vegetable bins 4- Butter-cheese compartment 13- Adjustable stands 5- Glass shelves 14- Frozen food storing compartments 6- Cooler compartment door shelves 15- Freezer compartment door shelves 7- Minibar accessory 16- Icematics 8- Water tank... -
Page 9: Refrigerator
Refrigerator *Optional: Figures in this user guide are schematic and may not be exactly match your product. If your product does not comprise the relevant parts, the information pertains to other models. Refrigerator / User Guide 8 / 37 EN... -
Page 10: Installation
Installation 3.1. Right place for installation 3.2. Attaching the plastic wedges Use the plastic wedges in the provided with Contact the Authorized Service for the product's the product to provide sufficient space for air installation. To ready the product for installation, circulation between the product and the wall. -
Page 11: Adjusting The Stands
Installation 3.4. Power connection 3.3. Adjusting the stands If the product is not in balanced position, adjust the WARNING: Do not use extension or multi front adjustable stands by rotating right or left. sockets in power connection. WARNING: Damaged power cable must be replaced by Authorized Service. -
Page 12: Water Connection
Installation 3.5. Water connection (Optional) WARNING: Unplug the product and the water pump (if available) during connection. The product’s water mains, filter and carboy connections must be rendered by authorizer service. The product can be connected to a carboy or directly to the water mains, depending on the model. -
Page 13: Connecting Water Hose To The Product
Installation 3.6. Connecting water 3.7. Connecting to water mains hose to the product (Optional) To connect the water hose to the product, To use the product by connecting to the cold water follow the instructions below. mains, a standard 1/2” valve connector must be 1. -
Page 14: For Products Using Water Carboy
Installation 4. Attach the connector into the faucet adaptor 2. Connect the other end of the water hose to and tighten by hand / tool. the water pump by pushing the hose into the pump’s hose inlet. 5. To avoid damaging, shifting or accidentally 3. -
Page 15: Fixing External Filter On The Wall (Optional)
Installation 3.9.1.Fixing external filter on the wall (Optional) WARNING: Do not fix the filter on the product. Check to see the following parts are supplied with your product’s model: 4. Attach the water hose extending from the top of the filter to the product’s water connection adaptor, (see 3.6.) 1. -
Page 16: Internal Filter
Installation 3.9.2.Internal filter 1. “Ice Off” indicator must be active while installing the filter. Switch the ON-OFF The internal filter provided with the product is not indicator using the “Ice” button on the screen. installed upon delivery; please follow the instructions below to install the filter. - Page 17 Installation 3. Remove the water filter by-pass cover by pulling. A few drops of water may flow out after removing the cover; this is normal. 4. Place the water filter cover into the mechanism and push to lock in place. 5.
-
Page 18: Preparation
Preparation 4.1. What to do for energy saving 4.2. First Use mehmet Before using your refrigerator, make sure the Connecting the product to electronic necessary preparations are made in line with energy-saving systems is harmful, as it the instructions in “Safety and environment may damage the product. -
Page 19: Using The Product
Using the product 5.1. Indicator panel Indicator panels may vary depending on the model of your product. Audial and visual functions of the indicator panel will assist in using the refrigerator. 1. Cooler compartment indicator 2. Error status indicator 3. Temperature indicator 4. - Page 20 Using the product 1. Cooler compartment indicator 5. Temperature adjustment button The cooler compartment light will turn on when Respective compartment's temperature varies in adjusting the cooler compartment temperature. -21°C..-15°C and 8°C...1°C ranges. 2. Error status indicator 6. Compartment selection button This sensor will activate if the refrigerator is not Use the refrigerator compartment selection cooling adequately or in case of sensor fault.
- Page 21 Using the product 7.1 7.2 1. Economic use 2- High temperature / fault alert 3. Energy saving function (display off) 4- Rapid cooling 5- Vacation function 6- Cooler compartment temperature setting 7. Energy saving (display off) /Alarm off 8- Keypad lock 9- Eco-fuzzy 10- Freezer compartment temperature setting 11- Rapid freezing...
- Page 22 Using the product 1. Economic use after 1 hour, unless cancelled by the user. Too This sign will light up when the freezer cool a large amount of fresh food, press the rapid compartment is set to -15°C', the most cool button before placing the food in the cooler economical setting.
- Page 23 Using the product seconds. The keypad lock sign will turn off and the keypad lock mode will be disengaged. Press the Display off button to prevent changingthe refrigerator’s tempeture settings. 9. Eco-fuzzy To activate the eco-fuzzy function, press and hold the eco-fuzzy button for 1 second.
- Page 24 Using the product 11.2 11.1 1. Freezer compartment temperature setting 2. Economy mode 3. Energy saving function (display off) 4. Power failure/High temperature / error warning indicator 5. Cooler compartment temperature setting 6. Rapid cooling 7. Vacation function 8. Keypad lock / filter replacing alert cancellation 9.
- Page 25 Using the product 1. Freezer compartment temperature setting 6. Rapid cooling For rapid cooling , press the button; this will Pressing the button ( ) will enable the freezer compartment temperature to be set at -15,-16,- activate the rapid cooling indicator ( 17,-18 ,-19,-20,-21,-15...
-
Page 26: Activating Water Filter Change Warning
Using the product display will go off and the display will enter the energy 2. Then enter 1-4-5-3 as password. saving mode. When you press the Display off button Confirming the entered Selecting the again and when the( ) function is lit, all password password numbers the other icons of the display will be lit and the display... -
Page 27: Humidity Controlled Crisper
Using the product 5.3. Humidity controlled crisper 5.4. Using the water fountain (FreSHelf) (for certain models) (This feature is optional) Humidity rates of the vegetables and fruit are The first few glasses of water taken from kept under control with the feature of humidity- the fountain will normally be warm. -
Page 28: Cleaning The Water Tank
Using the product 5.6. Cleaning the water tank Remove the water filling reservoir inside the door shelf. Detach by holding both sides of the door shelf. Hold both sides of the water tank and remove at 45° angle. Remove and clean the water tank lid. Do not fill the water tank with fruit juice, fizzy beverages, alcoholic beverages or any other liquids incompatible for use in... -
Page 29: Taking Ice / Water
Using the product 5.7. Taking ice / water • The water may be cloudy during first use of the filter; do not consume the first 10 glasses (Optional) of water. To take water ( ) / ice cube ( ) / fragmented • You must wait approximately 12 hours to get ice ( ), use the display to select the respective... -
Page 30: Zero Degree Compartment
Using the product 5.9. Zero degree compartment 5.12. Ionizer (Optional) (Optional) Use this compartment to keep delicatessen The ionizer system in the cooler compartment's at lower temperatures or meat products for air duct serves to ionize the air. The negative immediate consumption. -
Page 31: Icematic And Ice Storage Box
Using the product 5.16. Ice-maker 5.15. Icematic and ice storage box (Optional) (Optional) Ice maker is located on the upper section of the Fill the icematic with water and put in place. freezer cover. The ice will be ready after approximately two hours. - Page 32 Using the product Any sound you hear when the ice drops into the reservoir is a part of normal operation. When the ice dispenser does not work properly If you do not remove ice cubes for a long time, they When using your refrigerator for the first time or when will cause formation of ice chunks.
-
Page 33: Freezing Fresh Food
Using the product 5.17. Freezing fresh food 5.18. Recommendations for storing frozen foods • To preserve food quality, the food items placed in the freezer compartment must be frozen as The compartment must be set to at least -18°C. quickly as possible, use the rapid freezing for 1. -
Page 34: Placing The Food
Using the product 5.22. Interior light 5.20. Placing the food Interior light uses a LED type lamp. Contact the Freezer Various frozen goods including authorized service for any problems with this lamp. compartment meat, fish, ice cream, The lamp(s) used in this appliance is not suitable shelves vegetables etc. -
Page 35: Maintenance And Cleaning
Maintenance and cleaning 6.1. Preventing malodour The product is manufactured free of any Cleaning the product regularly will prolong its odorous materials. However, keeping the food in service life. inappropriate sections and improper cleaning of WARNING: Disconnect the power before internal surfaces may lead to malodour. -
Page 36: Troubleshooting
Troubleshooting Check this list before contacting the service. Doing so will save you time and money. This list includes frequent complaints that are not related to faulty workmanship or materials. Certain features mentioned herein may not apply to your product. The refrigerator is not working. - Page 37 Troubleshooting • The freezer compartment temperature is set to a very low degree. >>> Set the freezer compartment temperature to a higher degree and check again. The cooler temperature is very low, but the freezer temperature is adequate. • The cooler compartment temperature is set to a very low degree. >>> Set the freezer compartment temperature to a higher degree and check again.
- Page 38 Troubleshooting • The product is not cleaned regularly. >>> Clean the interior regularly using sponge, warm water and carbonated water. • Certain holders and packaging materials may cause odour. >>> Use holders and packaging materials without free of odour. • The foods were placed in unsealed holders. >>> Keep the foods in sealed holders. Micro-organisms may spread out of unsealed food items and cause malodour.
- Page 39 57 4101 0000/AN www.beko.com.tr www.beko.com .au...
Need help?
Do you have a question about the GN163020W and is the answer not in the manual?
Questions and answers