Table of Contents
Advertisement
Available languages
Available languages
Quick Links
LEA ANTES DE USAR
READ BEFORE USE
Visite www.hamiltonbeach.com (EE. UU.) o
www.hamiltonbeach.com.mx (México) para
ver otros productos de Hamilton Beach o para
contactarnos
Visit www.hamiltonbeach.com.mx for other
products or to contact us.
Preguntas
Por favor llámenos – nuestros
amables representantes están
listos para ayudar.
EE. UU.: 1.800.851.8900
MEX: 01 800 71 16 100
Le invitamos a leer cuidadosamente este
instructivo antes de usar su aparato.
Vaporera de Mano
Handheld
Español ..................... 2
English ..................... 10
Steamer
Advertisement
Table of Contents

Related Manuals for Hamilton Beach 11571


Summary of Contents for Hamilton Beach 11571
- Page 1 LEA ANTES DE USAR READ BEFORE USE Visite www.hamiltonbeach.com (EE. UU.) o www.hamiltonbeach.com.mx (México) para Vaporera de Mano ver otros productos de Hamilton Beach o para contactarnos Visit www.hamiltonbeach.com.mx for other products or to contact us. Handheld Steamer Preguntas Por favor llámenos – nuestros amables representantes están...
- Page 2 SALVAGUARDIAS IMPORTANTES Cuando utilice artefactos eléctricos, siempre deben seguirse precauciones de seguridad básicas a fin de reducir el riesgo de incendio, descarga eléctrica, y/o lesiones a personas, incluyendo las siguientes: 11. Siempre desconecte el generador de vapor manos libres del tomacorriente Lea todas las instrucciones.
-
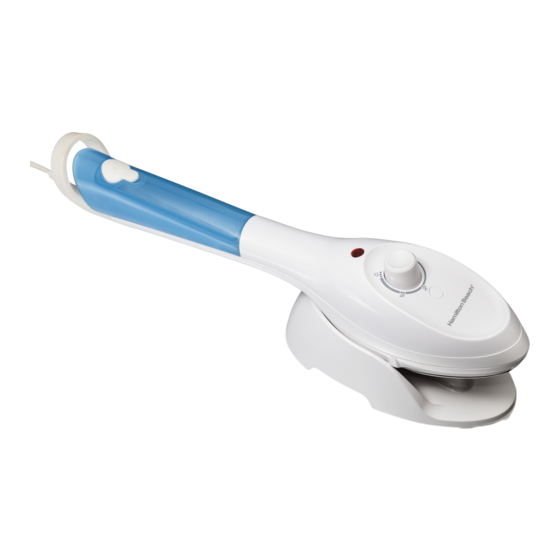
Page 3: Partes Y Características
Partes y Características ANTES DE USAR POR PRIMERA VEZ: Quite TODOS los materiales de empaque de la plancha de vapor de mano. Para ordenar partes: Tapón del Tanque México: 01 800 71 16 100 Gancho de de Agua Almacenamiento Mango/Tanque de Agua Accesorio de Vapor •... - Page 4 Cómo Vaporizar w ADVERTENCIA Peligro de Quemaduras. El vapor está muy caliente. Cuando se enchufa, la unidad está en ENCENDIDO. La unidad no puede estar en APAGADO. Asegúrese de que la unidad esté desenchufada al ensamblar los accesorios. Agregue agua a la taza de llenado hasta la línea MAX. Quite el tapón Siempre configure la Perilla de Presione el botón de vapor para de agua y vierta el agua en el tanque de agua.
- Page 5 Cómo Planchar AVISO: Para evitar daños a las prendas, revise las etiquetas de las prendas para la composición de las telas y las instrucciones de planchado. Los accesorios sólo se utilizan para vaporizar. Retire los accesorios antes de comenzar a planchar. Siempre coloque la plancha de Gire la Perilla de Control de Presione el botón de vapor para obtener una ráfaga de vapor o...
-
Page 6: Cuidado Y Limpieza
Cuidado y Limpieza Siga este procedimiento mensual para evitar depósitos de mineral y acumulaciones, lo cual puede afectar el desempeño para emitir vapor de la unidad. Coloque la Perilla de Control Vacíe la plancha de vapor sobre Mezcle una solución de mitad Enchufe la plancha de vapor. -
Page 7: Resolviendo Problemas
Resolviendo Problemas PROBLEMA CAUSA PROBABLE/SOLUCIÓN La plancha de vapor • ¿Está conectada la plancha de vapor y funciona la toma? Revise la toma conectando una no se calienta. lámpara. • ¿Se colocó la Perilla de Control de Temperatura en un ajuste de tela? Se fuga agua. - Page 8 Grupo HB PS, S.A. de C.V. Monte Elbruz No. 124 - 401 Col. Polanco V Sección, Miguel Hidalgo Ciudad de México, C.P. 11560 GARANTÍA PARA PRODUCTOS COMPRADOS EN MÉXICO MODELO: PRODUCTO: MARCA: Grupo HB PS, S.A. de C.V. cuenta con una Red de Centros de Servicio Autorizada, por favor consulte en la lista anexa el nombre y dirección de los establecimientos en la República Mexicana en donde usted podrá...
- Page 9 GUADALAJARA 44660 Jal. Tel: 01 33 3825 3480 Modelo: Tipo: Características Eléctricas: 11571 120 V~ 60 Hz 1000 W Los modelos incluídos en el instructivo de Uso y Cuidado pueden ir seguidos o no por un sufijo correspondiente a una o varias letras del alfabeto y sus combinaciones, separadas o no por un espacio, coma, diagonal, o guión.
- Page 10 IMPORTANT SAFEGUARDS When using electrical appliances, basic safety precautions should always be followed to reduce the risk of fire, electric shock, and/or injury to persons, including the following 10. Always disconnect the appliance from the electrical outlet before filling the Read all instructions.
-
Page 11: Parts And Features
Parts and Features BEFORE FIRST USE: Remove ALL packing materials from handheld steamer. To order parts: Water Tank Mexico: 01 800 71 16 100 Storage Hook Plug Handle/ Water Tank Steaming Attachment Power Light • General steaming Temperature Control Dial Steam Button Fabric Brush Attachment •... -
Page 12: How To Steam
How to Steam w WARNING Burn Hazard. Steam is hot. When plugged in, unit is ON. Unit cannot be turned OFF. Make sure unit is unplugged when assembling attachments. Add water to fill cup up to the Attach steaming attachment. Plug Always set Temperature Control Squeeze steam button for a blast MAX line. - Page 13 How to Iron NOTICE: To avoid garment damage, check garment label for fabric composition and ironing instructions. Attachments are for steaming only. Remove attachments prior to ironing. Always place steamer on stand Turn Temperature Control Dial Squeeze steam button for blast Turn Temperature Control Dial when not in use.
-
Page 14: Care And Cleaning
Care and Cleaning Follow this procedure monthly to avoid mineral deposits and buildup, which can affect the steaming performance of the unit. Set the Temperature Control Dial Empty water from steamer over Mix a solution of 1/2 white Plug in steamer. Set the to MIN. -
Page 15: Troubleshooting
Troubleshooting PROBLEM PROBABLE CAUSE/SOLUTION Steamer won’t heat. • Is steamer plugged in and the outlet working? Check outlet by plugging in a lamp. • Is the Temperature Control Dial turned to a fabric setting? Water is leaking. • If steaming or steam ironing, is the Temperature Control Dial set to the maximum temperature setting? Has the steamer had enough time to preheat? •... -
Page 16: Limited Warranty
Limited Warranty This warranty applies to products purchased and used in the U.S. This is the only express warranty for this product and is in lieu of any other warranty or condition. This product is warranted to be free from defects in material and workmanship for a period of one (1) year from the date of original purchase.
Need help?
Do you have a question about the 11571 and is the answer not in the manual?
Questions and answers