Table of Contents
Advertisement
Quick Links
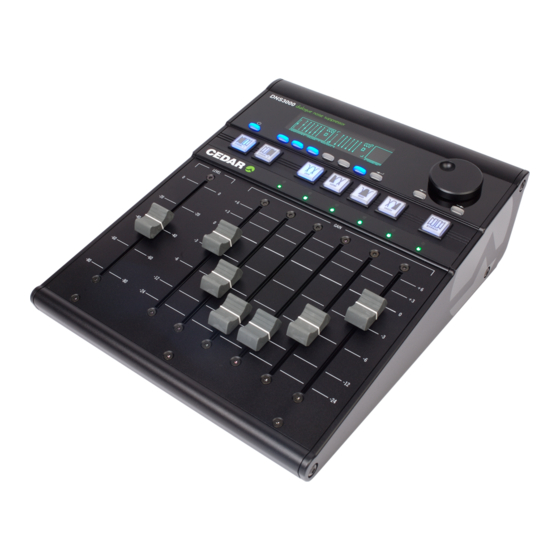
The CEDAR DNS3000
Dialogue noise suppressor
Version 1.0
18 April 2008
Copyright CEDAR Audio Ltd, © 2008
interstage
CEDAR is a registered trademark of CEDAR Audio Ltd
Phistersvej 31, 2900 Hellerup, Danmark
Telefon 3946 0000, fax 3946 0040
www.interstage.dk
E&OE, Subject to revision at the Company's sole discretion
- pro audio with a smile
Advertisement
Table of Contents

Related Manuals for Cedar DNS3000


Summary of Contents for Cedar DNS3000
- Page 1 Version 1.0 18 April 2008 Copyright CEDAR Audio Ltd, © 2008 interstage CEDAR is a registered trademark of CEDAR Audio Ltd Phistersvej 31, 2900 Hellerup, Danmark Telefon 3946 0000, fax 3946 0040 www.interstage.dk E&OE, Subject to revision at the Company’s sole discretion...
- Page 2 CEDAR DNS3000 dialogue noise suppressor...
-
Page 3: Table Of Contents
Table Of Contents Table Of Contents Introducing the CEDAR DNS3000 ..................1 Safety Instructions ......................3 Getting Started ......................4 Connections........................5 Front Panel Indicators and Controls .................. 6 Stand-alone operation ....................8 Case studies and tutorials ..................... 10 Case 1: Suppressing traffic noise ................10 Case 2: Suppressing tape hiss .................. -
Page 5: Introducing The Cedar Dns3000
Pro Tools, both on the Mac and PC. Today, the DNS3000 offers the manual control of the DNS1000 and its successor, the DNS1500, the Pro Tools integration of the DNS2000, plus an internal system of scenes, memories, and (when slaved to timecode) snapshot automation with moving faders. - Page 6 CEDAR DNS3000 dialogue noise suppressor...
-
Page 7: Safety Instructions
■ Mounting and ventilation The DNS3000 should be placed on a placed on a flat, stable surface. Do not subject it to strong sunlight, excessive dust, mechanical vibration or periodic shocks. It is not susceptible to heat build-up, but should be installed away from heat sources such as radiators, and audio devices such as amplifiers that produce large amounts of heat. -
Page 8: Getting Started
Mains power is provided using the standard IEC power cord supplied with the DNS3000. Mains power is switched on and off using the switch on the rear panel. However, you may normally leave this switched on and use the power switch on the top panel to turn the DNS3000 on and off. -
Page 9: Connections
The standards are: Digital SPDIF format You should connect the SPDIF output from your source to the SPDIF input of the DNS3000 using a single cable terminated with an RCA (or 'phono') plug. The SPDIF output of the DNS3000 should be connected to the SPDIF input of a recording device or external DAC. -
Page 10: Front Panel Indicators And Controls
Power ■ Power on/off button Press this to switch the DNS3000 on, and hold it to switch the unit off. If you switch off using the rear panel switch without first powering down using the soft power button, you risk corrupting the internal memory of the unit. - Page 11 The Range Selectors concentrate the unit’s activity into the desired part of the audio spectrum. ■ Level control The Level control tells the DNS3000 how much noise is present in the input signal. ■ Band Gain controls The Band Gain controls determine the maximum amount of processing that the DNS3000 will apply in each band.
-
Page 12: Stand-Alone Operation
To select Low + Mid or Mid + High, press the appropriate two buttons simultaneously or in quick succession. To select Full Range, press the Low and High buttons simultaneously or in quick succession. Selecting a range concentrates all of the filters within the DNS3000’s filter bank across that part of the audio spectrum. Level control Your next job will be to identify the noise level of the audio. - Page 13 You can route the input directly to the output by pressing the Bypass button. This allows you to switch off all processing, regardless of any other settings, either on the DNS3000 itself (including the in-built scenes and automation) or obtained by remote control. The signal latency is not affected by the Bypass state.
-
Page 14: Case Studies And Tutorials
CEDAR DNS3000 dialogue noise suppressor Case studies and tutorials The following case studies describe just three of the ways in which you can use the DNS3000. You can apply the DNS3000 equally to recorded signals and to ‘live’ signals at the point of recording or transmission. - Page 15 If this proves difficult, you can return the Band Gain controls to -24dB for this stage. The DNS3000 takes a short period to ‘settle’ after moving the Level control (especially in the lower ranges) so you should not adjust it rapidly.
-
Page 16: Case 2: Suppressing Tape Hiss
CEDAR DNS3000 dialogue noise suppressor Case 2: Suppressing tape hiss The DNS3000 can suppress the tape hiss that mars many older recordings. It will also improve the signal/noise ratio of dialogue tapes that have been poorly copied as well as those that are many generations old. -
Page 17: Case 3. Suppressing Excessive Reverberation
CEDAR DNS3000 dialogue noise suppressor Case 3. Suppressing excessive reverberation In many situations, the DNS3000 can suppress excessive reverberation. This can be useful in TV production when you need to match the audio from a large recording studio or soundstage to visual images set in a small room or other enclosed space. -
Page 18: Advanced Use
CEDAR DNS3000 dialogue noise suppressor Advanced use The following section of the manual describes how to set up the DNS3000 and how to use its advanced features, including its presets, snapshots and timecode facilities. Front Page The front page shows the process settings for both channels, allowing you to see the complete setup without flipping between the channels using the CHAN1 and CHAN2 buttons. -
Page 19: System Pages
CEDAR DNS3000 dialogue noise suppressor System pages System Setup Page This page reports the firmware version and provides access to the various system setup pages. Fader Calibration Page Fader calibration is necessary only after a firmware upgrade or after a faulty fader is replaced. - Page 20 Switching DHCP on or off takes effect at the next system boot. Other changes in settings take effect when you close this page. You may need to consult your network administrator for help in connecting the DNS3000 to your network. If required, the unit MAC address is printed on the rear of the unit. When connected...
- Page 21 CEDAR DNS3000 dialogue noise suppressor Timecode Setup page This page allows you to select automatic or manual selection of the timecode format. Toggle between the two states using the spinwheel when Mode is selected. Auto If automatic, the format field shows the current format for information only. The format can only be detected while the timecode input is active and playing.
-
Page 22: Using Scenes
Snapshots The system of snapshots provided by the DNS3000 allows you to automate the loading of process parameters against an external timecode source. This is done using the Snapshot Manager page. - Page 23 CEDAR DNS3000 dialogue noise suppressor Preset Manager Page This provides access to 100 storage slots for presets. ■ Recall: recalls the selected preset. ■ Store: stores the current settings in the selected preset and opens the Name Editor page ■ Delete: deletes the selected preset.
- Page 24 CEDAR DNS3000 dialogue noise suppressor Snapshot Manager Page STOP and PLAY There are two automation states: STOP and PLAY. The current state is displayed alongside the incoming timecode in the top right-hand corner of the display. Switch between states using the soft button labelled either Play or Stop (as applicable). In PLAY mode, snapshots are automatically recalled against the incoming timecode, and some snapshot creation/deletion/editing functions (see below) are disabled.
- Page 25 CEDAR DNS3000 dialogue noise suppressor Delete Snapshot? page This page allows you to delete the selected snapshot or all snapshots. You will be asked to confirm this operation. Snapshot Editor Page This page allows you to change the name and process settings of the selected snapshot, and the time at which it occurs.
- Page 26 CEDAR DNS3000 dialogue noise suppressor...
-
Page 27: Remote Control
CEDAR DNS3000 dialogue noise suppressor Remote Control The DNS3000 is supplied with remote control software (RCS) that allows you to control it from a Mac- or PC- based Pro Tools™ system. When used in this way, there is an Ethernet control connection between the DNS and its host. -
Page 28: Installing The Dns Software
DNS3000 Network Scanner The Network Scanner must be run in order to allocate which DNS3000 units on an Ethernet network are available to a given instance of the RCS. Until it is run, the RCS will only be able to see DNS2000 units connected by USB. - Page 29 Scan IP Allows the user to enter the IP address of a DNS3000 not on a local network, or that is on such a large local network that 'Scan All' would take too long to find it. You may then make the unit available from this Mac/PC by selecting it and moving it to the 'Registered DNS Units' list –...
-
Page 30: Using The Rcs
Remote Control Software. It performs no audio processing. To process an audio stream you must route it via the DNS3000 itself using the AES/EBU or SPDIF I/O. You can do this, for example, by using an insert point within the Pro Tools mixer. - Page 31 - together with the Pro Tools Bypass control - may be automated in standard Pro Tools fashion. To use the RCS in ‘Touch’ mode, the user must select touch mode on the DNS3000 as well as on Pro Tools, otherwise ‘fighting’ on the unit's faders can occur. The relevant faders will be shown in pink when touch mode is selected.
-
Page 32: Rcs Tutorial
DNS serial number shown in the list, it is available for use on your system. Choosing appropriate settings You set up the process controls of the DNS3000 in the same way when using the RCS as you do when using its front panel:... - Page 33 CEDAR DNS3000 dialogue noise suppressor Creating generic settings files If you save a Settings file in the Pro Tools Librarian menu window with ‘None’ selected as the DNS hardware, you can reload this file when connected to a given DNS and the control parameters will be retrieved without changing the hardware selection.
- Page 34 CEDAR DNS3000 dialogue noise suppressor...
-
Page 35: Contact Information
CEDAR DNS3000 dialogue noise suppressor Contact Information Headquarters: Address: CEDAR Audio Limited 20 Home End, Fulbourn, Cambridge, CB21 5BS, United Kingdom Telephone and Fax: T: +44 1223 881771 F: +44 1223 881778 Email: support@cedaraudio.com USA Office: Address: CEDAR Audio USA... -
Page 36: Technical Support
CEDAR DNS3000 dialogue noise suppressor Technical Support Should you experience difficulties with your CEDAR DNS3000, please contact your local dealer or CEDAR office. Alternatively, you may send an email to support@cedaraudio.com. In either case, please provide the following details: ■ Your hardware serial number and software version number. (See Getting Started and Connections). -
Page 37: Firmware Maintenance
CEDAR DNS3000 dialogue noise suppressor Firmware maintenance Upgrading The DNS3000 firmware can be upgraded over the Ethernet network. Please refer to the instructions received with the upgrade software. Special boot options Holding certain buttons as the unit is switched on triggers special boot behaviours as follows: CHAN2 Disable DHCP and use the default IP address 192.168.0.1. - Page 38 CEDAR DNS3000 dialogue noise suppressor...
-
Page 39: Specifications And Ce Certificates
< 0.10ms < 0.10ms EMC Regulations: In order to comply fully with EMC regulations, the DNS3000 should be connected using metal- shelled connectors and good quality shielded cable suitable for digital audio. Declaration of conformity: Date of issue: 1 April 2008... - Page 40 CEDAR DNS3000 dialogue noise suppressor...
-
Page 41: Licence And Limited Warranty
In this Licence and Limited Warranty the following words and phrases shall bear the following meanings: 'the Company' means CEDAR Audio Limited of 20 Home End, Fulbourn, Cambridge CB21 5BS, 'the System' means an instance of the DNS3000 sound-reprocessing system comprising... - Page 42 CEDAR DNS3000 dialogue noise suppressor 4.3 The Company shall have no liability to remedy any defect, failure, error or malfunction that arises as a result of any improper use, operation or neglect of the System, or any attempt to repair or modify the System by any person other than the Company or a person appointed with the Company's prior written consent.
- Page 43 CEDAR DNS3000 dialogue noise suppressor 9. LIMITATION OF LIABILITY The Company's maximum liability under any claim including any claim in respect of infringement of the intellectual property rights of any third party shall be, at the option of the Company...
- Page 44 CEDAR DNS3000 dialogue noise suppressor Serial Number: Inspected by: Date: Manufactured by: CEDAR Audio Ltd 20 Home End Fulbourn Cambridge CB21 5BS Web: www.cedaraudio.com interstage Email: info@cedaraudio.com Phistersvej 31, 2900 Hellerup, Danmark Telefon 3946 0000, fax 3946 0040 www.interstage.dk Tel: +44 1223 881771...
Need help?
Do you have a question about the DNS3000 and is the answer not in the manual?
Questions and answers